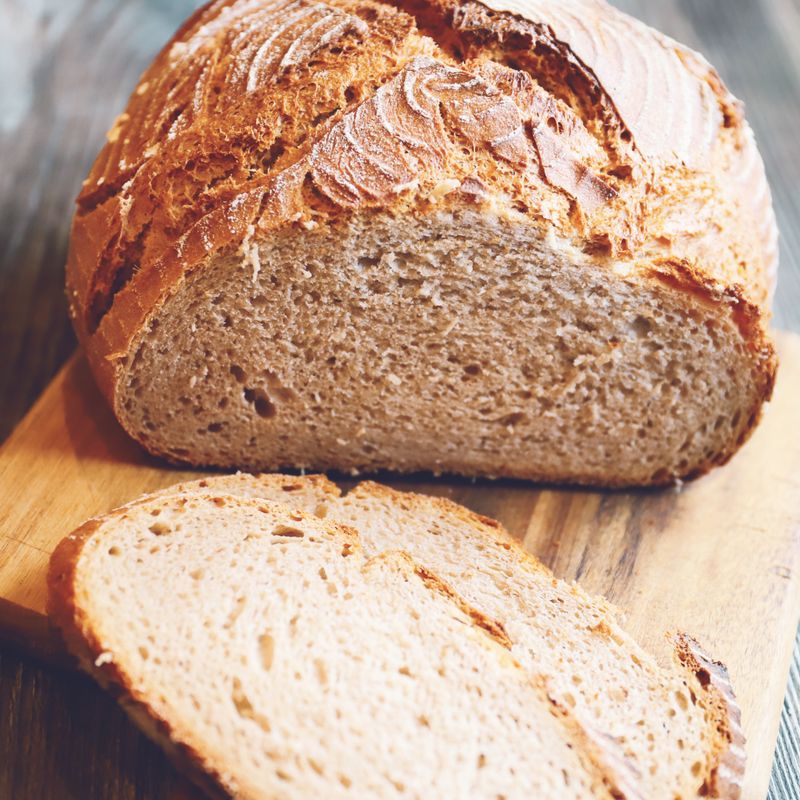
Sourdough Whole Wheat and Rye Blend
A rustic Scandinavian-inspired sourdough loaf combining whole wheat and rye flours with a 48-hour cold fermentation for deep flavor and excellent keeping quality. The blend creates a dense, slightly sweet crumb with earthy undertones and a dark, crispy crust.
- Prep
- 20 min
- Cook
- 45 min
- Wait
- 1.2 days
- Total
- 1.2 days
- Makes
- 1 loaf (about 1.25 lbs / 570 g; 12–14 slices)
Steps
Before you start
- Ensure your sourdough starter is active and bubbly, fed 4–6 hours before mixing (aim for peak activity)
- Have all ingredients at room temperature (68–72 °F / 20–22 °C) for predictable fermentation
- Use a Dutch oven or covered baking vessel; preheat it in the oven at least 45 minutes before scoring and baking
Mix dough
- In a large bowl, combine the active starter, water, whole wheat flour, rye flour, and bread flour.
- Mix with a wooden spoon or dough hook until all flour is hydrated and no dry bits remain.
- The dough will be shaggy and loose (about 75% hydration).
- Let it rest uncovered at room temperature for 30 minutes (autolyse).
- This rest allows the flour to fully absorb water and improves gluten development.
+ Show details− Hide details
Ready when: All flour is incorporated; dough is cohesive but not yet smooth
Tip: Use a dough hook on low speed if using a stand mixer (2–3 minutes), then rest it by hand; mixing by hand is traditional for sourdough and gives better feel for fermentation.
Add salt and continue mixing
- Sprinkle salt over the dough and incorporate it by pinching and folding the dough onto itself for 2–3 minutes.
- The dough will initially feel stiff, then gradually become more extensible as the salt fully integrates.
- At this point, the dough should feel slightly tacky but not wet.
+ Show details− Hide details
Ready when: Salt is fully incorporated; dough is cohesive, smooth, and slightly elastic
Tip: Avoid over-mixing at this stage; you want gluten development from fermentation, not mechanical mixing.
Bulk fermentation with folds
- Cover the bowl loosely with a damp towel or plastic wrap.
- Let the dough rest at room temperature for 4–5 hours.
- Every 30 minutes for the first 2 hours, perform a coil fold (lift one side of the dough, stretch it over the center, rotate the bowl 90°, and repeat 3 times).
- This builds tension without aggressive kneading.
- After the first 2 hours, let the dough rest undisturbed for the remaining 2–3 hours.
- The dough will increase in volume by about 30–40%, with visible bubbles on the surface.
+ Show details− Hide details
Ready when: Dough is visibly risen, jiggles when bowl is nudged, and smells pleasantly sour
Tip: Whole wheat and rye ferment faster than white bread flour; watch for gentle rise rather than dramatic doubling. If your kitchen is cooler (below 68 °F), extend bulk time to 5–6 hours.
Shape the loaf
- Lightly flour your work surface and banneton basket.
- Turn the dough out onto the floured surface (a bench scraper helps).
- Pre-shape it into a loose round by gently pulling the edges toward the center, rotating as you go.
- Let it rest for 15 minutes (bench rest) so the gluten relaxes and final shaping is easier.
- Then perform the final shape: fold one edge of the dough toward the center, press gently, rotate, and repeat until you form a taut, round boule.
- Flip it seam-side up into the floured banneton.
+ Show details− Hide details
Ready when: Dough is seam-side up in banneton with a smooth, taut surface
Tip: Handle whole wheat and rye dough gently; these flours absorb more water and the dough is more delicate than white dough. Avoid tearing the surface.
Cold proof overnight
- Cover the banneton with a plastic bag or damp towel and refrigerate at 38–40 °F (3–4 °C) for 12–24 hours (a long cold fermentation develops flavor and makes scoring easier).
- The dough will rise slightly in the fridge; this is normal.
- You can bake at any point within this window—taste and rise preference guide you.
- At 12 hours, the loaf will have a gentle sour flavor; at 24 hours, it will be noticeably tangy.
+ Show details− Hide details
Ready when: Dough is slightly risen and firm to the touch; a finger poke slowly springs back halfway
Tip: This stage is critical for flavor; don't skip it. Cold fermentation is especially beneficial for whole grain sourdoughs because it allows enzymes to break down bran and reduce bitterness.
Preheat oven and Dutch ovenOven 500°F / 260°C
- Remove the dough from the refrigerator 20 minutes before baking (this prevents thermal shock and allows the loaf to score crisply).
- Place your Dutch oven (lid on) in the oven and preheat to 500 °F (260 °C) for at least 45 minutes.
- The vessel must be fully heated to create steam and oven spring.
+ Show details− Hide details
Ready when: Oven thermometer reads 500 °F and Dutch oven is hot to the touch
Tip: Use an oven thermometer to verify true temperature; many ovens run cool or uneven at high heat.
Score and loadOven 500°F / 260°C
- Carefully remove the hot Dutch oven from the oven.
- Invert the banneton directly onto parchment paper or a flipped baking sheet dusted with cornmeal.
- Using a sharp scoring knife or lame, make a single decisive slash about ½-inch (1.3 cm) deep at a 30° angle across the top of the boule.
- Gently transfer the dough (with parchment) into the preheated Dutch oven.
- Replace the lid immediately.
+ Show details− Hide details
Ready when: Dough is scored cleanly and sealed in the hot Dutch oven
Tip: Work quickly to minimize heat loss. A cold loaf dropped into a hot vessel creates the most dramatic oven spring. If you're nervous, score the dough on parchment before loading it into the Dutch oven.
Bake coveredOven 500°F / 260°C
- Bake with the Dutch oven lid on for 30 minutes at 500 °F (260 °C).
- The trapped steam will puff the loaf and create a crispy crust.
- You should hear the loaf pop and crackle as it expands.
+ Show details− Hide details
Ready when: Loaf is puffed and steam is visible inside the covered Dutch oven
Tip: Don't peek for at least 20 minutes; opening the lid releases steam and stalls rise.
Bake uncovered until darkOven 450°F / 230°C
- Remove the Dutch oven lid and reduce the oven temperature to 450 °F (232 °C).
- Continue baking for 12–15 minutes until the crust is deep mahogany brown, almost dark chocolate on the scoring edge.
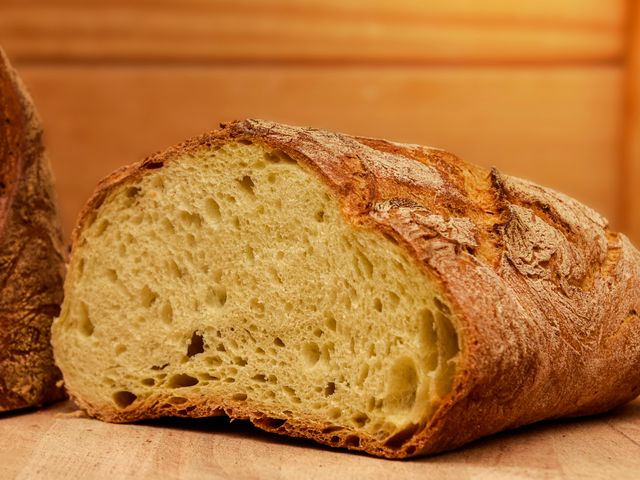
- A whole grain loaf will look darker than white bread and should sound hollow when tapped on the bottom.
+ Show details− Hide details
Ready when: Crust is deep brown; internal temperature reaches 205–210 °F (96–99 °C) when measured in the thickest part of the crumb
Tip: Don't pull it out early—a fully baked whole grain loaf has better flavor, texture, and keeping quality. The dark color is a feature, not a mistake.
Cool completely
- Transfer the loaf to a wire rack and let it cool completely at room temperature (at least 1–2 hours, ideally 3–4 hours).
- This allows the crumb to set fully and makes slicing cleaner.
- The loaf will continue to dry slightly and the crust will remain crispy.
+ Show details− Hide details
Ready when: Loaf is cool to the touch and sounds hollow when tapped
Tip: Resist slicing until fully cooled; a warm loaf will have a gummy interior. If you can't wait, slice thickly with a serrated knife using a gentle sawing motion.
Good to know
Tips
- Whole grain flours absorb more water than white flour and ferment faster. Watch your dough's rise and feel, not the clock. On a warm day, bulk fermentation may be done in 3–4 hours; in cool weather, 5–6 hours is normal.
- A cold, long proof (24 hours in the fridge) is essential for this recipe. It develops the sour, complex flavor that makes whole grain sourdough memorable and also allows enzymatic activity to soften the bran and reduce any harsh or bitter notes.
- Whole wheat and rye doughs are more delicate and extensible than white dough; handle gently and avoid excessive shaping tension. Tear the surface and you lose structure during bake.
- For maximum crust, bake your Dutch oven in the oven starting 1 hour before baking, and don't skip the preheating stage. The thermal mass is what creates steam and oven spring.
Make ahead
You can cold-proof the shaped dough for up to 48 hours in the refrigerator. The loaf also freezes beautifully for up to 3 months after cooling completely; thaw at room temperature (4–5 hours) or reheat gently in a 350 °F / 175 °C oven (wrapped in foil) for 15–20 minutes.
Storage & reheating
Store the cooled loaf wrapped in linen or breathable paper at room temperature (not plastic) for 3–4 days. The crust will soften slightly; recrisp it by placing the loaf in a 375 °F (190 °C) oven for 10 minutes. For longer storage, wrap tightly in plastic and freeze for up to 3 months. Whole grain sourdoughs keep exceptionally well because of their density and acid content.
Substitutions
- bread flour → all-purpose flour. The loaf will have a slightly less open crumb and slightly softer crust. Reduce the all-purpose flour by ¼ cup (30 g) and add it back as water (increase water to 1.35 cups / 320 ml) to maintain hydration.
- rye flour → spelt flour or additional whole wheat flour. Spelt creates a nuttier, slightly drier crumb; whole wheat gives an earthier, more uniform flavor. If using 100% whole wheat, expect a denser loaf and reduce total flour by 2 tablespoons (15 g) to maintain manageable hydration.
- whole wheat flour → emmer or einkorn flour. Ancient grains add distinct flavor and slightly lower hydration; you may need to reduce water by 2–3 tablespoons (30–45 ml). These ferment quickly, so watch bulk fermentation closely and reduce time by 30 minutes if needed.
- water → half water, half brewed cooled tea (barley, espresso, or herbal). Tea adds subtle depth and acidity; barley tea is traditional in Scandinavian rye breads. The loaf will taste slightly more complex and may take a few minutes longer to ferment.
More sourdough
See all →

Find more like this
- Meal
- Dinner
- Cuisine
- Moroccan
- Method
- Oven
- Quick & Easy
- 5 Ingredients or LessMake Ahead