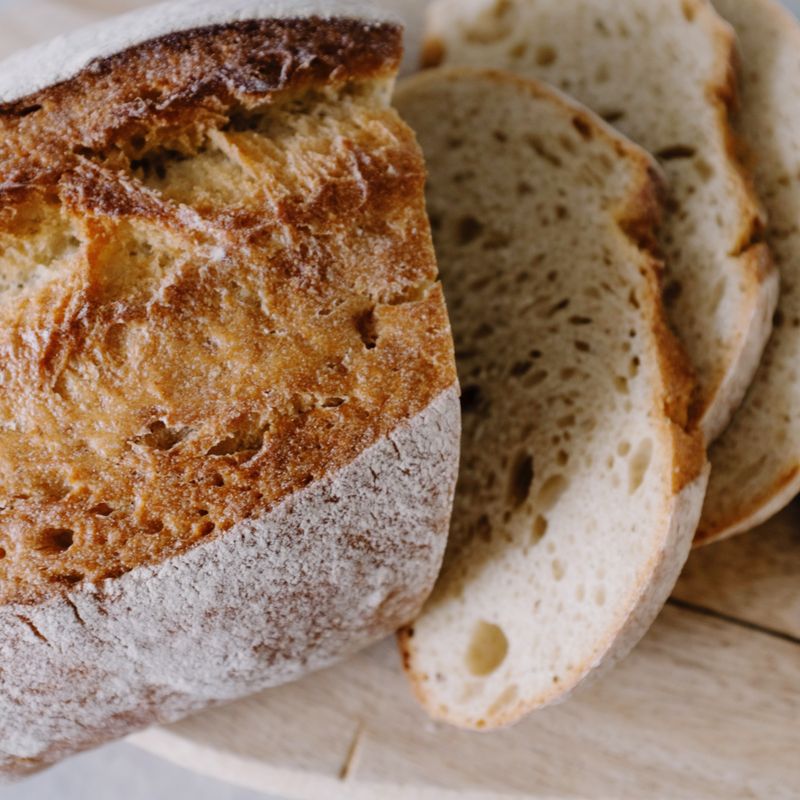
Sourdough Rustic White Bread
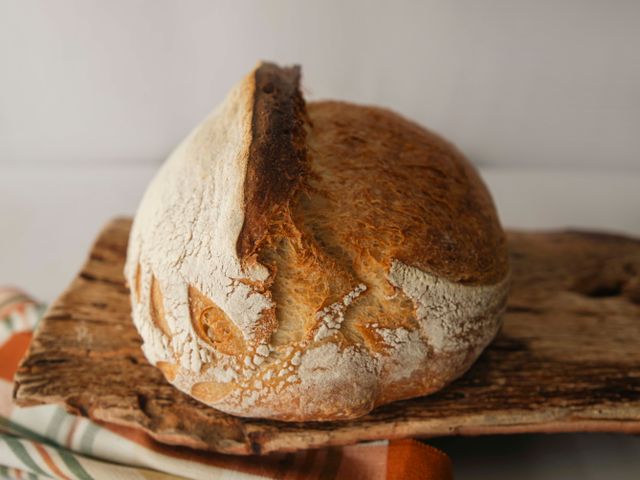
A classic European-style sourdough loaf with a crackling crust, open crumb structure, and tangy, complex flavor developed through a 24-hour cold fermentation. This recipe uses a simple mix of bread flour, water, salt, and mature sourdough starter to create an artisanal loaf worthy of any bakery.
- Prep
- 20 min
- Cook
- 45 min
- Wait
- 1 days
- Total
- 1.1 days
- Makes
- 1 loaf (about 12 slices)
Steps
Before you start
- Activate your sourdough starter 4-6 hours ahead by feeding it with equal parts flour and water; it should be bubbly and active at peak
- Ensure your bread flour is room temperature (68–72°F / 20–22°C)
- Use filtered or dechlorinated water if possible, as chlorine can inhibit fermentation
- If using a Dutch oven, place it in your oven before preheating so it heats for at least 45 minutes
Mix dough
- In a large bowl, combine the room-temperature bread flour, water, and active sourdough starter (at peak—bubbly and doubled).
- Stir vigorously with a wooden spoon or use a stand mixer on low speed with the dough hook for 3–4 minutes until all flour is hydrated.
- The mixture will be shaggy and sticky.
- Cover the bowl with a damp towel and let it rest for 30 minutes at room temperature (autolyse).
- This rest helps develop gluten and improves extensibility.
+ Show details− Hide details
Ready when: All flour is visibly hydrated into a shaggy mass
Tip: Do not add salt yet; it will inhibit fermentation during autolyse and slow flavor development.
Add salt and mix
- After the autolyse, sprinkle the fine sea salt over the dough.
- Wet your hand and pinch and fold the dough 6–8 times, incorporating the salt throughout.
- The dough will feel tacky and slightly loose.
- Alternatively, mix on low speed for 2–3 minutes until the salt is fully integrated and the dough feels slightly firmer.
+ Show details− Hide details
Ready when: Salt is fully incorporated and dough feels cohesive
Tip: Wet your hand to prevent sticking when folding; the dough will be slack and that is correct for high hydration sourdough.
Bulk fermentation (4 hours)
- Cover the bowl with a damp towel.
- Allow the dough to ferment at room temperature (68–72°F / 20–22°C) for 4 hours.
- Perform 4–5 coil folds or stretch-and-folds at 30-minute intervals during the first 2 hours.
- For a coil fold: wet your hand, grab the underside of the dough, lift it, and fold it over itself in the center of the bowl, rotating the bowl and repeating from all four sides.
- By hour 2, the dough should look visibly puffier, with some surface bubbles.
- After hour 2, leave it undisturbed for the final 2 hours so the surface develops strength.
+ Show details− Hide details
Ready when: Dough increases in volume by 50–75%, with bubbles visible on the surface and sides
Tip: Keep the room warm and consistent; cooler kitchens will slow fermentation and may require more time. Stretch-and-folds strengthen gluten without additional mixing.
Pre-shape dough
- Turn the dough out onto a lightly floured work surface.
- Gently pre-shape it into a round by folding the edges toward the center, creating surface tension.
- Let it rest on the bench for 20–25 minutes (bench rest).
- This allows the gluten to relax slightly, making final shaping easier.
+ Show details− Hide details
Ready when: Dough looks slightly puffy and gently springs back when poked
Tip: Use minimal flour during pre-shaping to avoid dry patches that will not seal properly.
Final shaping
- Flour the top of the dough lightly.
- Fold the top third down and press gently, then fold the sides in, then roll the dough away from you, sealing the seam with the heel of your hand.
- Flip the dough seam-side up into your floured banneton or bowl lined with a floured linen towel.
- The seam-side-up placement is intentional: it will become the bottom of the loaf and will develop a rustic, dimpled appearance.
+ Show details− Hide details
Ready when: Dough is shaped with a taut exterior and sealed seam
Tip: A well-sealed seam prevents the dough from opening unpredictably during baking and helps shape hold during the final proof.
Cold fermentation (overnight, 12–16 hours)
- Cover the banneton with a plastic bag or shower cap and place it in the refrigerator at 38–40°F (3–4°C) for 12–16 hours, ideally overnight.
- The cold fermentation develops deeper flavor, acidity, and better oven spring.
- You can bake any time from hour 12 onward; the loaf will develop more tang the longer it proofs.
+ Show details− Hide details
Ready when: Dough shows some visible bubbling at the sides (check by gently unfolding the towel) and resists gentle poke slightly
Tip: Cold fermentation also builds elasticity, so the dough will have excellent oven spring even if you do not do a warm proof beforehand.
Preheat oven and Dutch ovenOven 500°F / 260°C
- Remove the dough from the refrigerator 30 minutes before baking if your kitchen is very cold (below 65°F / 18°C).
- If your kitchen is warm (above 70°F / 21°C), you can bake straight from the fridge.
- Preheat your oven to 500°F (260°C) with the Dutch oven inside for at least 45 minutes.
- The oven and pot must be fully heated so the dough gets explosive oven spring and a crispy crust.
+ Show details− Hide details
Ready when: Oven thermometer reads 500°F (260°C) and Dutch oven is too hot to touch
Tip: Use an oven thermometer to verify actual temperature; oven dial readings are often inaccurate. A sufficiently hot Dutch oven is essential for a crispy, blistered crust.
Score and transferOven 500°F / 260°C
- Carefully remove the hot Dutch oven from the oven using heavy oven mitts.
- Turn the dough out seam-side down onto a piece of parchment paper.
- Using a lame or very sharp knife, score the top with one long diagonal slash at a 45-degree angle, about 1/4 inch (0.6 cm) deep and 6–8 inches (15–20 cm) long.
- Leave a small ear of dough uncut on the edge to create that classic rustic look.
- Using the parchment paper as a handle, quickly transfer the dough into the hot Dutch oven (the parchment will not burn at 500°F / 260°C).
+ Show details− Hide details
Ready when: Dough is scored cleanly and in the Dutch oven with lid on
Tip: Score with confidence and a single stroke; hesitant, shallow cuts will not open properly and will make the loaf look flat.
Bake covered (20 minutes)Oven 500°F / 260°C
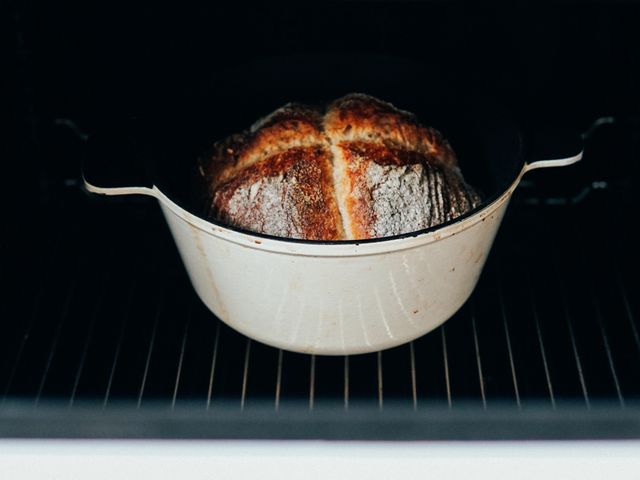
- Place the lid on the hot Dutch oven and return it to the 500°F (260°C) oven.
- Bake covered for 20 minutes.
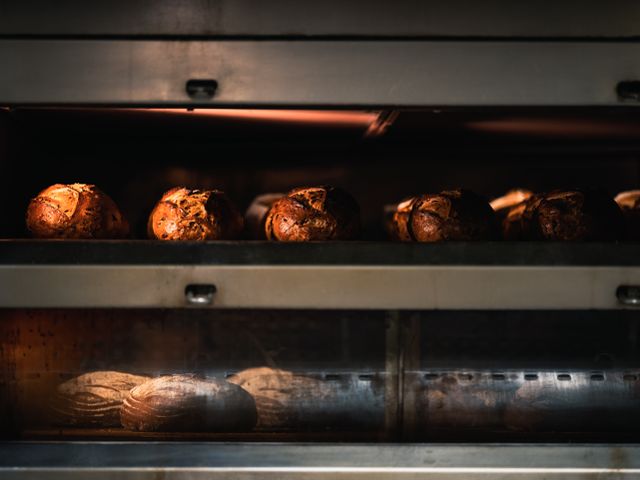
- The trapped steam will help develop a crispy, dark crust and give the loaf excellent oven spring.
- You should hear the dough crackle and pop inside the pot.
+ Show details− Hide details
Ready when: Bread begins to smell deeply toasted and you hear crackling sounds from inside the pot
Tip: Do not lift the lid during this phase, or steam will escape and the crust will not develop properly.
Bake uncovered (20–25 minutes)Oven 450°F / 230°C
- Carefully remove the lid (watch for hot steam).
- Reduce the oven temperature to 450°F (232°C).
- Continue baking uncovered for 20–25 minutes until the loaf is deep golden brown, almost mahogany, on all sides.
- The bottom should sound hollow when tapped with your knuckles and the internal temperature should reach 205–210°F (96–99°C) at the center.
+ Show details− Hide details
Ready when: Crust is deep mahogany brown, loaf sounds hollow when tapped on the bottom, internal temp is 205–210°F (96–99°C)
Tip: If the loaf is browning too fast, you can tent it loosely with foil for the final 5–10 minutes. Use an instant-read thermometer inserted into the center (not touching the bottom) to verify doneness.
Cool completely
- Remove the loaf from the Dutch oven using tongs or a long-handled fork (the pot is very hot).
- Place it on a wire rack or clean kitchen towel and cool for at least 1 hour at room temperature before slicing.
- Do not slice while warm; the internal crumb is still setting and will compress rather than show the open structure you worked hard to develop.
+ Show details− Hide details
Ready when: Loaf is cool to the touch and sounds hollow when tapped
Tip: Cooling on a rack allows air circulation and prevents the bottom from becoming soggy from trapped steam.
Slice and serve
- Once fully cooled, use a sharp serrated bread knife to slice the loaf.
- Cut slowly with a sawing motion to avoid compressing the crumb.
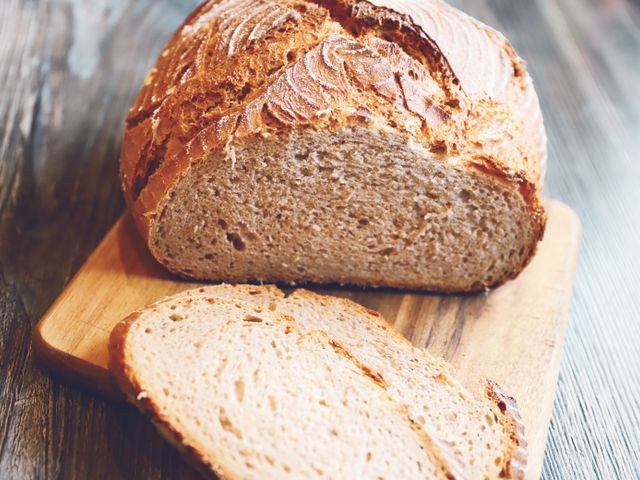
- The interior should show an open, irregular crumb structure with some visible fermentation bubbles, and the crust should crackle and shatter when cut.
+ Show details− Hide details
Ready when: Loaf is sliced cleanly with visible open crumb and crackling crust
Tip: A bread knife with a serrated edge cuts much cleaner than a sharp chef's knife on crusty bread.
Optional poke test for proofing check
- If you are uncertain whether the cold dough is ready to bake, you can perform a simple poke test.
- Gently poke the dough with a floured finger.
- If the poke springs back quickly (within 1 second), the dough needs more time.
- If it springs back very slowly (3–5 seconds), it is perfectly proofed.
- If the poke does not spring back at all, the dough is slightly over-proofed, but it will still bake into a delicious loaf—just watch carefully to avoid it spreading too wide.
+ Show details− Hide details
Ready when: Poke test shows slow spring-back (3–5 seconds) indicating proper final proof
Tip: The poke test is optional and is a backup method; cold dough is forgiving and will bake well from 12–16 hours in the fridge regardless.
Good to know
Tips
- Sourdough fermentation is temperature-dependent: at 70°F (21°C) it will bulk ferment in 4 hours, but at 65°F (18°C) it may take 5–6 hours. Watch the dough, not the clock. Aim for 50–75% volume increase and visible bubbling.
- A mature, active starter is essential. If your starter is sluggish or does not double in 4–6 hours after feeding, continue feeding it daily for 5–7 days until it becomes consistently vigorous. A weak starter will produce a flat, dense loaf.
- The banneton (proofing basket) is not strictly necessary; you can use a bowl lined with a well-floured linen towel or even a colander lined with cheesecloth. The goal is to support the dough and catch excess flour.
- Invest in a Dutch oven or covered bread cloche. The high, dry heat combined with trapped steam is what creates the crispy, blistered crust that defines a great artisanal loaf. You can use a covered metal baking pot, but ceramic Dutch ovens distribute heat more evenly.
Make ahead
Bulk fermentation can be done the day before: complete steps 1–4 in the morning, then place the pre-shaped dough in a banneton, cover it loosely, and refrigerate for up to 24 hours. Bake directly from the cold overnight proof. This creates an even more tangy, developed loaf.
Storage & reheating
Store the cooled loaf uncovered or in a paper bag at room temperature for up to 3 days. The crust will soften after 1 day. To refresh a stale loaf, wrap it in foil and warm in a 350°F (175°C) oven for 10–15 minutes. Slice and freeze in an airtight container or freezer bag for up to 3 months; thaw at room temperature or toast directly from frozen.
Substitutions
- bread flour (12–13% protein) → all-purpose flour (11% protein) or a 50/50 blend of all-purpose and whole wheat flour. All-purpose flour will produce a slightly less open crumb and chewier texture; whole wheat will add nuttiness and reduce rise slightly. Whole wheat dough may need an extra 5–10 minutes of fermentation.
- active sourdough starter (fed 4–6 hours ahead, at peak) → liquid levain made by mixing equal parts active starter, bread flour, and water, fed 4–6 hours ahead. Use 100g of the liquid levain in place of 100g of active starter. This gives you more control over hydration and fermentation speed.
- water → use 1.3 cups (310 ml) water instead if using whole wheat flour, as it absorbs more liquid. Adjust gradually; whole wheat dough should feel slightly wetter and looser than white dough. The higher hydration helps offset the drying effect of bran.
- fine sea salt → kosher salt (Diamond Crystal brand is 1:1 by volume with fine sea salt; if using Morton's kosher salt, use 1.5 teaspoons). Different salt brands have different crystal sizes and densities. Always measure by weight if possible. Do not use table salt, which can be harsh and contains anti-caking agents.
More sourdough
See all →

Find more like this
- Meal
- Dinner
- Cuisine
- Mediterranean
- Method
- Oven
- Quick & Easy
- 5 Ingredients or LessMake Ahead