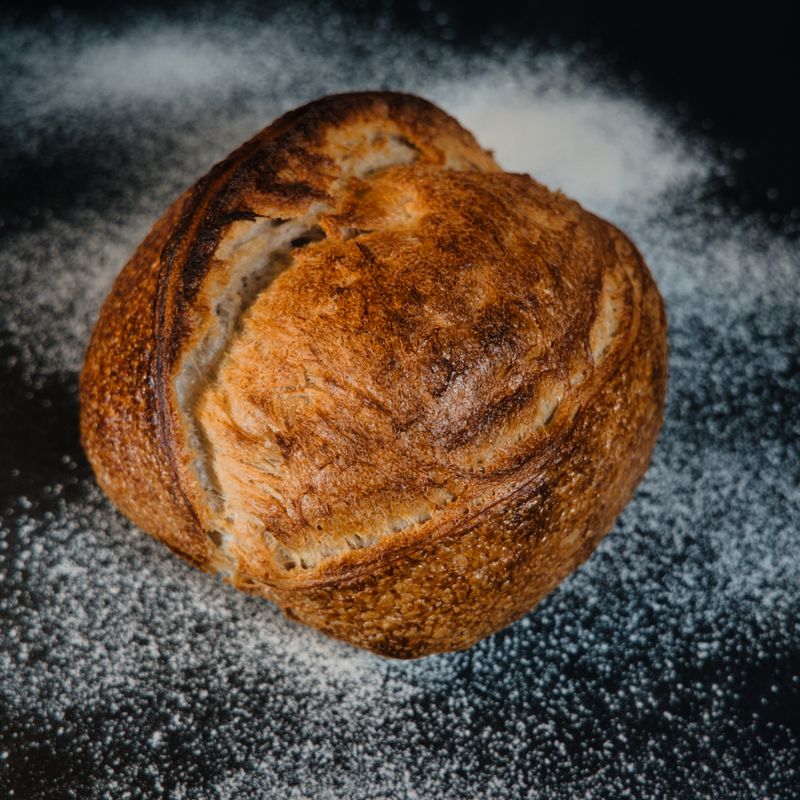
Sourdough Multigrain Ancient Grain Loaf
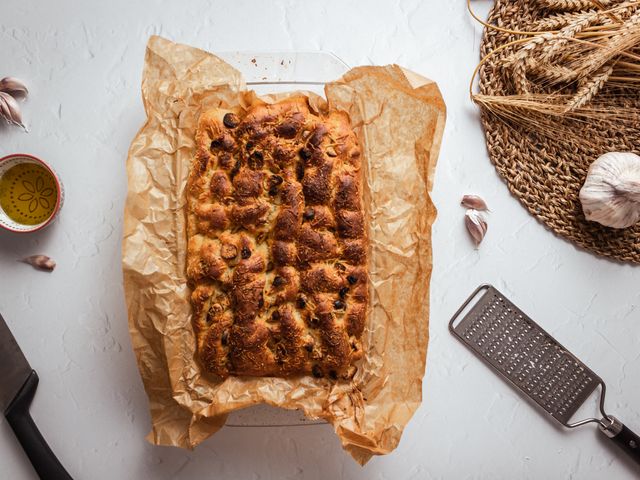
A rustic Mediterranean-inspired sourdough loaf combining spelt and einkorn ancient grains with toasted seeds and a long, cool fermentation for deep flavor. The blend of whole and refined flours creates a tender crumb with excellent keeping qualities, while the seeds add texture and nutrition. This loaf develops a crackling crust and reveals beautiful open crumb structure when sliced.
- Prep
- 20 min
- Cook
- 45 min
- Wait
- 7 hr
- Total
- 8 hr 5 min
- Makes
- 1 loaf (12–14 slices)
Steps
Before you start
- Feed your sourdough starter 4–6 hours before mixing so it is active, bubbly, and at peak strength (doubled and showing visible bubbles).
- Measure all dry ingredients by weight for accuracy; this recipe requires precision.
- Plan for a 12–16 hour overnight cold fermentation to fit your baking schedule.
- Have a Dutch oven or covered baking vessel preheating in the oven.
Toast and hydrate seeds
- In a dry skillet over medium heat, toast the sunflower seeds, pumpkin seeds, and sesame seeds separately (about 3–4 minutes each, stirring occasionally) until fragrant and lightly golden.
- Transfer to a small bowl and cool completely.
- Optionally, mix all toasted seeds with 50 ml (¼ cup) of cool water and let sit for 15 minutes to soften slightly; this makes them easier to distribute and adds moisture to the dough.
- If you prefer seeds with more texture, skip soaking.
+ Show details− Hide details
Ready when: Seeds smell fragrant and are lightly golden; no burned edges
Tip: Toast seeds just before making the dough so they add maximum flavor. Do not over-toast or they will taste bitter.
Mix dough
- In a large bowl, combine the active sourdough starter and 310 ml (1¼ cups) of lukewarm water.
- Stir until mostly combined.
- Add the spelt flour, einkorn flour, bread flour, whole wheat flour, and flax seeds.
- Mix with your hands or a dough whisk until all dry ingredients are hydrated and no dry flour remains at the bottom of the bowl.
- The dough will be shaggy and slightly stiff.
- Cover with a damp towel and let rest at room temperature for 30–40 minutes (autolyse phase).
+ Show details− Hide details
Ready when: Dough is fully hydrated and slightly relaxed; no dry patches visible
Tip: The autolyse rest allows gluten to develop naturally and makes the dough easier to handle. Room temperature should be 68–72°F (20–22°C) for best results.
Add salt and seeds
- Sprinkle the fine sea salt over the dough.
- Using wet hands, pinch and fold the dough on itself 10–12 times, distributing the salt evenly throughout.
- Once the salt is incorporated, add the cooled toasted seeds and flax seeds (if not already added) and fold another 8–10 times until the seeds are evenly distributed.
- The dough should feel slightly tacky but cohesive.
+ Show details− Hide details
Ready when: Salt is fully dissolved and seeds are evenly distributed throughout the dough
Tip: Wet your hands frequently during folding to prevent sticking. Do not overwork the dough at this stage; gentle folding preserves the open crumb structure.
Bulk fermentation (3–4 hours)
- Return the dough to the bowl and cover with a damp towel or plastic wrap.
- Let it ferment at room temperature (68–72°F / 20–22°C) for 3–4 hours.
- Perform 4 sets of stretch and folds at 30-minute intervals during the first 2 hours: wet your hand, grab one side of the dough, stretch it up and fold it over the center, rotate the bowl 90 degrees, and repeat 4 times.
- After 2 hours, let the dough rest undisturbed for the remaining 1–2 hours.
- The dough should increase in volume by about 50–75% and show visible bubbles on the surface and sides.
+ Show details− Hide details
Ready when: Dough has increased by 50–75% in volume, feels airy, and shows visible bubbles throughout
Tip: Stretch and folds strengthen the gluten network without traditional kneading. If your kitchen is cooler than 68°F (20°C), extend fermentation time by 30–60 minutes.
Pre-shape and rest
- Turn the dough out onto a lightly floured work surface (use minimal flour to avoid drying the surface).
- Gently pre-shape it into a round by folding the edges toward the center, then flip it over so the seam is on the bottom.
- Let it rest on the counter for 20–30 minutes, uncovered or loosely covered.
- This resting period relaxes the gluten and makes final shaping easier.
+ Show details− Hide details
Ready when: Dough is visibly relaxed; it springs back slowly when gently poked
Tip: Do not overwork the dough during pre-shaping. Gentle handling preserves the bubbles you've built during bulk fermentation.
Final shape and banneton
- Flip the pre-shaped dough over so the seam is facing up.
- Fold the top edge down toward the center, then fold the sides in slightly, then roll the dough toward you into a tight log, sealing the seam with the heel of your hand as you go.
- Flip it seam-side down and shape it into a round by cupping your hands around the dough and dragging it gently toward you on the counter 3–4 times, creating surface tension.
- Place it seam-side up in a well-floured banneton or a bowl lined with a floured kitchen towel.
- Cover loosely with plastic wrap or a plastic bag.
+ Show details− Hide details
Ready when: Dough is shaped into a round with visible surface tension and a sealed seam
Tip: Proper shaping creates the structure needed for oven spring. Do not over-flour the banneton or the flour will prevent scoring and browning.
Cold overnight fermentation (12–16 hours)
- Place the banneton in a 38–42°F (3–6°C) refrigerator overnight, or for 12–16 hours.
- During this long fermentation, the dough develops complex flavor from slow yeast and bacterial activity, and the cold temperature makes scoring and handling easier.
- The dough should increase slightly in volume (about 20–30%) and feel cold and firm when you remove it from the fridge.
+ Show details− Hide details
Ready when: Dough is cold, firm, and has visibly expanded slightly; a gentle poke with your finger leaves a slow-to-spring-back indent
Tip: Cold fermentation is the key to depth of flavor in sourdough. If you cannot wait overnight, allow 4–6 hours of room-temperature fermentation instead, though flavor will be lighter.
Preheat Dutch ovenOven 500°F / 260°C
- About 1 hour before baking, remove the dough from the refrigerator (it will still be cold).
- Place a Dutch oven or covered baking vessel inside your oven and preheat to 500°F (260°C).
- Allow the Dutch oven at least 45 minutes to reach full temperature; this ensures excellent oven spring and crust development.
+ Show details− Hide details
Ready when: Dutch oven is very hot and oven has reached 500°F (260°C)
Tip: A preheated Dutch oven creates steam that promotes oven spring and crust development. Do not skip this step.
Score and bake with steam (20 minutes)Oven 500°F / 260°C
- Carefully remove the hot Dutch oven from the oven.
- Working quickly, turn the cold dough out onto parchment paper seam-side down.
- Using a lame or sharp bread knife, score the top with a deep slash (¼-inch / 6 mm deep) at a 30-degree angle, or make an X or cross pattern, depending on your preference.
- Carefully transfer the dough (on parchment) into the hot Dutch oven, replace the lid, and return to the 500°F (260°C) oven.
- Bake for 20 minutes covered to trap steam.
+ Show details− Hide details
Ready when: Dough has expanded noticeably (oven spring); lid is covered with condensation
Tip: Score immediately after turning out the dough so the cold surface slices cleanly. Do not hesitate or the crust will set before scoring.
Continue baking uncovered (25 minutes)Oven 450°F / 230°C
- Carefully remove the lid from the Dutch oven (watch for hot steam) and reduce the oven temperature to 450°F (232°C).
- Continue baking uncovered for 25 minutes, until the crust is deep golden brown with darker spots and the loaf sounds hollow when tapped on the bottom.
- The internal temperature should reach 205–210°F (96–99°C) when measured in the center of the loaf.
+ Show details− Hide details
Ready when: Crust is deep golden brown with darker spots; loaf sounds hollow when tapped; internal temperature is 205–210°F (96–99°C)
Tip: Remove the lid promptly to allow moisture to escape and the crust to brown evenly. If the top is browning too quickly, cover loosely with foil for the last 5 minutes.
Cool completely
- Transfer the loaf to a wire cooling rack and let it cool for at least 1 hour before slicing.
- The crumb continues to set during cooling, and the flavor develops further.
- If you slice too early, the crumb will be gummy.
- For the most tender crumb and best flavor, wait up to 4 hours or even overnight before slicing.
+ Show details− Hide details
Ready when: Loaf is at room temperature and feels firm to the touch
Tip: Cooling is crucial for proper crumb development. Resist the urge to slice while the loaf is warm or the crumb will tear and feel dense.
Good to know
Tips
- Maintain an active, healthy sourdough starter by feeding it regularly (daily at room temperature, or twice weekly if kept in the refrigerator). A weak starter will not rise the dough effectively; always verify that your starter is bubbly, has doubled, and smells pleasant before using.
- Dough temperature matters: aim for a final dough temperature of 75–78°F (24–26°C) after mixing. If your kitchen is cold, use slightly warmer water. If it is hot, use cooler water. Consistency in temperature leads to predictable fermentation.
- Stretch and folds during bulk fermentation replace traditional kneading and build gluten strength while preserving the open crumb structure that sourdough is prized for. Perform them with wet hands and a gentle touch.
- Ancient grains like spelt and einkorn are more fragile than modern wheat and absorb water differently. If the dough seems too dry after the autolyse, add water 5 ml at a time until it reaches the correct texture (tacky but cohesive).
Make ahead
You can cold-ferment the shaped dough in the banneton for up to 48 hours in the refrigerator. Alternatively, after the bulk fermentation step, you can freeze the dough in the banneton for up to 3 weeks; thaw overnight in the refrigerator before baking. The slow fermentation actually improves flavor, so overnight (12–16 hours) is the standard timing and will yield the best result.
Storage & reheating
Room temperature: Keep wrapped in a clean kitchen towel or in a paper bag for up to 3 days; the crust will gradually soften. Refrigerator: Wrap in plastic wrap or a bag and store for up to 5 days; slice and toast to refresh. Freezer: Wrap the cooled loaf tightly in plastic wrap and foil, and freeze for up to 3 months. To serve frozen slices, toast directly from the freezer at 375°F (190°C) for 8–10 minutes until heated through. For the best flavor and texture, serve within 2 days of baking.
Substitutions
- einkorn flour (whole grain preferred) → Spelt flour, heritage wheat flour, or additional whole wheat flour. Einkorn is prized for its nutty flavor, but it is harder to find. Spelt will give a similar whole-grain result, though the flavor will be slightly less complex. Use the same weight.
- spelt flour (whole grain preferred) → Rye flour, Khorasan (Kamut) flour, or additional whole wheat flour. Spelt adds nuttiness and structure. Rye will make the loaf slightly denser and more tangy; reduce the amount to 80 g and increase bread flour by 20 g. Khorasan flour is sweeter and more buttery.
- sunflower seeds (raw or lightly toasted) → Hemp seeds, millet, or additional pumpkin seeds. Sunflower seeds are mild and nutritious. Hemp seeds add a distinctive earthy flavor. Millet adds a slight sweetness and crunch. Use the same weight and toast if desired.
- bread flour or all-purpose unbleached flour → All-purpose unbleached flour. Bread flour has slightly higher protein, which enhances gluten development and crust. All-purpose flour will work but may result in a slightly softer crumb and less dramatic oven spring. Use the same weight.
More sourdough
See all →


Find more like this
- Meal
- Breakfast
- Cuisine
- Mediterranean
- Method
- Oven