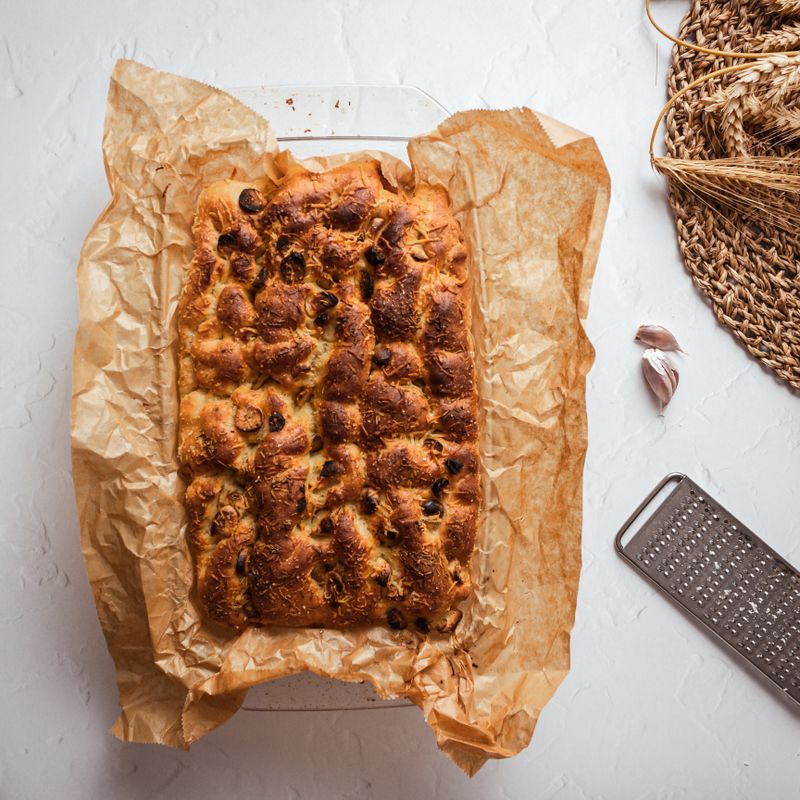
Sourdough Roasted Garlic and White Bean Focaccia
A rustic Italian focaccia built on a sourdough base, studded with creamy white beans and pockets of sweet roasted garlic. The dough develops deep flavor from its long fermentation, while the toppings stay tender beneath a crackling, olive oil–crisped crust. Perfect as a side bread or vehicle for cheese and cured meats.
- Prep
- 20 min
- Cook
- 25 min
- Wait
- 8 hr
- Total
- 8 hr 45 min
- Makes
- 1 focaccia, 8 slices
Steps
Before you start
- Have your active sourdough starter at room temperature and fed 4–6 hours before mixing (it should be bubbly and roughly doubled)
- Roast the garlic ahead: halve 2 heads, rub with oil, wrap in foil, roast at 400°F (200°C) for 40 minutes, then cool and squeeze out the cloves
- Preheat your oven to 450°F (230°C) 30 minutes before baking
- Use a 9×13-inch (23×33 cm) metal baking pan or rimmed sheet pan; oil it generously
Mix the dough
- In a large bowl or the bowl of a stand mixer, combine the active sourdough starter (¾ cup / 180 ml), lukewarm water (¾ cup / 180 ml), and bread flour (2½ cups / 315 g).
- Using the dough hook on medium speed (or stirring vigorously by hand), mix until no dry flour remains, about 2 minutes.
- The dough will be shaggy and slightly sticky—this is correct.
- Let it rest uncovered for 30 minutes at room temperature (this resting period is called an autolyse).
+ Show details− Hide details
Tip: Don't skip the autolyse—it develops gluten strength and improves flavor.
Add salt and develop dough
- After the autolyse, add fine sea salt (1 teaspoon / 6 g) to the dough.
- Continue mixing on medium speed for 5–7 minutes (or knead by hand, slapping the dough against the bowl), until the dough becomes smoother, more elastic, and slightly less sticky.
- It should pass the windowpane test: pinch a small piece and gently stretch it; if it forms a thin, translucent membrane without tearing, gluten development is sufficient.
+ Show details− Hide details
Ready when: Dough is smooth, elastic, and passes the windowpane test
Tip: Don't overwork the dough; sourdough develops strength gradually during fermentation, not just in the mixer.
Bulk fermentation (first rise)
- Transfer the dough to a lightly oiled bowl, turn it to coat, and cover loosely with a towel or plastic wrap.
- Let it rest at room temperature (68–72°F / 20–22°C) for 4–5 hours, performing three stretch-and-folds: at 30 minutes, 1 hour, and 1.5 hours after mixing.
- For each stretch-and-fold, wet your hand, grab one side of the dough, pull it up and fold it over the center, rotate the bowl 90°, and repeat from all four sides.
- By the end of bulk fermentation, the dough should increase by about 50% and feel airy when gently pressed.
+ Show details− Hide details
Ready when: Dough is puffy, airy, and springs back slowly when poked
Tip: Stretch-and-folds replace traditional kneading and are gentler on an open crumb structure.
Shape and oil the pan
- Generously oil a 9×13-inch (23×33 cm) metal baking pan with olive oil (reserve from the 3 tablespoons in ingredients).
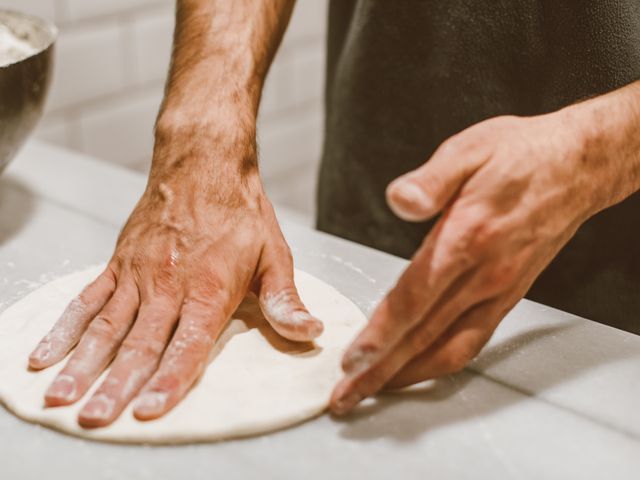
- Tip the fermented dough onto a lightly floured work surface (it will be sticky—that's fine).
- Gently stretch it into a rough rectangle about 8×10 inches (20×25 cm), then transfer it to the oiled pan.
- Let it settle and relax for 10 minutes, then gently stretch it to fill the pan, being careful not to tear the dough.
- The dough should be about ½ inch (1.3 cm) thick.
- Dimple the surface all over with your fingertips, creating small indentations—this is the signature focaccia texture and prevents large air bubbles.
+ Show details− Hide details
Ready when: Dough fills pan with ½-inch (1.3 cm) thickness and is dimpled
Tip: Oil your fingertips generously; sticky dough won't adhere to well-oiled fingers.
Second rise and preheatOven 450°F / 230°C
- Cover the pan loosely with a towel and let the dough proof at room temperature for 1–1.5 hours, until it's noticeably puffy and springs back slowly when you poke it (it should not fully spring back).
- Meanwhile, preheat your oven to 450°F (230°C) for at least 30 minutes—use an oven rack positioned in the middle of the oven.
+ Show details− Hide details
Ready when: Dough is puffy and springs back slowly when poked
Tip: Overproofing creates a dense, flat focaccia; aim for 'pouf,' not 'brick.'
Top the focaccia
- About 10 minutes before baking, add the toppings.
- Scatter the drained and patted-dry white beans (425 g / 1 can) evenly over the dough, pressing them in gently.
- Distribute the roasted garlic cloves (18 cloves) among the beans, spacing them so every slice gets a bit of garlic.
- Sprinkle the fresh rosemary leaves (1 tablespoon / 3 g) over the surface.
- Drizzle the remaining extra-virgin olive oil (3 tablespoons / 45 ml) evenly across the focaccia.
- Finish with a light sprinkle of fleur de sel (¾ teaspoon) and cracked black pepper to taste.
+ Show details− Hide details
Ready when: Toppings are evenly distributed and lightly pressed into dough
Tip: Don't add toppings too early—they'll sink and become dry. Wait until just before baking.
Bake until goldenOven 450°F / 230°C
- Transfer the pan to the preheated 450°F (230°C) oven and bake for 20–25 minutes, until the focaccia is deep golden brown across the top and the edges are lightly caramelized.
- The beans should be warm and slightly crispy, and you should smell a rich, toasted aroma.
- If the top is browning too quickly before the center is set, lower the oven to 425°F (220°C) after 12 minutes.
+ Show details− Hide details
Ready when: Top is deep golden brown; edges are caramelized; aroma is rich and toasted
Tip: Every oven varies; start checking at 20 minutes. The crust should sound hollow when tapped.
Cool and finish
- Remove the focaccia from the oven and let it cool in the pan for 5 minutes.
- Transfer it to a wire rack or cutting board and let it cool for at least 10 minutes before slicing.
- The crumb will set as it cools, making slicing cleaner.
- If desired, brush the warm focaccia lightly with a tiny bit more olive oil for extra richness.
+ Show details− Hide details
Ready when: Focaccia has cooled enough to slice without tearing
Tip: Slicing warm focaccia while still steaming will compress the crumb; patience yields better texture.
Good to know
Tips
- Roast your garlic the day before to save time on baking day—it's the most hands-on prep.
- The long, cool fermentation is key to sourdough flavor; don't rush it or skip the stretch-and-folds. They replace traditional kneading and are gentler on open crumb.
- Pat your white beans very dry before scattering them; excess moisture will make them soggy rather than crispy.
- For an even more rustic focaccia, sprinkle a pinch of fleur de sel or Maldon salt after baking while the oil is still warm—it adds a final pop of flavor and texture.
Make ahead
Roast the garlic heads 1–2 days ahead and store in an airtight container in the fridge. The dough can be shaped and refrigerated overnight after the second rise (cover well); bake directly from the fridge, adding 5–10 minutes to the baking time.
Storage & reheating
Store cooled focaccia in an airtight container or resealable bag at room temperature for up to 2 days. Refresh by wrapping loosely in foil and warming in a 350°F (175°C) oven for 8–10 minutes. Freeze for up to 3 months; thaw at room temperature, then refresh in a 350°F oven for 10–12 minutes.
Substitutions
- canned white beans (cannellini or great northern), drained and rinsed → Chickpeas (garbanzo beans) or cannellini beans. Keeps the same creamy texture and earthy flavor; use the same quantity.
- fresh rosemary sprigs → Fresh thyme, oregano, or a mix of Italian herbs. Use the same quantity; adjust to taste. Thyme is more delicate, so it won't overpower.
- roasted garlic cloves → Caramelized onions or roasted shallots (about 1 cup / 150 g). Offers sweetness instead of garlic's pungency; still mellow and delicious.
- bread flour → All-purpose flour (use 2 cups / 250 g to account for lower protein). The crumb will be slightly more tender; sourdough's acidity still gives good flavor.
More sourdough
See all →

Find more like this
- Meal
- Dinner
- Cuisine
- Italian
- Main ingredient
- White Beans
- Method
- Oven
- Quick & Easy
- Make Ahead