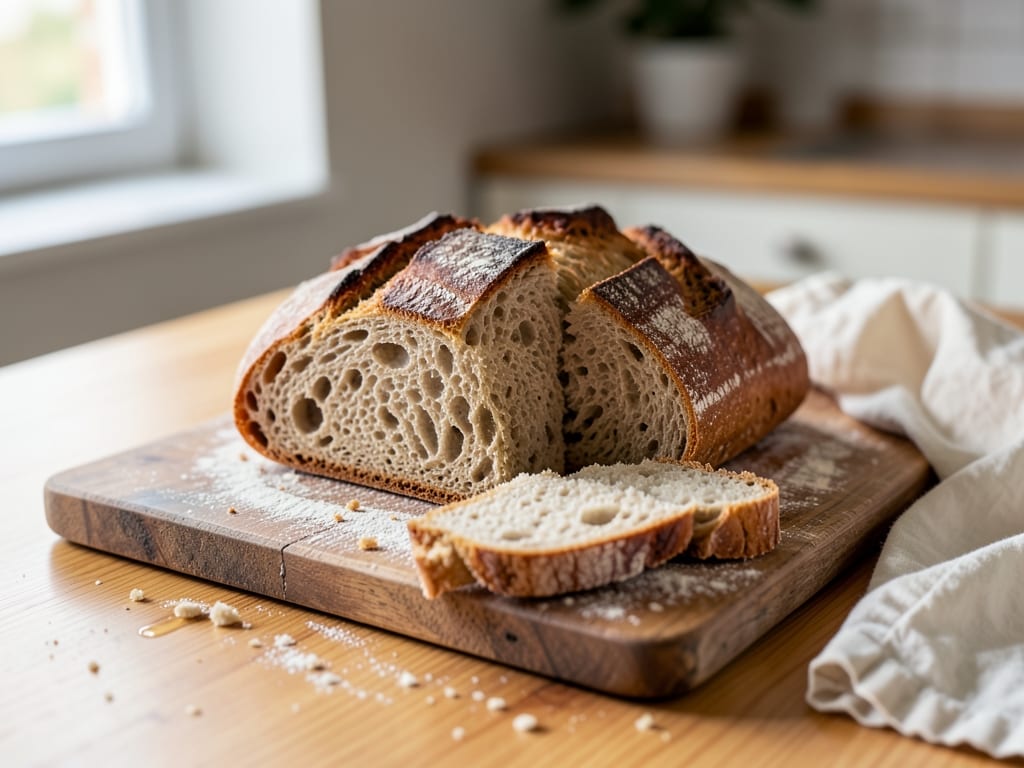
Sourdough Pane Pugliese
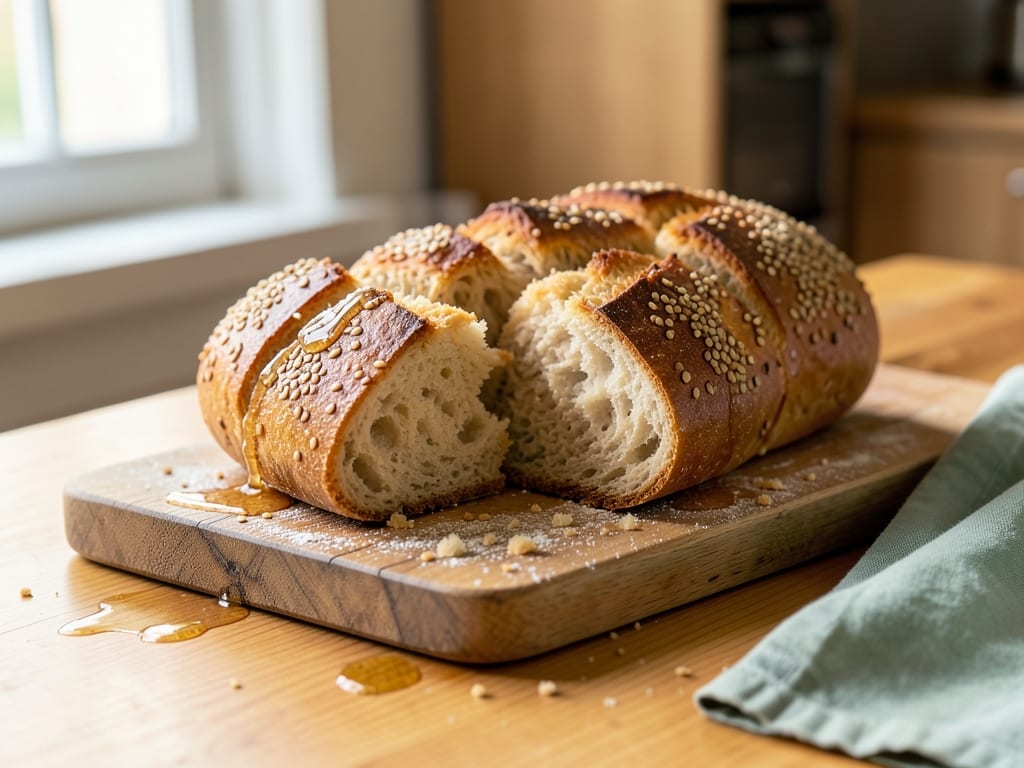
A traditional Italian bread from Puglia with a crispy, blistered crust and soft, open crumb. Made with semolina rimacinata (re-milled durum wheat) and naturally leavened with sourdough starter, this rustic loaf develops complex flavor and a distinctive golden color through long, cool fermentation. The characteristic tender interior contrasts beautifully with the shattered, sun-gold crust.
- Prep
- 40 min
- Cook
- 45 min
- Wait
- 17 hr 35 min
- Total
- 19 hr
- Makes
- 1 loaf (12–14 slices)
Steps
Before you start
- Activate your sourdough starter 4–12 hours ahead; it should be bubbly, risen, and nearly doubled by the time you bake
- Plan for 18–20 hours total, most of it unattended. The overnight cold proof overnight is essential for flavor development and an open crumb
- Obtain semolina rimacinata (re-milled durum wheat flour), not regular semolina; the fineness is crucial for the bread's texture and characteristic golden color
- Have ready a banneton proofing basket (10–12 inch round), a 4.5–5 quart Dutch oven, parchment paper, and a lame or sharp bread knife
Mix and autolyse dough
- In a large mixing bowl, combine 400g semolina rimacinata, 100g all-purpose flour, 330ml room-temperature water, and 100g active sourdough starter.
- Using your hand or a wooden spoon, stir until there are no streaks of dry flour and the mixture is a shaggy, slightly wet dough.
- The dough will seem loose; this is normal.
- Cover the bowl with a damp towel or plastic wrap and let rest undisturbed for 30 minutes.
- This autolyse allows the flours to fully hydrate and gives the starter time to activate.
+ Show details− Hide details
Ready when: Dough should feel relaxed and slightly more cohesive
Tip: Keep the mixing bowl covered to prevent the dough from drying out during the autolyse.
Add salt and finalize
- Add 10g fine salt to the dough.
- Wet your hand slightly and pinch and fold the salt into the dough, working around the bowl and incorporating it evenly.
- This should take 2–3 minutes.
- The dough will initially feel more slack as the salt dissolves; continue folding until the salt is fully integrated and the dough holds together.
+ Show details− Hide details
Ready when: Salt is no longer visible; dough is uniform in color and holds together when folded
Tip: Wet your hands to prevent sticking; the dough is naturally sticky and that's correct.
Bulk fermentation with stretches and folds
- The dough will now ferment for about 5.5 hours total, during which you'll perform four sets of stretches and folds to build strength without traditional kneading.
- Working in the bowl, wet one hand slightly and grab the dough from the underside, stretch it up and over the center of the mass, then rotate the bowl 90° and repeat.
- Do this 4 times per set (you'll have stretched all sides), then rest.
- Perform the first stretch-and-fold set now (takes about 2–3 minutes), then cover and rest 30 minutes.
- Repeat three more times (so 4 sets total, spaced 30 minutes apart).
- After the 4th set, cover the bowl and let the dough rest undisturbed for another 4–4.5 hours until it has visibly increased by 50–75% in volume, feels airy when gently poked, and jiggles when the bowl is moved slightly.
- The dough should smell pleasantly sour and yeasty.
+ Show details− Hide details
Ready when: Dough has increased 50–75%, feels light and airy, and retains a fingerprint when poked gently
Tip: Keep the dough at around 75–78°F (24–26°C) for predictable fermentation. If your kitchen is cool, place the bowl in a warm spot (like near a sunny window or in an unheated oven with the light on). Stretch and folds should feel gentle; you're building strength gradually, not aggressively kneading.
Pre-shape and bench rest
- Turn the dough out onto a lightly floured work surface (use minimal flour to avoid drying the surface).
- Using a bench scraper, gently fold the dough into a rough round, creating tension on the top surface by pulling it toward you.
- Work gently; you want to maintain the open crumb.
- Cover with a damp towel and let rest on the counter for 20 minutes.
- This resting period relaxes the gluten before final shaping.
+ Show details− Hide details
Ready when: Dough has softened slightly; the surface feels supple
Tip: Use just enough flour to prevent sticking—too much flour will make the crust dry and make it hard for the banneton to grip the dough.
Shape into final form
- Flip the pre-shaped dough so the non-floured side is now facing up.
- Gently fold the top third of the round down toward the center and press lightly with your palm.
- Fold the bottom third up and seal it into the middle, then fold the round in half and seal the seam with the heel of your hand.
- Now shape it into a tight round by rotating it on the work surface, using your hands to pull the dough toward you, building tension on the surface.
- This should take about 8–10 minutes of gentle, patient work.
- Place the shaped dough seam-side up into your floured banneton or towel-lined bowl.
+ Show details− Hide details
Ready when: Dough is shaped into a smooth, taut round; seam is tucked underneath
Tip: Tension on the surface helps the dough expand evenly in the oven and creates lift. Take your time shaping; rushing this step leads to a flat, dense loaf.
Cold proof overnight
- Cover the banneton with plastic wrap or place it inside a large plastic bag to prevent a skin from forming.
- Refrigerate for at least 10 hours or up to 16 hours (overnight is ideal).
- The cold temperature dramatically slows fermentation and allows the dough to develop deeper flavor, while making it much easier to score.
- The dough should still be cold and stiff when you remove it for baking; do not allow it to warm up before baking.
+ Show details− Hide details
Ready when: Dough is cold and firm; a finger pressed into it leaves a slight indentation that springs back slowly
Tip: Cold proof is essential for pane pugliese. The long, cool fermentation develops the complex flavor that distinguishes this bread. If you cannot do an overnight proof, room-temperature fermentation for 3–4 hours is acceptable but will yield less complex flavor.
Preheat oven and prepare for bakingOven 500°F / 260°C
- Place your Dutch oven (with lid on) into the oven and preheat to 500°F (260°C) for 45 minutes.
- The Dutch oven must be very hot to generate steam for the crust.
- About 5 minutes before the oven is fully preheated, remove the banneton from the fridge.
- Line a piece of parchment paper under and around the banneton, then gently tip the cold dough out onto the parchment paper seam-side down.
- The cold dough should turn out easily; if it sticks, run a bench scraper underneath to release it.
+ Show details− Hide details
Ready when: Dutch oven is very hot (test by carefully opening the door and feeling the heat; you should feel strong radiant heat)
Tip: Handle the cold dough minimally; it will be stiff and prone to cracking if warmed or overworked. Keep it in the fridge until the very last moment.
Score the loaf
- Using a bread lame, very sharp knife, or new razor blade, score the top of the cold dough boldly.
- You may cut a single long slash at an angle, an X pattern, or a cross—choose whichever appeals to you.
- Score at least 1/4 inch (6 mm) deep; this allows the loaf to expand in the oven and prevents random bursting.
- Work decisively; hesitant scores will not open properly.
+ Show details− Hide details
Ready when: Loaf has a clear, deep cut or cuts that will guide expansion
Tip: A dull blade will drag the dough instead of cutting it cleanly, resulting in poor oven spring. Use a very sharp blade and one clean, confident motion for each score.
Bake covered for crust developmentOven 500°F / 260°C
- Carefully remove the hot Dutch oven from the oven.
- Transfer the parchment-lined dough into the Dutch oven (it's okay if the parchment paper hangs slightly over the edge).
- Place the lid on the Dutch oven and return it to the 500°F oven.
- Bake covered for 20 minutes.
- The steam trapped in the Dutch oven will cause the dough to expand rapidly and develop a thick, crispy crust.
+ Show details− Hide details
Ready when: Crust is pale golden and bread has noticeably risen (you may see it through the lid's edges)
Tip: Do not open the Dutch oven during this phase; the steam is critical. Peeking will release steam and prevent proper crust formation.
Bake uncovered until goldenOven 500°F / 260°C
- Carefully remove the hot lid (steam will be very hot; use a kitchen towel for protection).
- Continue baking the loaf uncovered for 25–30 minutes until the crust is deep golden-brown, with some darker blistering and spots.
- The crust should sound crispy and hollow when tapped.
- An instant-read thermometer inserted into the center should read 205–210°F (96–99°C), though for this bread, color and sound are equally reliable doneness cues.
+ Show details− Hide details
Ready when: Crust is deep golden with blistered spots; loaf sounds hollow when tapped on the bottom
Tip: Watch the crust carefully in the final 10 minutes; it can go from golden to too dark surprisingly quickly. If it's browning very fast, you can lower the oven to 475°F (246°C) for the remainder.
Cool completely before slicing
- Remove the loaf from the Dutch oven and transfer it to a wire rack or wooden board.
- Let it cool at room temperature for at least 30 minutes (ideally 1–2 hours) before slicing.
- The crumb continues to set and firm up as it cools.
- Slicing into warm bread will compress the crumb and make it dense.
+ Show details− Hide details
Ready when: Loaf is completely cooled and no longer warm to the touch; crust is fully crispy
Tip: Patience with cooling is rewarded with a better crumb structure. If you slice too early, the interior will still be steaming and compresses easily.
Good to know
Tips
- Semolina rimacinata is the heart of authentic pane pugliese; seek it out from Italian suppliers, specialty bakers' shops, or online retailers. Regular semolina or stone-ground cornmeal will not yield the same texture or color.
- Stretch and folds are gentler than traditional kneading and better for an open crumb. Each fold takes only a few minutes and should feel relaxed, not aggressive.
- The overnight cold proof is essential: it develops flavor, makes the dough easier to score (it won't tear), and creates superior oven spring. Skipping it will result in blander, denser bread.
- Trust your senses over exact timing: fermentation speed depends on your kitchen's temperature. Look for the dough to jiggle slightly when the bowl is moved, to feel airy when poked, and to increase about 50–75% before moving to the next step.
Make ahead
The dough can be prepared up to 2 days ahead through the shaping step (Step 5). After shaping, refrigerate in the banneton for up to 36 hours and bake directly from cold storage. Alternatively, the fully baked loaf can be baked a day ahead; store wrapped and refresh in a 375°F (190°C) oven for 5 minutes just before serving to restore crispness to the crust.
Storage & reheating
Room temperature (2 days): Store wrapped in a clean kitchen towel in a bread bag or on the counter. Place cut-side down if you've sliced it. | Refrigerator (5–7 days): Wrap cooled loaf tightly in plastic wrap, then place in a bread bag. Before serving, refresh in a 375°F (190°C) oven for 5 minutes to revive the crust. | Freezer (up to 3 months): Wrap the cooled loaf tightly in plastic wrap, then in aluminum foil. Thaw completely at room temperature (6–8 hours), then refresh in a 375°F oven for 8–10 minutes if desired to restore crust crispness.
Substitutions
- All-purpose flour or bread flour → bread flour (13% protein). Bread flour has more gluten and will create a slightly chewier crumb. Use 5–10g less water, as bread flour absorbs more liquid than all-purpose.
- Semolina rimacinata (re-milled durum wheat flour) → semolina di durum (coarser) or whole grain spelt flour. Semolina rimacinata is preferred for its fine texture; coarser semolina will yield a grainier crumb. Note: whole grain flours will require slightly more water and produce a less golden crumb.
- Sourdough starter (100% hydration) → active dry yeast (2g / 0.5 tsp) mixed with extra water for hydration. This substitution sacrifices the complex sour flavor and long fermentation benefits, but the bread will still bake. Reduce cold proof time to 2–3 hours at room temperature or 4–6 hours in the refrigerator.
- Fine sea salt or kosher salt → kosher salt (use 12g for Diamond Crystal or 13g for Morton's due to density differences). Fine sea salt is ideal for even distribution, but kosher salt works. Adjust quantity based on the brand's density to maintain salinity.
More sourdough
See all →

Find more like this
- Meal
- Dinner
- Cuisine
- Italian
- Method
- Oven
- Quick & Easy
- 5 Ingredients or LessMake Ahead