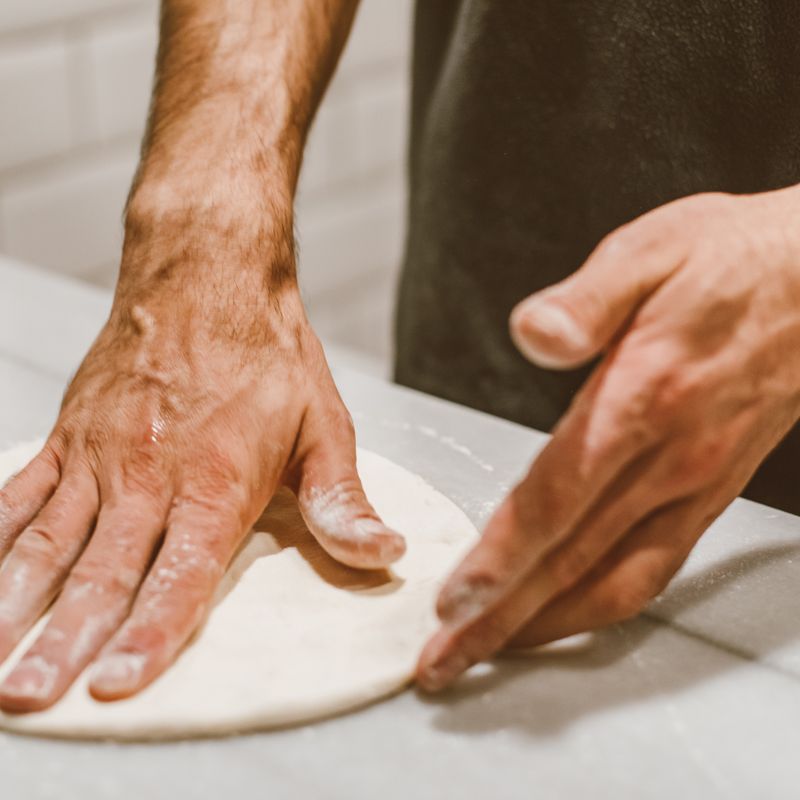
Sourdough Pizza Dough
A chewy, blistered, lightly tangy pizza crust built on a 24-hour cold ferment. This makes four 12-inch pizzas, and the dough is flavorful enough to stand with simple toppings like tomato, mozzarella and basil.
- Prep
- 46 min
- Cook
- 24 min
- Wait
- 1.2 days
- Total
- 1.3 days
- Makes
- 4 dough balls (285 g each), enough for four 12-inch (30 cm) pizzas
Steps
Before you start
- Feed your starter 4–6 hours before mixing, and use it when it has doubled and is domed and bubbly (at its peak). A sluggish starter gives dense, pale crust.
- Plan ahead: the dough needs about 5½ hours at room temperature, then 24 to 72 hours in the fridge. Mix it a day or more before you want to bake.
- Weigh the ingredients with a kitchen scale. Sourdough hydration is sensitive, and the cup measures are approximate.
- Aim for a room temperature of about 75°F (24°C). In a cooler kitchen, bulk fermentation will take longer, so judge by the dough and not the clock.
Mix and autolyse
- In a large bowl, stir the water and starter together with your hand or a spatula until the starter mostly dissolves and the water looks milky.
- Add the bread flour and mix until no dry flour remains and the dough looks shaggy.
- Cover the bowl and let it rest for 30 minutes.
- This rest lets the flour hydrate and makes the dough easier to handle.
+ Show details− Hide details
Ready when: No dry flour is visible and the dough is a rough, sticky mass
Tip: Dissolving the starter first spreads it evenly, so the dough ferments uniformly.
Add salt and oil
- Sprinkle the salt over the dough and drizzle on the 1 Tbsp (15 ml) olive oil.
- Wet your hand and pinch and squeeze the dough about 20 times, then fold it over itself in the bowl for 2 minutes.
- Keep going until the salt has dissolved and the dough feels cohesive and a little tacky, not soupy.
+ Show details− Hide details
Ready when: The dough feels smooth, no salt grains are felt, and it holds together as one mass
Tip: Keep your hand wet, because the dough is about 68% hydration and sticks to dry skin.
Stretch and fold
- Cover the bowl.
- Over the next hour, do 3 sets of stretch-and-folds, spaced 30 minutes apart (one now, one at 30 minutes, one at 60 minutes).
- For each set, wet your hand, grab the edge of the dough, stretch it up until it resists, and fold it over the center.
- Turn the bowl a quarter turn and repeat 4 times in all.
- Cover the bowl after each set.
- The dough should become smoother and more elastic with each set.
+ Show details− Hide details
Ready when: After the third set the dough is smooth, springy and pulls away from the bowl sides
Tip: If the dough tears while you stretch it, stop and let it rest 10 minutes before continuing.
Bulk ferment
- Leave the covered dough at about 75°F (24°C) for about 3 hours more, until it has grown by about 50% and not doubled.
- Look for a domed top, bubbles around the edges and a slightly jiggly feel when you shake the bowl.
- Move it to a lightly oiled container if you want to measure the rise.
+ Show details− Hide details
Ready when: Dough is about 50% bigger, domed, with visible bubbles and a jiggly feel
Tip: Don't wait for it to double at this stage. Over-fermented dough turns slack and sticky and tears easily.
Divide and ball
- Lightly flour the counter and scrape the dough out.
- Cut it into 4 equal pieces of about 285 g each.
- Shape each into a tight ball: pull the edges to the center, flip it seam side down, and drag it toward you on the counter in small circles with a cupped hand until it is smooth and taut.
- Brush 4 lidded containers with some of the extra olive oil (about 1 tsp total each), put one ball in each, and seal.
- Alternatively, space the balls on an oiled baking sheet and wrap tightly in plastic.
+ Show details− Hide details
Ready when: Each ball is smooth, taut on top and holds a round dome shape
Tip: Save about 2 tsp of the extra oil for drizzling after baking if you want to keep it exact.
Cold ferment
- Refrigerate the sealed dough balls for 24 hours, or up to 72 hours.
- A longer rest gives a tangier flavor, more browning and more blisters.
- The dough will puff slightly and show a few bubbles.
+ Show details− Hide details
Ready when: Balls have risen modestly and show small bubbles through the container
Tip: Don't leave the dough for more than 72 hours, or it can turn slack and overly sour.
Warm up and preheatOven 500°F / 260°C
- One hour before baking, take the dough out of the fridge and leave it, covered, at room temperature.
- At the same time, put a baking steel or stone on an upper-middle rack and preheat the oven to 500°F (260°C) for the full hour.
- The steel needs the full hour to get very hot, which gives a crisp bottom and good oven spring.
+ Show details− Hide details
Ready when: The dough feels soft and slightly puffy, and the oven has been at temperature for at least 45 minutes
Tip: Cold dough springs back when you stretch it, so don't skip the warm-up.
Stretch the first pizza
- Generously dust the counter with semolina.
- Gently turn one ball out onto it, keeping the airy rim intact.
- With your fingertips, press from the center out, leaving a 1-inch (2.5 cm) border.
- Lift the dough and stretch it over your knuckles to about 12 inches (30 cm) across.
- Lay it on a semolina-dusted peel and give it a shake to check that it slides freely.
+ Show details− Hide details
Ready when: The dough is a thin, even circle about 12 inches wide with a puffy rim, and it slides on the peel
Tip: Never use a rolling pin, as it pushes out the air bubbles that give the crust its open crumb.
Top and bakeOven 500°F / 260°C
- Spread about ¼ cup (60 g) of crushed tomatoes over the dough, leaving the border bare.
- Scatter on about ¾ cup (85 g) of the grated mozzarella.
- Slide the pizza onto the hot steel and bake at 500°F (260°C) for 5–7 minutes, until the rim is puffed and deeply browned with dark blisters and the cheese is bubbling and spotted with brown.
- Remove it with the peel, drizzle with a little olive oil and scatter with torn basil if using.
+ Show details− Hide details
Ready when: Rim is puffed and deep golden-brown with dark blisters, the cheese is bubbling and the underside is crisp when lifted
Tip: Top the pizza quickly on the peel. A wet or slow topping job makes the dough stick.
Repeat and serveOven 500°F / 260°C
- Let the oven recover for 2 minutes between pizzas.
- Stretch, top and bake the remaining 3 dough balls the same way, using the rest of the tomatoes, mozzarella, olive oil and basil.
- Let each pizza rest for 2 minutes on a rack before slicing so the cheese sets and the bottom stays crisp.
+ Show details− Hide details
Ready when: Each pizza has a puffed, blistered, deep golden rim and a crisp base
Tip: Keep the remaining dough balls covered and cold-ish until you're ready to stretch them, since they get sticky as they warm.
Good to know
Tips
- Use a very hot steel or stone: 45–60 minutes of preheating is what gives the crispy underside and big oven spring.
- If your starter is slow, bulk fermentation can take 4–6 hours. Judge by the 50% rise, bubbles and jiggle instead of the clock.
- For a stronger flavor and more browning, push the cold ferment to 48–72 hours.
- Use the broiler for the last 1–2 minutes if your oven tops out at 500°F (260°C) and the top of the pizza is pale. Watch it closely.
Make ahead
The dough is designed to be made ahead. After shaping, the balls can sit in the fridge for 24 to 72 hours. You can also freeze the balls (see storage) for up to 3 months.
Storage & reheating
Unbaked dough: refrigerate in sealed, oiled containers for up to 72 hours. Freeze individual balls in oiled freezer bags for up to 3 months, then thaw in the fridge for 24 hours and warm at room temperature for 1 hour before stretching. Baked pizza: keep at room temperature for up to 2 hours, or refrigerate in an airtight container for up to 3 days. Reheat slices in a dry skillet over medium heat, covered, for 3–4 minutes, or in a 450°F (230°C) oven for 5–8 minutes until the crust is crisp.
Substitutions
- bread flour → All-purpose flour. The crust will be a little softer and less chewy. Cut the water to about 370 ml (1½ cups plus 1 Tbsp), since all-purpose flour absorbs less.
- semolina flour or extra bread flour → Extra bread flour or rice flour. Semolina gives the best crunch and release. Rice flour is the most non-stick of the alternatives.
- low-moisture mozzarella → Fresh mozzarella, drained and patted dry. Tear it into pieces and blot well, or the extra moisture makes the pizza soggy in the center.
- extra-virgin olive oil → Neutral oil such as avocado oil. The crust will be slightly less flavorful but the texture will be the same.
More pizza
See all →
Find more like this
- Meal
- Dinner
- Cuisine
- Neapolitan
- Main ingredient
- MozzarellaTomatoes
- Method
- Oven
- Quick & Easy
- Make Ahead