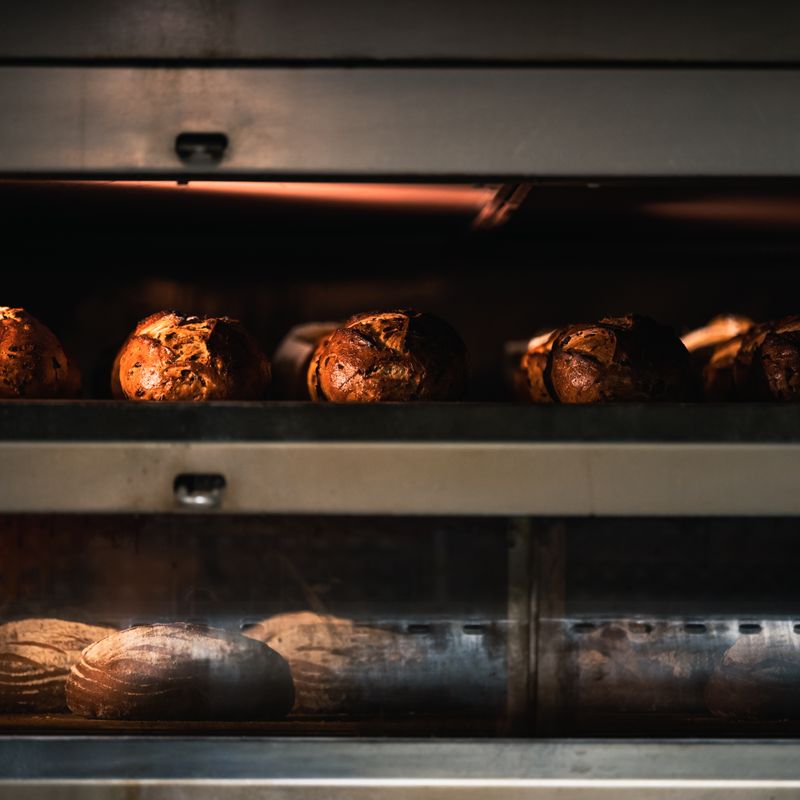
Sourdough Greek Island Walnut Olive Oil Bread
A rustic, artisanal sourdough loaf enriched with toasted walnuts and fruity extra virgin olive oil. This Greek-inspired bread has a chewy interior with a crispy, blistered crust. The walnuts add earthiness and subtle bitterness that pairs beautifully with the olive oil's peppery notes, making it perfect for dipping in oil, spreading with cheese, or serving alongside Mediterranean meals.
- Prep
- 30 min
- Cook
- 45 min
- Wait
- 9 hr
- Total
- 10 hr 15 min
- Makes
- 1 loaf (14–16 slices)
Steps
Before you start
- Bring your sourdough starter to peak activity (bubbly, doubled, smells pleasantly sour) at room temperature the morning of baking—it should take 4–8 hours from feeding depending on temperature and starter vigor
- Toast walnuts in a dry skillet over medium heat for 4–5 minutes, stirring constantly, until fragrant; cool completely before chopping
- Use a Dutch oven (4–5 quart); preheat it empty in the oven at 500°F (260°C) for at least 30 minutes
- Have a banneton or bowl lined with a floured kitchen towel ready for proofing
Mix the dough
- In a large 5-quart bowl, combine the 150 g active sourdough starter, 320 ml room-temperature water, and 450 g bread flour.
- Using your fingers or a dough scraper, mix until all flour is hydrated and there are no dry pockets—the dough will look shaggy and rough.
- Cover the bowl with a damp kitchen towel and let rest at room temperature for 30 minutes (this autolyse period allows the flour to absorb water fully and develop gluten naturally).
+ Show details− Hide details
Tip: Autolyse improves extensibility and final crumb structure; don't skip it.
Incorporate salt and oil
- After the 30-minute rest, sprinkle the 9 g sea salt and 30 ml olive oil over the dough.
- Wet your hand and pinch and fold the dough onto itself (reach down, grab the bottom, fold up over the top) 15–20 times in one direction, rotating the bowl 90 degrees and repeating until salt and oil are fully incorporated.
- The dough should feel smoother and more cohesive.
+ Show details− Hide details
Ready when: Dough is smooth, elastic, and holds together
Tip: Wet hands prevent sticking; folding develops gluten without harsh mixing that can toughen sourdough.
First fold and walnut incorporation
- Cover the bowl and let the dough rest at room temperature for 20 minutes.
- Perform a series of 4 stretch-and-fold cycles over the next 80 minutes (one every 20 minutes): wet your hand, reach into the bowl, grab a section of dough from the bottom, stretch it up and fold it over the center, rotate the bowl, and repeat 4 times per fold.
- On the second fold cycle (at the 40-minute mark), gently fold in the 150 g toasted, chopped walnuts, distributing them evenly throughout the dough.
- Continue the remaining two fold cycles.
- Between folds, keep the dough covered.
+ Show details− Hide details
Ready when: Dough increases in volume by about 50% and feels bubbly and alive
Tip: Stretch-and-folds replace intensive kneading and create strength without overworking the dough. Adding nuts partway through prevents them from breaking apart.
Bulk fermentation
- After the final fold, cover the bowl and let the dough ferment at room temperature for 2 hours.
- The dough should increase noticeably in volume (roughly 50–75% rise), feel pillowy to the touch, and show small bubbles just beneath the surface when you gently press it.
- The dough is ready when a poke leaves a slight indent that slowly springs back halfway.
+ Show details− Hide details
Ready when: Dough has risen 50–75%, feels airy, poke test shows partial spring-back
Tip: Room temperature matters; if your kitchen is cool (below 70°F/21°C), extend this to 2.5–3 hours. If warm (above 75°F/24°C), check at 1.5 hours.
Pre-shape the dough
- Dust your work surface and a banneton proofing basket (or bowl lined with a floured kitchen towel) lightly with flour.
- Turn the dough out onto the work surface; it will be soft and slack.
- Using a dough scraper, gently fold the edges toward the center to create surface tension, then flip it seam-side down.
- Cup your hands around the dough and drag it toward you in small pulls to tighten the outer surface without degassing.
- Shape into a round or oblong boule.
- Let it rest, uncovered, for 20 minutes (bench rest).
+ Show details− Hide details
Ready when: Dough relaxes but retains shape; surface is taut
Tip: Avoid overworking; gentle shaping preserves the bubbles already created during bulk fermentation.
Final shape
- Flip the rested dough seam-side up.
- Using the same folding-and-dragging technique, gently fold the edges inward and roll the dough away from you to create a smooth, tension-filled oval or boule.
- Place it seam-side up into your floured banneton or lined bowl.
- Cover loosely with plastic wrap or a damp towel.
+ Show details− Hide details
Ready when: Seams are clearly visible on the top surface; dough feels taut
Tip: Final seam placement determines the crust score pattern; set this side up into the banneton.
Cold overnight proof
- Place the banneton in a food-grade plastic bag or cover very loosely, and refrigerate for 12–16 hours (or up to 18 hours).
- Cold proofing develops flavor, makes the dough easier to score, and gives you flexibility on baking timing.
- The dough should rise slightly more in the fridge and feel very cold and firm when you remove it.
+ Show details− Hide details
Ready when: Dough is fully chilled; feels firm and slightly puffy
Tip: Don't let it go beyond 18 hours or it may over-proof and collapse; if baking directly after bulk fermentation, reduce cold proof to 4–6 hours at room temp.
Preheat and scoreOven 500°F / 260°C
- Remove the dough from the refrigerator.
- Place your preheated Dutch oven (with the lid on) into a 500°F (260°C) oven for 30 minutes to ensure it is thoroughly hot.
- While waiting, place parchment paper on a cutting board.
- Quickly invert the banneton onto the parchment, score the dough with a bread lame or very sharp serrated knife.
- Make 1–2 bold slashes (about ¼ inch deep) across the top at a 30-degree angle; these will guide the oven spring and create the characteristic 'ear' on the crust.
+ Show details− Hide details
Ready when: Dutch oven is steaming hot; you can hear a faint hum from the heat
Tip: Score confidently and quickly; a dull blade drags and deflates the dough, while hesitation causes uneven cuts.
Bake coveredOven 500°F / 260°C
- Carefully remove the Dutch oven from the 500°F (260°C) oven (it will be extremely hot).
- Using the parchment paper as a sling, gently transfer the scored dough into the Dutch oven.
- Cover with the hot lid and return to the oven.
- Bake covered for 20 minutes.
- The steam trapped inside will create a crispy, blistered crust and help the bread expand fully.
+ Show details− Hide details
Ready when: Steam visibly escapes when you crack the lid; bread has risen significantly
Tip: Don't peek before 20 minutes; every opening releases steam and reduces oven spring.
Bake uncoveredOven 450°F / 230°C
- Remove the Dutch oven lid (be careful of steam) and reduce the oven temperature to 450°F (232°C).
- Continue baking uncovered for 22–25 minutes, until the crust is deep golden brown to dark mahogany in color and sounds hollow when tapped on the bottom.
- The internal crumb temperature should reach 205–210°F (96–99°C) when measured with an instant-read thermometer inserted near the center (avoid touching the sides).
+ Show details− Hide details
Ready when: Crust is deep mahogany, loaf sounds hollow when tapped, internal temp is 205–210°F (96–99°C)
Tip: Every oven is different; if your crust is browning very fast, reduce to 425°F (218°C). If it's pale after 25 minutes, increase to 475°F (246°C) for the final 5 minutes.
Cool completely
- Transfer the finished loaf to a wire rack and cool at room temperature for at least 1 hour before slicing.
- The crumb will continue to set as it cools; cutting too early releases steam and results in a gummy interior.
- A fully cooled loaf is easier to slice cleanly and has better flavor definition.
+ Show details− Hide details
Ready when: Bread is room temperature; crust is fully set and crispy
Tip: If you slice while warm, the inside will be steamy and compress rather than reveal a beautiful open crumb.
Optional: final oil finish
- Once completely cooled, you may brush or drizzle a small amount of extra virgin olive oil over the crust for a Mediterranean finish.
- This is entirely optional but echoes traditional Greek bread service.
- Serve alongside more olive oil for dipping, crumbled feta, and fresh vegetables.
+ Show details− Hide details
Tip: This step is cosmetic and adds flavor; do it just before serving for the best visual impact.
Good to know
Tips
- This recipe requires a mature, vigorous sourdough starter. If your starter is sluggish or very young (less than 3–4 weeks old), extend bulk fermentation to 3 hours and cold proof to 18 hours for deeper flavor. A strong starter is the foundation of great sourdough flavor and oven spring.
- Hydration (71%) is moderate for sourdough, making this dough manageable for home bakers while still yielding an open, chewy crumb. If your kitchen is very warm or you prefer a stickier dough, add up to 20 ml more water; if it feels too loose, reduce by 10 ml.
- Walnut pieces will vary in size; aim for chunks roughly pea-to-grape-sized. Very small pieces may disappear into the crumb, while huge chunks can create large air pockets. Toasting before adding develops nutty flavor and prevents them from tasting raw.
Make ahead
Dough can be bulk-fermented and shaped up to 24 hours ahead; cold-proof in the refrigerator for up to 18 hours. You can also freeze the shaped, unbaked dough (after 2 hours room-temp proofing) for up to 2 weeks; bake directly from frozen, adding 10 minutes to the covered bake time.
Storage & reheating
Room temperature (in a bread box or paper bag): 3–4 days. The crust will soften over time; to restore crispness, wrap in foil and reheat in a 350°F (175°C) oven for 10 minutes. Refrigerator (wrapped in plastic): up to 1 week; reheat as above. Freezer (wrapped in plastic, then foil): up to 3 months. Thaw at room temperature for 2 hours, then reheat wrapped in foil at 350°F (175°C) for 15 minutes, or slice while frozen and toast.
Substitutions
- raw walnut halves → raw hazelnuts or toasted almonds (same weight). Hazelnuts offer a sweeter, subtly chocolatey note; almonds will be milder. Both work beautifully in this bread.
- bread flour → all-purpose flour (450 g) with 1 tablespoon (10 g) vital wheat gluten stirred in. All-purpose flour alone will yield a slightly less open crumb and chewier texture, but remains delicious. Vital wheat gluten helps compensate for lower protein.
- extra virgin olive oil → neutral oil like grapeseed or light olive oil if you prefer a milder flavor. Extra virgin olive oil's peppery, fruity notes are essential to the 'Greek island' character, so use it if possible; however, a milder oil won't harm the bread.
- fine sea salt → kosher salt (9 g by weight, or about 1.5 teaspoons). Kosher salt crystals are larger, so measure by weight to avoid over-salting. Table salt is not recommended; if that's all you have, use only 6 g (it's denser than sea salt).
More sourdough
See all →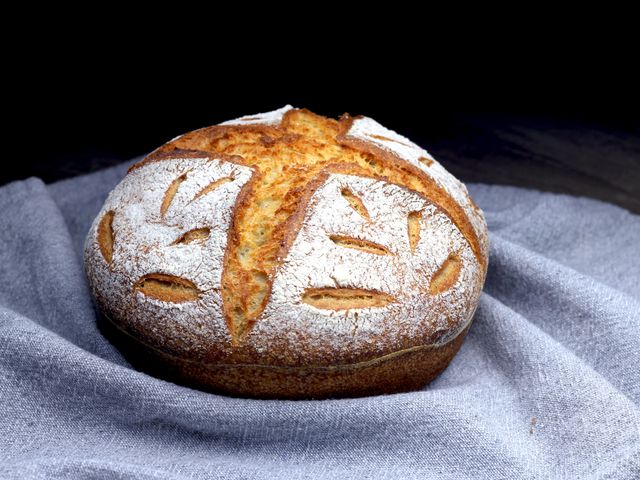

Find more like this
- Meal
- Dinner
- Cuisine
- Mediterranean
- Method
- Oven