Sourdough Normandy Cider Apple Bread
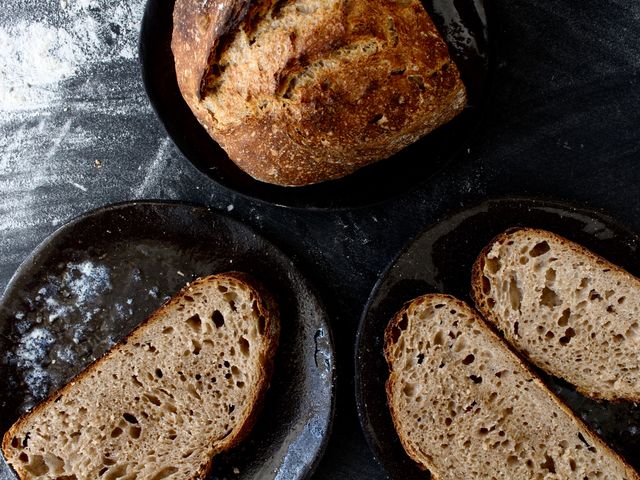
A rustic French-inspired sourdough loaf infused with apple cider reduction and studded with caramelized apple pieces. The combination of sourdough's natural tang with sweet, tart apple creates a complex flavor perfect for breakfast toast, afternoon tea, or alongside cheese. This bread develops a golden, crackled crust and a tender crumb with distinct apple flavor throughout.
- Prep
- 45 min
- Cook
- 45 min
- Wait
- 7 hr 45 min
- Total
- 9 hr 15 min
- Makes
- 1 loaf (12 slices)
Steps
Before you start
- Ensure your sourdough starter is active and fed at room temperature (peak fermentation, bubbly)
- Reduce apple cider to ½ cup well ahead—this takes 20 minutes on the stove and must cool completely before using
- Preheat your oven to 475°F (245°C) 30 minutes before baking for proper oven spring
- Clear 7–8 hours for bulk fermentation and final proof; plan to mix dough by mid-morning for an evening bake
Reduce apple cider
- Pour 1 cup (240 ml) fresh apple cider into a small saucepan.
- Bring to a gentle simmer over medium-high heat and cook, stirring occasionally, until reduced to ½ cup (120 ml)—about 15–20 minutes.
- The cider should taste concentrated and slightly caramelized, with deeper color.
- Pour into a small bowl and let cool completely to room temperature, at least 30 minutes.
+ Show details− Hide details
Ready when: Cider darkens slightly, volume reduces to half
Tip: Do not skip cooling—warm cider will kill the sourdough starter in the dough
Mix dough
- In a large 4-quart mixing bowl, combine the 1.5 cups (360 ml) of active sourdough starter with the cooled reduced cider (½ cup / 120 ml) and ½ cup (120 ml) of cool water.
- Stir together briefly until mostly combined.
- Add 3.5 cups (440 g) bread flour, 2 teaspoons (12 g) fine sea salt, 1.5 tablespoons (19 g) granulated sugar, and ½ teaspoon (2.5 g) cinnamon if using.
- Mix by hand or with a wet hand, folding and turning, for about 2 minutes until a shaggy mass forms—all flour should be incorporated and no dry streaks remain.
+ Show details− Hide details
Ready when: Shaggy dough forms with all flour wet, mixture cohesive but still rough
Tip: Do not knead yet—you will develop the gluten through folds during bulk fermentation
First rest and prepare apples
- Cover the dough bowl loosely with a damp kitchen towel or plastic wrap.
- Let rest at room temperature (68–72°F / 20–22°C) for 30 minutes while you prepare the apples.
- Peel, core, and cut 2 medium firm apples (about 350 g total) into ½-inch (1.3 cm) cubes.
- Toss with the 2 tablespoons (28 g) softened unsalted butter in a small bowl until coated.
- This prevents oxidation and ensures even caramelization.
+ Show details− Hide details
Ready when: Dough is slightly less shaggy, apples are cubed and coated
Tip: Prepare apples and butter mixture just before the rest ends so apples don't brown too much
Fold in apples and begin bulk fermentation
- After the 30-minute rest, wet your hand and add the prepared apple cubes to the dough.
- Fold the dough over itself several times (about 8 folds over 1 minute), rotating the bowl as you fold to distribute apples evenly.
- The dough will feel tacky and apples will be partially embedded.
- Cover loosely and let sit at room temperature for 3 hours.
- During this time, perform three more "stretch and fold" sets at 45-minute intervals (at 45 min, 90 min, and 135 min into bulk fermentation): Wet your hand, grab one side of the dough, stretch up and fold over itself, rotate bowl 90°, repeat 4 times.
- These folds build strength without traditional kneading.
+ Show details− Hide details
Ready when: After 3 hours total, dough has increased 50–75% in volume, feels airy and jiggly, apples distributed throughout
Tip: Room temperature matters—warmer than 74°F (23°C) accelerates fermentation; cooler than 68°F (20°C) slows it. Aim for 70°F (21°C) if possible. Apples will weep slightly; this is fine and adds moisture
Shape the boule
- Dust a banneton or proofing basket lightly with flour.
- Turn the fermented dough out onto a lightly floured work surface.
- Gently pre-shape by pulling the edges toward the center 4 times, rotating 90° between each pull, creating a round.
- Rest uncovered for 20 minutes to allow the gluten to relax.
- Then perform a final shape: flip the dough over so the smooth side is down, fold the top third down, seal with the heel of your hand, fold the bottom third up and seal, then fold the dough in half lengthwise and roll tightly toward you, sealing the seam with your palms.
- Place seam-side up in the floured banneton.
+ Show details− Hide details
Ready when: Dough is shaped into a tight boule; seam is sealed, dough holds shape without sagging
Tip: If dough sticks during shaping, dust with flour—do not add water, as the dough has ample moisture from the apples and cider
Cold final proof overnight
- Cover the banneton with a plastic bag or damp towel.
- Refrigerate at 38–40°F (3–4°C) for 12–16 hours (or up to 24 hours).
- Cold fermentation develops deeper sourdough flavor and makes scoring easier.
- The dough can also cold-proof for 4–6 hours at room temperature if time is short, though overnight yields the best flavor.
+ Show details− Hide details
Ready when: Dough is chilled, slightly expanded, ready to bake from cold
Tip: Overnight cold proof is not optional for sourdough—it's where much of the flavor develops. You may poke the dough lightly; if the indent slowly springs back halfway, it's ready. If it springs back fully, proof longer; if it doesn't spring back, it's slightly over-proofed but still bakes well
Preheat oven and prepare for bakingOven 475°F / 245°C
- About 45 minutes before baking, preheat your oven to 475°F (245°C) with a Dutch oven inside on the middle rack.
- The Dutch oven traps steam, creating the signature sourdough crust.
- Have a bench scraper or lame (razor blade) ready for scoring.
- Cut a piece of parchment paper slightly smaller than your Dutch oven's interior.
+ Show details− Hide details
Ready when: Oven and Dutch oven are fully preheated, thermometer reads 475°F (245°C)
Tip: A properly preheated Dutch oven is essential—cold Dutch ovens won't create steam. Use an oven thermometer to verify temperature
Score and load doughOven 475°F / 245°C
- Remove the chilled dough from the refrigerator.
- Carefully turn the banneton over onto a piece of parchment paper so the dough is seam-side down.
- Score the top with a sharp, decisive ¼-inch (0.6 cm) deep slash in a cross or elongated oval pattern—this controls where the bread expands.
- Quickly but carefully remove the preheated Dutch oven from the oven.
- Place the parchment paper with dough inside the pot and cover with the lid.
- Return to the oven immediately.
+ Show details− Hide details
Ready when: Dough is scored cleanly, loaded into hot Dutch oven, lid is secured
Tip: Work quickly when loading the oven—every second the Dutch oven is open, steam escapes. A cold dough will not generate spring in a cool pot
Bake covered (steam phase)Oven 475°F / 245°C
- Bake covered at 475°F (245°C) for 20 minutes.
- The dough will rise aggressively in the first 10 minutes (oven spring).
- The lid traps moisture, creating steam that allows the crust to expand fully before setting.
- You should not peek during this phase.
+ Show details− Hide details
Ready when: Dough has risen significantly, steam visible when lid is briefly lifted (do not lift yet)
Tip: Resist the urge to check—opening the Dutch oven releases critical steam and collapses oven spring
Bake uncovered (browning phase)Oven 450°F / 230°C
- Remove the lid carefully (steam is hot).
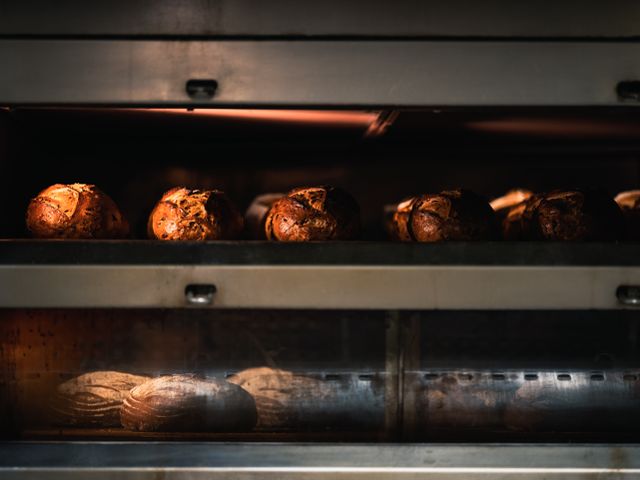
- Reduce the oven temperature to 450°F (232°C) and continue baking uncovered for another 20–25 minutes until the crust is deep golden brown—caramelized but not burned.
- The bottom should sound hollow when tapped lightly with a knife handle.
- If browning too fast, tent loosely with aluminum foil.
+ Show details− Hide details
Ready when: Crust is deep golden brown to mahogany, bread sounds hollow when tapped on bottom, internal temperature reaches 205°F (96°C)
Tip: Use an instant-read thermometer inserted into the center (avoiding apples) to check doneness—sourdough's dense crumb means color alone isn't reliable. Aim for 205°F (96°C) for a fully set crumb
Cool completely
- Remove the bread from the oven (carefully remove from Dutch oven if still inside) and place on a wire rack or cutting board.
- Do not slice for at least 1 hour—the interior continues to set as it cools.
- Crumb structure is still developing, and slicing warm breaks apart the gluten matrix.
- Cool at room temperature for 2–3 hours before slicing for best texture.
- The apples will have softened and caramelized, their flavor deepened by the baking process.
+ Show details− Hide details
Ready when: Bread is room temperature, no longer warm to touch, can be sliced cleanly without compressing
Tip: This is hard to wait for, but it's non-negotiable for sourdough. Slicing while warm creates gummy, compressed slices. If you must slice sooner, use a serrated knife and saw gently; wait at least 1 hour minimum
Good to know
Tips
- Temperature control is crucial: bulk fermentation at 70°F (21°C) takes about 3 hours; warmer room will shorten this, cooler will lengthen it. Use a thermometer to monitor your kitchen or move dough to a warmer spot (near a window, on top of the refrigerator) if needed.
- Sourdough is forgiving but timing matters. If bulk fermentation finishes early (2.5 hours), shape and proof. If it takes 4 hours, that's fine too—the flavor deepens. Trust the dough's appearance (50–75% volume increase) over strict timing.
- Apples release moisture as they ferment, making the dough slightly wetter than typical sourdough. This is intentional and yields a more tender crumb. If the dough feels unworkable (very sticky), add flour in tiny pinches during bulk fermentation, but start conservatively.
- The combination of reduced apple cider and fresh apples creates layers of apple flavor: the cider adds deep sweetness and subtle tartness to the crumb, while fresh apple cubes remain partially distinct, caramelizing during baking for a pleasant texture variation.
Make ahead
You can make the full dough 1–2 days ahead: After shaping (Step 5), cover and refrigerate for up to 24 hours. The longer cold fermentation actually improves flavor. Bake directly from the fridge without bringing to room temperature. You can also reduce the apple cider 1–2 days ahead and store covered in the refrigerator; warm it gently before mixing the dough so it's at room temperature.
Storage & reheating
Store the cooled loaf wrapped in a kitchen towel or paper bag at room temperature for 3–4 days; the crumb will firm slightly after 24 hours (ideal for slicing). For longer storage, slice the bread, wrap tightly in plastic wrap, and freeze for up to 2 months. Thaw at room temperature (wrapped) for 2–3 hours or toast from frozen. Do not refrigerate the whole loaf—cold (not frozen) storage accelerates staling.
Substitutions
- firm tart apples (such as Granny Smith or Honeycrisp) → other firm tart apples (Braeburn, Pink Lady, or even a mix of sweet and tart). Granny Smith and Honeycrisp are traditional, but other firm varieties work; avoid very soft apples like Red Delicious, which collapse into mush
- fresh or bottled apple cider, unsweetened → apple juice concentrate, reconstituted (or use 1 cup straight apple juice and reduce to ½ cup), or hard cider (½ cup reduced, cooled completely before adding to dough). Fresh cider has the best flavor, but good-quality unsweetened apple juice is a reliable substitute; hard cider adds subtle tang and alcohol bakes off completely
- ground cinnamon → ground nutmeg (¼ teaspoon), ground cardamom (¼ teaspoon), or omit entirely. Cinnamon is optional and complements apples, but sourdough tang and apple flavor are strong enough to stand alone if you prefer a cleaner taste
- active sourdough starter, fed 4–8 hours prior, at peak ripeness (bubbly and doubling) → unfed starter (at its peak; if using a regularly-fed starter at 100% hydration, use the full amount unfed), or a fresh fed starter at peak. The timing and hydration of your particular starter vary. A bubbly, doubling starter at peak is the key. If using a stiff starter, adjust water slightly downward
More sourdough
See all →

Find more like this
- Meal
- Breakfast
- Cuisine
- French
- Main ingredient
- Apples
- Diet
- Vegetarian
- Method
- Oven