
Sourdough Crusty Pan Bread
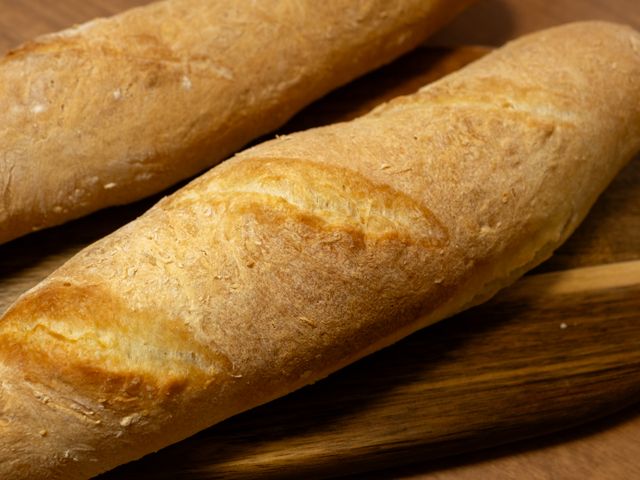
A rustic, high-hydration sourdough loaf baked in a Dutch oven for a shatteringly crisp crust and open, airy crumb. The long cold fermentation develops deep flavor and makes shaping easier. Perfect for weekend baking or a next-day loaf.
- Prep
- 25 min
- Cook
- 35 min
- Wait
- 21 hr
- Total
- 22 hr
- Makes
- 1 loaf (about 500g / 1.1 lb, 8–10 slices)
Steps
Before you start
- Use active, peak sourdough starter (doubled after feeding, bubbly throughout)
- Place Dutch oven in oven and preheat to 500°F (260°C) at least 45 minutes before baking
- Have a banneton or medium bowl lined with a well-floured tea towel ready for the second rise
- Use a kitchen scale for accuracy—baker's percentages rely on precise measurements
Mix dough
- In a large bowl, combine 350 ml lukewarm water, 100 g peak sourdough starter, and 500 g bread flour.
- Stir with a dough whisk or your hand until all flour is hydrated and no dry bits remain.
- The dough will be shaggy and slightly wet.
- Cover with plastic wrap or a shower cap and let rest at room temperature for 30 minutes.
+ Show details− Hide details
Ready when: All flour is hydrated; dough is cohesive
Tip: Avoid adding salt during the autolyse—it can tighten the gluten prematurely
Incorporate salt and knead
- Dissolve the 10 g salt in 25 ml cool water.
- Pour the salt water over the dough and incorporate it by pinching and folding the dough over itself for 2–3 minutes until the salt is fully mixed in.
- The dough will become smoother and slightly firmer.
+ Show details− Hide details
Ready when: Salt is fully incorporated; dough is cohesive and smooth
Tip: Wet hands make this easier—pinch and fold, rotating the bowl as you go
Bulk fermentation (first 2 hours)
- Cover the bowl and let the dough sit at room temperature (68–72°F / 20–22°C) for 2 hours.
- During this time, perform four sets of stretch-and-folds: at 30 minutes, 60 minutes, 90 minutes, and 120 minutes after mixing.
- For each stretch-and-fold, wet your hand, grab the dough from one side, stretch it up and fold it over itself, rotate the bowl 90°, and repeat 4 times.
- This builds strength without kneading.
+ Show details− Hide details
Ready when: Dough is puffy, supple, and noticeably risen after 2 hours
Tip: Perform each fold quickly—aim for 1–2 minutes total per set. The dough should feel alive and bouncy by the end
Cold ferment overnight
- After the bulk fermentation, cover the bowl tightly with plastic wrap and place it in the refrigerator for 12–18 hours.
- Cold fermentation develops flavor, makes shaping easier, and improves dough structure.
- The dough does not need to double during this time.
+ Show details− Hide details
Ready when: Dough is cold, firm, and has risen slightly in the bowl
Tip: Cold fermentation also gives you flexibility—shape any time the next day without rushing
Preheat Dutch ovenOven 500°F / 260°C
- About 1 hour before you plan to bake, remove the dough from the refrigerator.
- Place your Dutch oven (lid on) in the oven and preheat to 500°F (260°C).
- The Dutch oven must be screaming hot before the dough goes in—at least 45 minutes of preheat time.
+ Show details− Hide details
Ready when: Oven temperature reaches 500°F (260°C)
Tip: Use an oven thermometer to verify actual temperature—many home ovens run cool
Shape the dough
- Turn the cold dough out onto a lightly floured work surface.
- Gently pre-shape it into a round by folding the edges toward the center, then let it rest on the counter for 20 minutes uncovered (this is the bench rest).
- After resting, perform the final shape: flip the dough seam-side down, gently stretch it into a round, then fold the top half down toward you, seal the seam with the heel of your hand, roll it away from you, and flip seam-side up into a floured banneton or bowl lined with a tea towel.
+ Show details− Hide details
Ready when: Dough is shaped into a taut round; seam is centered in banneton
Tip: Handle cold dough gently—if it tears, it loses steam during baking. If it's too stiff, let it sit 5 more minutes
Final proof
- Cover the banneton with plastic wrap and let the shaped dough proof at room temperature for 45–60 minutes.
- It should rise slightly and feel airy when poked gently with a floured finger—the indent should slowly spring back halfway.
- Do not let it proof too long, or it will spread instead of rise in the oven.
+ Show details− Hide details
Ready when: Dough is puffy; poke test shows dough springs back halfway
Tip: Underproof slightly rather than overproof—cold dough has more oven spring to come
Score and bake (covered)Oven 500°F / 260°C
- Carefully remove the screaming-hot Dutch oven from the oven.
- Line the bottom with parchment paper if desired (optional but prevents sticking).
- Invert the banneton over the Dutch oven and quickly tip the dough into the pot seam-side up.
- Using a sharp lame or knife, score the top with a single confident slash about ¼ inch (0.6 cm) deep at a 30° angle, or make a cross-hatch pattern.
- Cover the Dutch oven with its lid and slide it back into the 500°F (260°C) oven.
- Bake covered for 20 minutes.
+ Show details− Hide details
Ready when: Dough is set and beginning to brown inside the pot
Tip: Work quickly when transferring dough—speed preserves heat. A lame gives a cleaner score than a knife
Bake uncovered and finishOven 450°F / 230°C
- Remove the lid carefully (steam is hot—tilt it away from you).
- Reduce the oven temperature to 450°F (232°C) and bake uncovered for another 15–18 minutes, until the crust is deep golden-brown and the loaf sounds hollow when tapped on the bottom.
- The internal temperature should reach 205–210°F (96–99°C) at the center.
+ Show details− Hide details
Ready when: Crust is deep golden-brown; loaf sounds hollow when tapped; internal temp is 205–210°F (96–99°C)
Tip: If crust is still pale at 15 minutes, increase temperature to 475°F (246°C) for the final 3 minutes
Cool completely
- Remove the loaf from the Dutch oven and place it on a wire rack.
- Let it cool completely at room temperature for at least 1 hour before slicing.
- This allows the crumb to set—slicing too early results in a gummy interior.
+ Show details− Hide details
Ready when: Loaf is completely cool to the touch
Tip: Resist the urge to slice warm—a warm loaf will be doughy inside no matter how well baked it looks
Good to know
Tips
- Baker's percentages: This recipe is 70% hydration (350 g water ÷ 500 g flour × 100). If your starter is particularly liquid or stiff, adjust water by ±25 ml to maintain 68–72% hydration.
- Scoring matters: A proper score directs oven spring upward and creates the characteristic "ear." A hesitant or shallow score will result in a flat loaf.
- Room temperature affects timing: If your kitchen is 62°F (17°C), bulk fermentation may take 2.5–3 hours instead of 2. If it's 75°F (24°C), reduce to 1.5–1.75 hours. Dough temperature, not clock time, is the guide.
- Dutch oven is non-negotiable: It traps steam, which is essential for a crispy crust. A covered baking stone or cast-iron skillet with a preheated sheet pan on top can substitute in a pinch, but results will be less dramatic.
Make ahead
Dough can be cold-fermented in the fridge for up to 2 days. Shape and bake as directed. Dough can also be frozen after shaping (in the banneton) for up to 1 month; thaw overnight in the fridge before final proof and baking.
Storage & reheating
Store uncovered on a wire rack at room temperature for up to 3 days, then wrap tightly in plastic wrap or store in a bread box for up to 5 days total. Freeze whole loaf or slices in a freezer bag for up to 3 months. Reheat frozen slices in a 350°F (175°C) oven for 10–15 minutes, wrapped in foil to prevent over-browning.
Substitutions
- bread flour → all-purpose flour (11–12% protein). All-purpose will produce a slightly less open crumb and tighter structure, but the loaf will still rise and crust well. Increase hydration by 25 ml if using all-purpose for a lighter crumb.
- active sourdough starter → 100 g fed and active rye sourdough starter. Rye starter ferments slightly faster and adds subtle earthy flavor. Follow the same timing, but reduce final proof to 40–50 minutes.
- water → same weight in filtered or bottled water. Chlorinated tap water can slow fermentation slightly. Filtered water is ideal, especially if your tap water is heavily treated.
- sea salt or kosher salt → 10 g fine sea salt or fleur de sel. Avoid iodized table salt, which can inhibit fermentation. Kosher salt works equally well; measure by weight, not volume.
More sourdough
See all →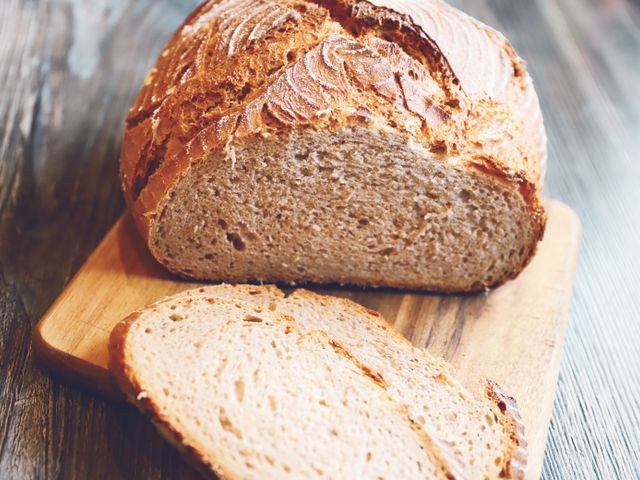

Find more like this
- Meal
- Dinner
- Method
- Oven
- Quick & Easy
- 5 Ingredients or LessMake Ahead