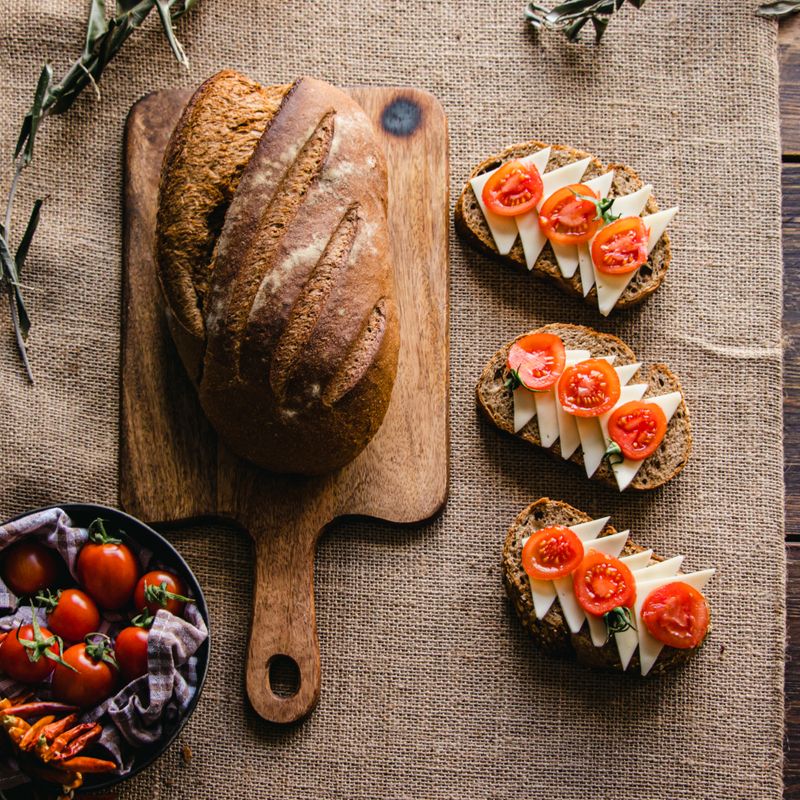
Sourdough Peruvian Rocoto Chili and Cheese Bread
A rustic sourdough bread infused with charred rocoto peppers, creamy pockets of queso fresco, and fresh cilantro. This Peruvian-inspired loaf has a tangy, chewy crumb with pockets of melted cheese and bright, fruity heat from roasted rocoto chiles. Perfect for serving alongside soups or as a bold accompaniment to traditional Peruvian mains.
- Prep
- 30 min
- Cook
- 35 min
- Wait
- 8 hr
- Total
- 9 hr 5 min
- Makes
- 1 loaf (12 slices)
Steps
Before you start
- Activate sourdough starter 4–6 hours ahead or overnight until bubbly and at peak rise
- If using fresh rocoto peppers, roast them whole over an open flame or under the broiler until blackened, then cool and peel
- Place Dutch oven in oven to preheat with it to 500°F (260°C)
- Have all wet and dry ingredients measured and ready before mixing
Mix dough
- In a large 3 qt (2.8 L) bowl, combine the active sourdough starter, 1¼ cups (300 ml) cool water, and 3¼ cups (420 g) bread flour.
- Using your hands or a wooden spoon, stir until all flour is hydrated and a shaggy, wet dough forms with no dry pockets.
- The dough should feel sticky and rough at this stage.
+ Show details− Hide details
Ready when: Dough looks evenly moistened with no visible dry flour
Tip: This 30-minute rest, called autolyse, makes the dough easier to work with and improves flavor
Add salt and fold
- Sprinkle the 2 tsp (12 g) fine sea salt over the dough.
- Using wet fingers, pinch and fold the dough onto itself from the sides toward the center, rotating the bowl 90 degrees after each fold, for about 1 minute until the salt is fully incorporated.
- The dough will tighten slightly.
+ Show details− Hide details
Ready when: Salt is evenly distributed throughout the dough with no visible white specks
Tip: Work quickly but gently—overworking at this stage can overdevelop gluten unevenly
First bulk fermentation with folds
- Cover the bowl loosely with a damp kitchen towel.
- Let the dough rest at room temperature (68–72°F / 20–22°C) for 4 hours, performing a series of coil or stretch-and-fold every 30 minutes for the first 2 hours (4 sets total).
- For each fold: wet your hand slightly, grab the underside of the dough, stretch it up and over the top, rotate the bowl 90 degrees, and repeat 4 times.
- After 2 hours, let the dough rest undisturbed for the final 2 hours.
- The dough should increase in volume by 50–75%, look puffy, and pass the poke test (indent slowly springs back halfway).
+ Show details− Hide details
Ready when: Dough is noticeably puffier, jiggles slightly when the bowl is shaken, and a poke leaves a slow-recovering indent
Tip: Stretch-and-folds strengthen gluten without kneading; cooler fermentation deepens sourdough tang
Incorporate fillings
- Working gently to avoid deflating the dough, turn it out onto a lightly floured work surface.
- Spread the dough into a rough 9×7-inch (23×18 cm) rectangle.
- Brush lightly with 1 tbsp (15 ml) olive oil.
- Scatter the 240 g roasted rocoto peppers (diced), 150 g crumbled queso fresco, 12 g chopped cilantro, and 15 g minced garlic evenly over the dough.
- Using a bench scraper or your hands, gently fold and press the fillings into the dough, being careful not to tear it.
- Rotate and fold the dough over itself a few times to distribute ingredients.
+ Show details− Hide details
Ready when: Fillings are relatively evenly distributed throughout the dough with pockets visible
Tip: Work gently so the cheese and peppers don't burst through the dough skin; some pockets will remain and that's desirable
Pre-shape loaf
- Form the dough into a round boule by pulling the edges toward the center and rolling it into a tight ball.
- Work with confidence but gentleness to keep some gas in the dough.
- Place the seam-side up in a banneton proofing basket (or a medium bowl lined with a well-floured kitchen towel) dusted with flour.
+ Show details− Hide details
Ready when: Dough forms a round, smooth-topped ball with the seam-side facing upward
Tip: A tight pre-shape creates surface tension that helps the bread rise up rather than spread out
Cold final proof overnight
- Cover the banneton loosely with plastic wrap or a plastic bag.
- Place in the refrigerator at 38–40°F (3–4°C) for 12–16 hours.
- This cold, slow fermentation deepens flavor and makes scoring easier.
- The dough should look puffy but not overproofed when cold.
+ Show details− Hide details
Ready when: Dough is visibly puffed but still holds its shape; a gentle poke leaves a slowly-closing indent
Tip: Cold fermentation is optional but recommended—it improves flavor and makes the dough easier to handle when scoring
Preheat and prepare Dutch ovenOven 500°F / 260°C
- Remove the Dutch oven from the oven and carefully turn the cold dough out onto the hot surface (seam-side down).
- It will sizzle slightly.
- Working quickly, use a sharp serrated bread knife to score the top with a single confident slash about ½ inch (1.3 cm) deep at a 30-degree angle, or make a cross pattern if preferred.
- The cold dough will not spring back much, and that's fine.
+ Show details− Hide details
Ready when: Score is clean and visible; dough is positioned in the hot Dutch oven
Tip: Work quickly once the dough hits the hot Dutch oven—speed prevents heat loss that could slow oven spring
Bake coveredOven 500°F / 260°C
- Cover the Dutch oven with its lid.
- Place it in the preheated 500°F (260°C) oven.
- Bake for 20 minutes covered.
- The steam trapped inside will puff the dough and create a chewy crumb.
+ Show details− Hide details
Ready when: Dough has noticeably risen; interior is set
Tip: Do not open the oven door during this time or steam will escape and oven spring will diminish
Bake uncovered until goldenOven 450°F / 230°C
- Remove the lid from the Dutch oven.
- Reduce the oven temperature to 450°F (232°C).
- Continue baking for 12–15 minutes until the loaf is deep golden brown on top and the crust sounds hollow when tapped on the bottom.
- Internal temperature should reach 205–210°F (96–99°C) when measured with an instant-read thermometer inserted into the thickest part of the loaf (avoid hitting large pockets of cheese).
+ Show details− Hide details
Ready when: Crust is deep golden-brown; loaf sounds hollow when tapped; internal temp reads 205–210°F (96–99°C)
Tip: If the crust is browning too quickly after removing the lid, tent loosely with foil for the final few minutes
Cool on rack
- Remove the loaf from the Dutch oven (use tongs or carefully tip it out) and place on a wire rack.
- Let cool for at least 45 minutes before slicing.
- During cooling, the crumb continues to set and the crust finishes crisping.
- The bread will be quite hot internally for the first 20 minutes.
+ Show details− Hide details
Ready when: Loaf has cooled to warm room temperature; knife cuts cleanly without compressing the crumb
Tip: Slicing before the crumb is fully set will compress the interior and result in a dense, gummy texture
Good to know
Tips
- Rocoto peppers are traditionally found in Andean regions of Peru and have a distinctive fruity, slightly smoky heat. If fresh rocotos are unavailable, look for them at Peruvian or Latin American markets, or order them online. They are worth seeking out for their unique flavor, but poblanos or even red bell peppers can work in a pinch.
- Sourdough starter strength varies greatly. If your starter is not bubbly and at peak rise (about doubled in volume within 4–6 hours of feeding), the bulk fermentation may take longer—extend it to 5–6 hours total. A slow, cool fermentation is better than a rushed, warm one.
- The dough is wetter than typical sandwich bread dough; this creates the open, chewy crumb. If it feels unmanageable, wet your hands rather than adding more flour.
- Queso fresco melts slightly in the oven and creates pockets of creaminess; the cilantro will wilt but add brightness, and the roasted rocoto peppers will soften and perfume the crumb with fruity heat. Some cheese may brown on the crust—this is desirable for flavor.
Make ahead
Cold fermentation overnight (12–16 hours) is strongly recommended and improves both flavor and handling. The dough can also be frozen after the first bulk fermentation (after step 3); thaw overnight in the refrigerator before proceeding to step 4.
Storage & reheating
Keep in an airtight container at room temperature for up to 3 days. For longer storage, wrap tightly and freeze for up to 3 months. Thaw at room temperature for 2–3 hours, then refresh in a 325°F (163°C) oven for 10–15 minutes to restore crust crispness.
Substitutions
- fresh rocoto peppers → poblano peppers or red bell peppers. Rocotos are prized for their fruity, complex heat; poblanos are milder and earthier, bell peppers are sweet. Rocotos cannot be truly replaced but these will give a different but pleasant Peruvian-inspired character. Use the same weight.
- queso fresco or feta cheese → feta cheese, cotija cheese, or ricotta salata. All are crumbly, salty fresh cheeses. Feta will have a sharper tang; cotija is drier and more salty; ricotta salata is creamier. Use the same weight.
- fresh cilantro → Italian flat-leaf parsley or a mix of cilantro and parsley. Cilantro is traditional in Peruvian cooking and has an herbaceous, slightly citrus note. Parsley is milder. Use the same weight or slightly less parsley as it is less potent.
- bread flour → all-purpose flour. All-purpose flour has slightly less protein and gluten development will be gentler. The loaf will be slightly less chewy and more tender. Increase hydration slightly (add 1–2 tbsp more water if the dough feels too dry).
More yeast breads
See all →



Find more like this
- Meal
- Dinner
- Cuisine
- South African
- Main ingredient
- CheeseBell Peppers
- Method
- Oven