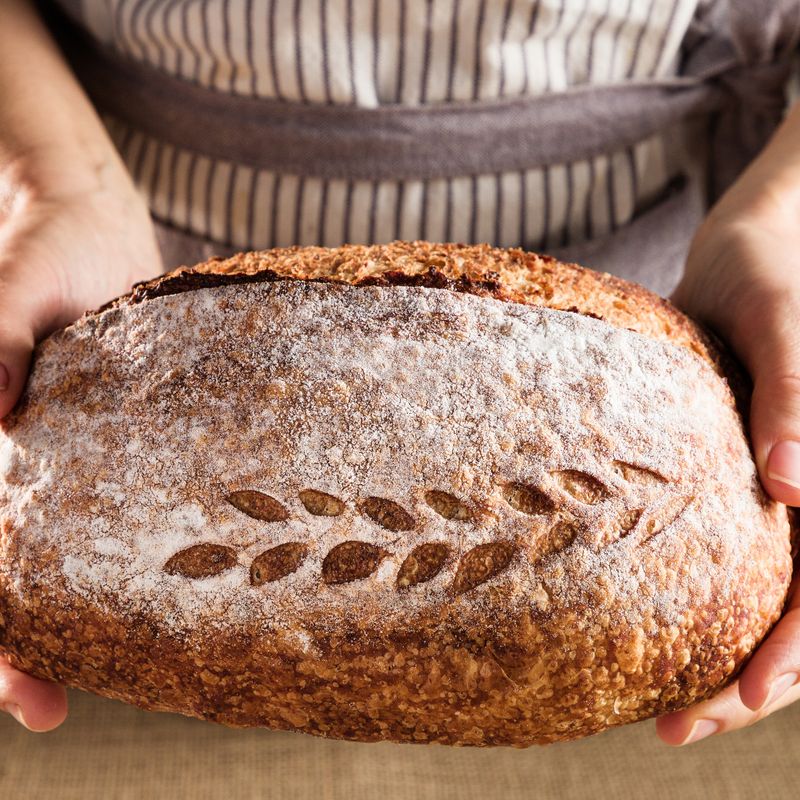
Sourdough Brazilian Broa Cornmeal Loaf
A rustic Brazilian broa—a golden cornmeal and sourdough bread with a crisp, crackled crust and tender crumb studded with polenta. This naturally leavened loaf balances the earthiness of sourdough with the subtle sweetness and texture of cornmeal. Perfect alongside beans, stews, or cheese.
- Prep
- 20 min
- Cook
- 45 min
- Wait
- 8 hr 45 min
- Total
- 9 hr 50 min
- Makes
- 1 loaf (10–12 slices)
Steps
Before you start
- Ensure your sourdough starter is active and bubbly—fed within 4–8 hours before mixing
- Use a Dutch oven or covered baking vessel; it will be preheated in the oven
- Read through the bulk fermentation times; they vary by room temperature (aim for 75–78 °F / 24–26 °C for predictable results)
- Have a banneton basket or bowl lined with a floured towel ready for the final proof
Mix dough and autolyse
- In a large mixing bowl, combine 300 g active sourdough starter, 350 g bread flour, and 100 g polenta or coarse cornmeal.
- Stir with a dough scraper or wooden spoon until all flour is hydrated and no dry pockets remain (the mixture will be shaggy).
- Cover the bowl loosely with a damp kitchen towel or plastic wrap.
- Let rest for 30 minutes at room temperature.
- This autolyse allows the flour and cornmeal to absorb water, improving gluten development.
+ Show details− Hide details
Ready when: All flour is incorporated and the dough is visibly shaggy
Tip: Polenta is coarser than flour and takes longer to fully hydrate; don't skip this rest period.
Add water and salt
- After the autolyse, pour 310 ml room-temperature water over the dough.
- With a dough scraper, mix and squeeze the dough for 2–3 minutes, breaking up the starter and distributing the water evenly throughout.
- The dough will look rough and wet.
- Sprinkle 10 g salt over the top and continue mixing and squeezing for another 2–3 minutes until the salt is fully incorporated and the dough becomes slightly more cohesive.
- The gluten network will start to visibly strengthen as you work it.
+ Show details− Hide details
Ready when: Dough is evenly mixed, salt is dissolved, and the mass holds together but is still sticky
Tip: Squeeze the dough rather than knead it; this technique is faster and gentler on long-gluten strands.
Bulk fermentation, phase 1
- Cover the bowl and let the dough rest undisturbed at room temperature (75–78 °F / 24–26 °C) for 45 minutes.
- Do not fold or stretch yet.
+ Show details− Hide details
Ready when: Dough has begun to rise slightly and may show small bubbles at the surface
Tip: If your kitchen is cooler (70 °F / 21 °C or below), add 15 minutes to this rest.
Coil folds and stretch-and-fold
- Uncover the bowl.
- Wet your hand lightly (to prevent sticking) and perform a series of stretch-and-folds: grab a portion of dough from the edge, stretch it upward, and fold it over the center.
- Rotate the bowl 90 degrees and repeat 4 times.
- This is one round of folds.
- Perform 4 rounds of folds, rotating the bowl and resting 5 minutes between each round.
- The dough will gradually become smoother and more elastic.
- After the final round, cover the bowl and let it rest for 15 minutes.
+ Show details− Hide details
Ready when: Dough is noticeably smoother, more cohesive, and slightly increased in volume after the folds
Tip: Coil folds (pulling the dough down and away rather than up) work well here; they distribute cornmeal particles and prevent gluten breakage. Resist over-working the dough—gentle folds are more effective than aggressive kneading.
Bulk fermentation, phase 2
- Cover the bowl and allow the dough to ferment at room temperature for 90 minutes.
- The dough should visibly rise and become pillowy.
- You should see small to medium bubbles forming beneath the surface when you tilt the bowl slightly.
- The dough should feel airy and springs back slowly when poked.
+ Show details− Hide details
Ready when: Dough has increased by 40–50% in volume, feels airy, and shows visible bubbles under the surface
Tip: Bulk fermentation time varies with temperature. At 70 °F (21 °C), you may need 2 hours; at 78 °F (26 °C), 75–90 minutes is often sufficient. Trust visual cues over the clock.
Pre-shape and rest
- Turn the dough out onto a very lightly oiled or damp countertop (do not use flour, which will absorb moisture and toughen the crust).
- Using a dough scraper, gently shape the dough into a rough round by folding the edges toward the center, rotating as you go.
- Rest the round seam-side up for 20 minutes.
- This bench rest allows the gluten to relax before final shaping, making the next step easier.
+ Show details− Hide details
Ready when: Dough no longer springs back aggressively when pressed; it feels relaxed
Tip: A damp counter prevents the dough from sticking and keeps the surface from drying out.
Final shaping
- Flip the pre-shaped round over (seam-side down) onto the damp countertop.
- Using a dough scraper and both hands, fold the far edge of the dough toward you, stretching gently.
- Fold the top down toward you, then fold the bottom edge up and toward the center.
- Roll the dough toward you, creating tension on the surface as you go.
- The final shape should be a taut, round boule.
- Turn seam-side up, then place the boule seam-side up into a banneton basket or a medium bowl lined with a well-floured kitchen towel.
- Dust the top (seam side) and inside the banneton generously with 15 g polenta or cornmeal—this prevents sticking and adds a rustic, golden crust texture.
+ Show details− Hide details
Ready when: Boule is evenly shaped, seam is visible at the bottom, and polenta dust coats the surface
Tip: Tension on the surface helps the loaf rise upward rather than spreading outward; this creates oven spring and an attractive dome.
Final proof: cold retard
- Cover the banneton or bowl with a plastic bag or plastic wrap and place it in the refrigerator at 38–40 °F (3–4 °C) for 8–16 hours (overnight is ideal).
- The cold retard slows fermentation, allowing flavors to develop and making the dough easier to score.
- If you prefer a faster proof, you may do a 60–90 minute room-temperature proof instead, but the flavor will be less complex.
+ Show details− Hide details
Ready when: When poked gently, the dough should indent slowly and not immediately spring back (ripe for baking)
Tip: A longer, cooler fermentation enhances the sour flavor typical of Brazilian broa. If you retard for 24 hours, the dough will be extra-flavorful but may be slightly more sour than some prefer.
Preheat Dutch oven and ovenOven 500°F / 260°C
- About 1 hour before baking, place your Dutch oven (lid on) in the oven.
- Preheat the oven to 500 °F (260 °C) for 1 hour.
- This ensures the Dutch oven is thoroughly heated and will trap steam for a crisp, crackled crust.
- Position the oven rack in the lower-middle position for even heat distribution.
+ Show details− Hide details
Ready when: Oven reaches 500 °F (260 °C) and maintains temperature steadily
Tip: A fully preheated Dutch oven is essential for maximum oven spring and crust development. Do not skip this step.
Score and load the loafOven 500°F / 260°C
- Remove the dough from the refrigerator.
- If it has been retarded for 8+ hours, it should be fully proofed and pass the poke test: a gentle indent should not spring back.
- Carefully remove the Dutch oven from the oven (use thick oven mitts—it is very hot).
- Turn the banneton upside down and gently place the boule seam-side down into the center of the Dutch oven.
- Using a bread lame or very sharp knife held at a 30-degree angle, score the top with a single deep slash (about ¼ inch / 6 mm deep) or an X pattern.
- The score directs oven spring and allows steam to escape in a controlled way.
- Replace the lid on the Dutch oven and return it to the oven.
+ Show details− Hide details
Ready when: Loaf is centered in the Dutch oven, score is visible and deep, and lid is in place
Tip: Work quickly to minimize heat loss. A confident, single-stroke score is better than tentative sawing, which can deflate the dough.
Bake covered, develop crustOven 500°F / 260°C
- Bake the loaf covered (with the Dutch oven lid on) at 500 °F (260 °C) for 25 minutes.
- The lid traps steam, creating the humid environment needed for a crisp, crackled crust and maximum oven spring.
- You may see some steam escaping around the edges—this is normal and desirable.
+ Show details− Hide details
Ready when: Loaf has risen noticeably within the Dutch oven; golden color should be starting to appear at the edges
Tip: Do not lift the lid during this phase; you will release all the steam and compromise the crust.
Finish baking, color and crackleOven 450°F / 230°C
- Carefully remove the lid from the Dutch oven (watch for escaping steam).
- Reduce the oven temperature to 450 °F (232 °C).
- Continue baking uncovered for 18–20 minutes, until the loaf is a deep golden brown with visible crackles across the top and the crust sounds hollow when tapped on the bottom.
- The cornmeal dust should be golden and slightly charred.
+ Show details− Hide details
Ready when: Crust is deep golden brown with visible cracks, bottom sounds hollow when tapped, internal temperature reaches 205–210 °F (96–99 °C)
Tip: If the top is browning too quickly before the bottom crust sets, cover loosely with foil for the last 5 minutes. The cornmeal particles on the surface may brown darker than wheat flour—this is expected and desirable for authentic broa.
Cool completely
- Turn the loaf out of the Dutch oven onto a wire rack.
- Let it cool at room temperature for at least 1 hour before slicing.
- The interior crumb continues to set as it cools, and the crust will firm up and develop its final crackle.
- Do not wrap or store the bread while it is still warm, or steam will soften the crust.
+ Show details− Hide details
Ready when: Loaf is at room temperature and crust rings hollow when tapped; slicing does not create a gummy interior
Tip: If you slice while warm, the crumb will appear underdone. Patience is rewarded with a properly set crumb and a crisp crust.
Good to know
Tips
- For consistent results, maintain your dough at 75–78 °F (24–26 °C) during bulk fermentation. If your kitchen is cooler, place the bowl in a proofing box, on top of a preheating oven, or in a turned-off oven with the light on.
- Brazilian broa is characteristically less sour than other sourdoughs. A cold 8–12 hour retard is ideal. Longer retards (16–24 hours) will develop stronger sour notes; shorter room-temperature proofs (60–90 minutes) will yield milder flavor.
- Polenta or cornmeal is susceptible to rancidity. Buy stone-ground or whole-grain versions from a store with good turnover, and store in the freezer if not using within 2–3 weeks. Rancid cornmeal will impart an off flavor.
- Do not over-ferment. If the dough is left too long (especially at warm temperatures), it will spread rather than rise, the crust will be pale rather than golden, and the interior may have large irregular holes and a gummy texture. Use the poke test and visual cues, not just the clock.
Make ahead
You can shape and cold-retard the dough for up to 24 hours in the refrigerator, which deepens the sour flavor. If retarding longer than 16 hours, you may notice the loaf does not need as much oven time (watch for golden-brown color at 40–43 minutes total).
Storage & reheating
Store the cooled loaf uncovered or in a paper bag at room temperature for up to 3 days. Avoid plastic bags, which trap steam and soften the crust. To refresh, wrap in foil and warm in a 350 °F (175 °C) oven for 10 minutes. Freeze the whole loaf or slices in an airtight bag for up to 1 month; thaw at room temperature or toast from frozen.
Substitutions
- bread flour (or all-purpose flour) → all-purpose flour (10–12% protein). All-purpose flour will produce a slightly softer, less chewy crumb but will still yield a good loaf. Use the same weight (350 g). The dough may be slightly more extensible; reduce bulk fermentation by 10–15 minutes if the dough overproofs visibly.
- polenta or coarse cornmeal → masa harina (corn flour) or finely ground polenta. Masa harina will impart a more authentic Latin American corn flavor and slightly different texture. Use the same weight (100 g). Finely ground polenta will produce a smoother crumb; coarse polenta will be more rustic.
- active sourdough starter, unfed → levain made from your starter (active at peak rise). If your starter is weak, prepare a levain 4–6 hours ahead: feed your starter and let it reach peak (doubled, bubbly top, slightly collapsed center). Use 300 g of this peak levain instead of the starter.
- sea salt or kosher salt → kosher salt (Diamond Crystal or other brand). Different salt brands have varying densities. Diamond Crystal kosher salt weighs about 5 g per tablespoon; Morton's or sea salt weighs about 6–7 g per tablespoon. Adjust by 1–2 g if using a saltier variety, to taste.
More yeast breads
See all →



Find more like this
- Meal
- Dinner
- Method
- Oven
- Quick & Easy
- Make Ahead