
Sourdough Beet Walnut Bread
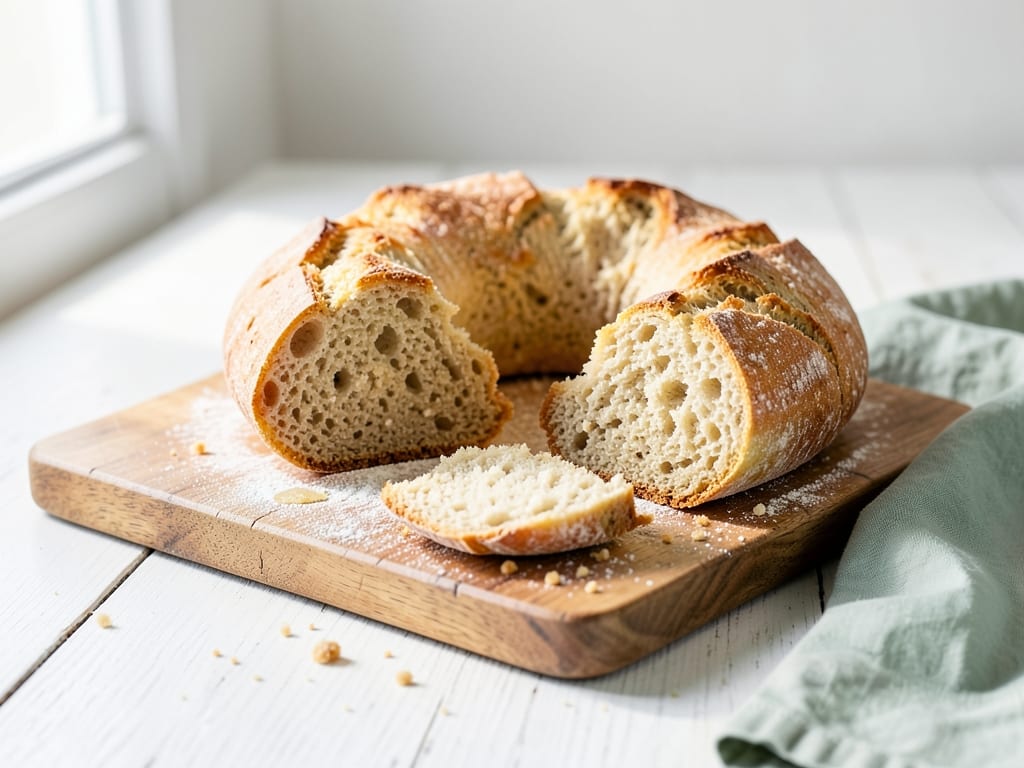
A vibrant sourdough loaf studded with earthy roasted beets and toasted walnuts. The beets add subtle sweetness, moisture, and striking speckled color to the crumb, while walnuts provide a gentle crunch and richness. Perfect for sandwiches or served alongside cheese and charcuterie. This recipe uses a long bulk fermentation to develop complex flavor and can be cold-proofed overnight for convenience and deeper sourdough tang.
- Prep
- 30 min
- Cook
- 40 min
- Wait
- 10 hr
- Total
- 11 hr 10 min
- Makes
- 1 loaf (8–10 slices)
Steps
Before you start
- Have active, bubbly sourdough starter ready—fed 4–8 hours prior, doubled in volume, showing bubbles on surface
- If using raw beets, roast them ahead or plan for that time; alternatively use pre-roasted or canned beets drained and patted dry
- Toast walnuts and let cool to room temperature before mixing into dough
- Place a 4–5 quart Dutch oven with its lid in the oven (you'll preheat it later)
Toast the walnutsOven 350°F / 175°C
- Preheat your oven to 350°F (175°C).
- Spread the walnuts on a baking sheet in a single layer.
- Toast for 8–10 minutes until fragrant and light golden brown.
- Transfer to a plate to cool completely.
- Toasting removes excess moisture and deepens the nutty flavor, both crucial for bread texture.
+ Show details− Hide details
Ready when: Walnuts are light golden brown and fragrant
Tip: Don't skip toasting—it brings out flavor and reduces moisture that can compromise dough hydration
Prepare roasted beetsOven 400°F / 205°C
- If starting with raw beets: wash 1 medium beet (about 150g), peel, cut into 1-inch cubes, toss with a tiny drizzle of oil, wrap in foil, and roast at 400°F (200°C) for 25–30 minutes until fork-tender.
- Cool completely, then finely grate to yield 100g.
- If using pre-roasted beets (from the market or canned, drained and patted dry), simply grate to the needed amount.
+ Show details− Hide details
Ready when: Beets are fork-tender, cooled completely, and grated
Tip: Pat roasted or canned beets dry with paper towels—excess moisture affects dough hydration
Mix dough and autolyse
- In a large mixing bowl, combine 100g active sourdough starter, 280ml cool water, 100g grated roasted beets, and 400g bread flour.
- Using your hand or a wooden spoon, mix until all flour is thoroughly hydrated and no dry bits remain.
- The dough will be shaggy and rough—this is correct.
- Cover the bowl with a lid or damp cloth and let rest for 30 minutes at room temperature.
- This rest allows the flour to fully absorb water and begins gluten development.
+ Show details− Hide details
Ready when: All flour is fully hydrated; no dry bits visible
Tip: Use cool water to slightly slow fermentation and give you more control over timing
Add salt and walnuts
- After the autolyse, sprinkle 10g fine sea salt over the dough.
- Wet your hand and begin pinching and folding the dough, rotating the bowl 90 degrees after each fold.
- Perform about 10–12 folds until the salt is fully distributed and the dough firms slightly.
- Then fold in the 75g cooled chopped walnuts until evenly distributed throughout.
- You want them scattered consistently so most slices include walnuts.
+ Show details− Hide details
Ready when: Salt and walnuts are completely incorporated; dough is cohesive
Tip: Use gentle folds, not aggressive kneading—you're building strength while preserving the gas bubbles you'll develop
Bulk ferment with coil folds
- Cover the bowl and let the dough ferment at room temperature (68–72°F / 20–22°C) for 4–5 hours.
- At the 45-minute and 90-minute marks, perform a 'coil fold': wet your hand, reach down the side of the bowl, pull the dough up and fold it over itself, rotate the bowl 90 degrees, and repeat 4 times.
- These folds build strength without overworking the dough.
- By the end of bulk fermentation, the dough should have increased in volume by 50–75%, feel airy, and show visible bubbles on the surface and sides.
+ Show details− Hide details
Ready when: Dough has increased 50–75% in volume, jiggles gently when the bowl is shaken, visible bubbles on surface
Tip: Use the poke test: gently poke the dough with a floured finger. It should spring back slowly but not immediately. If your kitchen is cool (under 68°F), bulk ferment may take 5–6 hours; watch the dough, not the clock
Pre-shape on work surface
- Lightly flour your work surface.
- Turn the dough out so it's seam-side up (the bumpy side that was touching the bowl).
- With lightly floured hands, gently pull the edges toward the center 4–5 times to create a relaxed round shape.
- Flip it seam-side down so the top is now smooth and rounded.
- Let rest on the floured surface for 20 minutes.
- This allows the dough to relax slightly before final shaping.
+ Show details− Hide details
Ready when: Dough holds a relaxed round shape and doesn't spring back aggressively
Tip: Don't over-compress. You want to maintain the gas bubbles developed during bulk fermentation
Final shape into boule
- Flip the pre-shaped dough so it's now seam-side up (the bumpy side facing you).
- Using your hands and a bench scraper, gently pull each edge toward the center.
- Once you've done this 4 times, grip the edge closest to you, roll the dough toward you creating tension, then use your thumbs to roll it away slightly to seal the seam.
- Flip it seam-side up into a well-floured banneton basket or into a bowl lined with a well-floured kitchen towel.
- The seam must be facing upward in the banneton.
+ Show details− Hide details
Ready when: Dough is taut on the outside, seam centered and facing up in the banneton
Tip: Creating tension on the outside helps the loaf rise upward rather than spreading sideways
Final proof (choose your timing)
- You have two options: (A) Room temperature: Leave the banneton on the counter at room temperature (68–72°F / 20–22°C) for 2–3 hours.
- The dough is ready when poking it gently with a floured finger leaves a slight indent that springs back slowly.
- (B) Cold proof (recommended): Cover the banneton with a plastic bag and refrigerate for 12–16 hours.
- This develops deeper sourdough flavor, is more forgiving, and you bake directly from cold the next day.
+ Show details− Hide details
Ready when: Room temp: poke test shows slow spring-back with slight indent remaining; Cold: dough is firm and cold from fridge
Tip: Cold proof is my recommendation. It gives you more control, deeper flavor, and easier scoring
Preheat Dutch oven and ovenOven 500°F / 260°C
- Place a 4–5 quart Dutch oven (with its lid) in your oven.
- Preheat to 500°F (260°C) for 45 minutes.
- The Dutch oven needs to be very hot to create steam and lift the dough rapidly during baking.
+ Show details− Hide details
Ready when: Oven and Dutch oven are fully preheated and very hot
Tip: Use thick oven mitts when handling the hot Dutch oven—it reaches 500°F
Score and steam-bakeOven 450°F / 230°C
- Carefully remove the hot Dutch oven from the oven (use thick oven mitts).
- Line the bottom with a piece of parchment paper.
- Turn your banneton over the Dutch oven so the dough releases seam-side down onto the parchment.
- Using a bread lame or very sharp knife held at a 30° angle, make one confident slash about 1/4 inch (6 mm) deep on the top of the loaf.
- Immediately place the Dutch oven back in the oven, cover with the lid, and reduce heat to 450°F (232°C).
- Bake covered for 20 minutes to trap steam and maximize oven spring.
+ Show details− Hide details
Ready when: Dough has expanded visibly; steam visible inside the Dutch oven
Tip: A confident, clean score allows the loaf to expand upward cleanly. Hesitant or shallow scoring causes uneven rising
Finish baking uncoveredOven 425°F / 220°C
- Remove the Dutch oven lid.
- Reduce the oven temperature to 425°F (218°C) and bake uncovered for 15–18 more minutes until the crust is deep golden brown to mahogany.
- You can rotate the loaf halfway through this stage if the top is browning unevenly.
- Tap the bottom of the loaf with your knuckles; it should sound hollow, indicating the interior is baked through.
+ Show details− Hide details
Ready when: Crust is deep golden brown or mahogany; loaf sounds hollow when tapped on bottom
Tip: If the crust is browning too fast, reduce temperature to 400°F (200°C)
Cool completely
- Transfer the loaf to a cooling rack using a bench scraper or metal spatula.
- Let cool at room temperature for at least 1 hour before slicing.
- The interior crumb is still setting during this time.
- This patience will reward you with a better crumb structure and cleaner slices.
+ Show details− Hide details
Ready when: Loaf is room temperature; a skewer inserted comes out dry
Tip: Resist the urge to slice while warm—slicing warm bread compresses the crumb and creates a gummy texture
Good to know
Tips
- Active starter matters: Use a starter that has been fed 4–8 hours prior, is bubbly and active, and has at least doubled in volume. A weak starter means long, unpredictable fermentation.
- Beet prep: Freshly roasted beets (or cooked from a can, drained and patted very dry) work best. Avoid adding any beet juice, which oversaturates the dough and weakens gluten.
- Temperature control: Sourdough timing depends heavily on ambient temperature. A warmer kitchen (72°F) ferments faster than a cool one (68°F). Watch the dough's visual cues, not the clock.
- The poke test is your friend: At final proof, gently poke the dough with a floured finger. If the indent springs back immediately, the dough needs more time. If the indent doesn't spring back at all, you've overproofed (though cold-proofed dough is very forgiving).
Make ahead
Yes. After shaping, wrap the banneton with a plastic bag and refrigerate 12–16 hours. Bake directly from cold the next day without any additional proofing. This cold fermentation develops deeper sourdough flavor and makes timing more forgiving. You can also freeze a shaped, unbaked dough (in the banneton, wrapped tightly) for up to 1 week; thaw in the fridge overnight before baking.
Storage & reheating
Room temperature: Store in a paper bag or wrapped in a kitchen towel for 2–3 days. Refrigerator: Place in an airtight container or zip-top bag for up to 5 days. To refresh, wrap in foil and warm at 350°F for 10–15 minutes. Freezer: Wrap tightly in plastic wrap and aluminum foil for up to 2 months. Thaw at room temperature for 2–3 hours, or reheat from frozen at 350°F (175°C) wrapped in foil for 20–25 minutes.
Substitutions
- bread flour → all-purpose flour. All-purpose flour has slightly less protein, so the crumb will be less chewy. Extend bulk fermentation by 20–30 minutes. Results are still excellent.
- walnuts → toasted sunflower seeds or pumpkin seeds. Use the same weight (75g). These seeds are milder in flavor but add nice texture. Sunflower seeds work particularly well with the earthy beets.
- roasted beets → roasted carrots, roasted red peppers, or cooked red cabbage. Roasted carrots add sweetness; peppers add brightness and subtle tang; red cabbage adds earthiness. Maintain the same 100g amount and pat very dry.
- active sourdough starter → 1/4 teaspoon instant yeast plus 1/2 cup (120ml) cooled cooked rice porridge or 1/2 cup water with 1 tablespoon whole wheat flour (for wild fermentation). This is a workaround if you don't have sourdough starter, but the flavor and crust will be different. The result will be faster-rising and less sour.
More yeast breads
See all →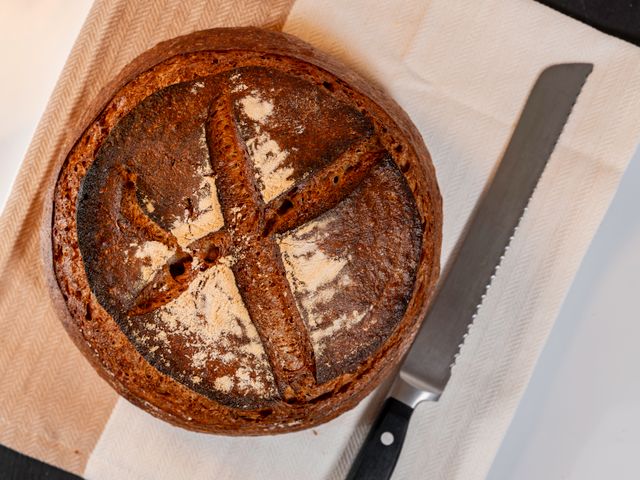

Find more like this
- Meal
- Breakfast
- Method
- Oven
- Quick & Easy
- Make AheadFreezer Friendly