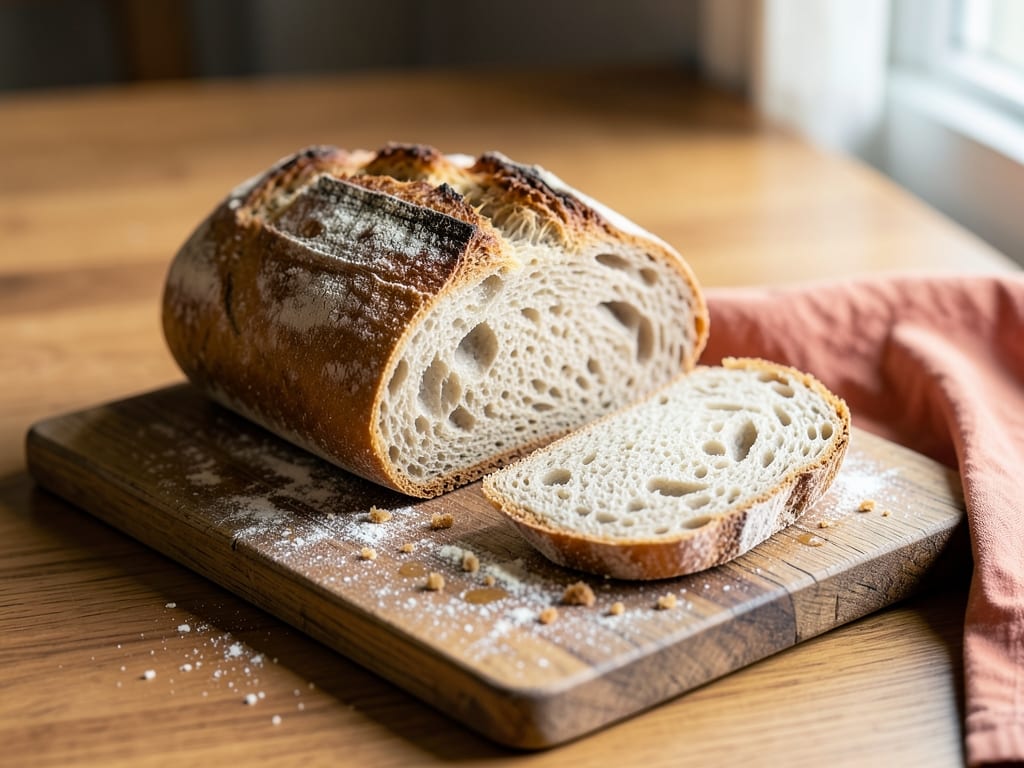
Sourdough Pain de Campagne
A rustic French country bread with a naturally tangy flavor from long sourdough fermentation. This classic pain de campagne features a crispy, caramelized crust and an open, chewy crumb. The dough uses a blend of bread flour, whole wheat, and rye for complexity, enhanced by an overnight cold fermentation that develops deeper flavor and makes shaping easier.
- Prep
- 50 min
- Cook
- 40 min
- Wait
- 14 hr 20 min
- Total
- 15 hr 50 min
- Makes
- 2 loaves (about 600g each)
Steps
Before you start
- Activate your sourdough starter 4–8 hours before mixing by feeding it with equal parts flour and water; it should be bubbly and roughly doubled in volume (at peak fermentation).
- Have all ingredients at room temperature (except water, which should be cool at about 75°F / 24°C) for predictable fermentation timing.
- Read through the full recipe and understand this is a 2-day process: one day for mixing and bulk fermentation, then overnight cold retard, then baking the next day.
- Preheat your Dutch ovens 45 minutes before baking; this is non-negotiable for proper crust and oven spring.
- If you prefer a same-day bake without overnight cold retard, see the Make Ahead section for timing adjustments.
Mix flour and water
- In a large bowl, combine the bread flour, whole wheat flour, rye flour, and cool water.
- Using a dough whisk or your fingers, mix until all dry flour is fully hydrated and no dry bits remain.
- The mixture will be shaggy and rough—this is correct and is called the autolyse.
- Cover the bowl with a lid, damp cloth, or plastic wrap and let rest at room temperature for 30 minutes.
- During this time, the flour fully hydrates and gluten begins developing passively without aggressive mixing.
+ Show details− Hide details
Ready when: All dry flour is incorporated; mixture is shaggy and uniform
Tip: Use water around 75°F (24°C); water temperature affects dough temperature and fermentation speed.
Add starter and salt
- After the 30-minute rest, sprinkle the active sourdough starter over the dough surface.
- Wet one hand and gently squeeze and fold the starter into the dough until mostly incorporated.
- Once the starter is distributed, sprinkle salt over the surface.
- Continue folding with your wet hand, rotating the bowl as you go, until salt is fully dissolved and distributed throughout.
- The dough will become more cohesive and silky as you work.
- This should take 3–5 minutes of gentle folding.
- Cover and let rest for 5 minutes.
+ Show details− Hide details
Ready when: Starter and salt are fully incorporated; dough feels cohesive and stronger
Tip: Use sourdough starter at peak—bubbly, roughly doubled, and pleasantly sour. A weak starter will slow fermentation significantly.
Bulk ferment with stretches and folds
- Leave the dough covered at room temperature.
- Every 30 minutes for the next 2.5–3 hours, perform a stretch and fold: wet one hand, grab a portion of dough at the bowl's edge, pull it up and fold it over toward the center, then rotate the bowl and repeat from another edge.
- Perform four folds from different sides, taking 1–2 minutes per set.
- These folds build strength without aggressive kneading.
- After 4–6 fold sets (roughly 2–2.5 hours), stop folding and let the dough rest undisturbed.
- The dough is ready when it has visibly increased in volume by 25–50%, shows visible bubbles on the surface, and passes the poke test: gently poke with a wet finger; it should leave an indent that slowly springs back about halfway.
- Bulk fermentation typically takes 3.5–4.5 hours total depending on room temperature.
+ Show details− Hide details
Ready when: Volume increased 25–50%, visible surface bubbles, poke test indent holds slightly before slowly springing back
Tip: Warmer kitchens (75–78°F / 24–26°C) ferment faster; cooler ones (68–70°F / 20–21°C) take longer. Aim for at least 3 hours minimum. Overfermentation (dough collapsing) is worse than underfermentation.
Pre-shape and bench rest
- Lightly flour your work surface with bread flour.
- Turn the dough out onto the floured surface; don't degass it completely, but let it settle naturally.
- Using a bench scraper, divide the dough in half with quick, minimal motions.
- Gently pre-shape each half into a round boule by folding the edges underneath toward the center, creating surface tension.
- Use minimal pressure and work quickly to preserve bubbles.
- Place each pre-shaped piece seam-side up on floured surface, a floured banneton, or a small bowl lined with a well-floured cloth.
- Cover with plastic wrap or a damp cloth and rest at room temperature for 20–25 minutes.
- This bench rest allows the gluten to relax and makes final shaping much easier.
+ Show details− Hide details
Ready when: Dough appears slightly relaxed, holds its shape, and is slightly puffy
Tip: Minimize handling to preserve gas bubbles developed during bulk fermentation; your final oven spring depends on it.
Shape loaves
- Gently flip a pre-shaped piece seam-side down on an unfloured surface (friction helps with shaping).
- Fold the top edge down about one-third of the way toward you and press gently to seal.
- Fold the left and right edges toward the center, overlapping slightly, and press to seal.
- Roll the dough tightly toward you in one smooth motion, creating tension in the dough skin.
- The final seam should be on the bottom.
- You should have a nicely shaped boule with good surface tension.
- Repeat with the second piece.
- Place each shaped loaf seam-side up in a floured banneton or cloth-lined bowl.
- Cover loosely with plastic wrap.
+ Show details− Hide details
Ready when: Each loaf is tightly shaped with visible surface tension; seams are on the bottom
Tip: The tension you create in shaping is crucial—it helps the loaf rise upward (oven spring) in the oven rather than spreading outward.
Cold retard overnight
- Cover the shaped loaves loosely with plastic wrap and place them in your refrigerator at 38–40°F (3–4°C).
- Leave undisturbed for 8–16 hours (overnight is typical).
- During extended cold fermentation, yeast activity slows dramatically but bacteria continue to produce acids slowly, developing complex flavor.
- The cold dough is also much easier to score without deflating.
- The loaves can go directly from the fridge to the oven in the next step.
+ Show details− Hide details
Ready when: Dough is very cold to the touch; may show slight bubbling on surface
Tip: This overnight step is the hallmark of traditional pain de campagne. For same-day baking, see the Make Ahead section.
Final proof
- Remove the loaves from the refrigerator.
- If baking directly from cold dough (recommended), let them sit on the counter for 10–15 minutes while the oven preheats.
- If you prefer room-temperature final proof, remove the loaves 30–60 minutes before baking and let them proof at room temperature.
- A loaf is properly proofed when puffy but not over-risen.
- Perform the poke test: gently poke the dough with a wetted finger; it should spring back slowly and leave a slight indent.
- If the dough is unresponsive and doesn't spring back (overproofed), the loaf may spread rather than rise in the oven.
- Cold dough from the fridge will complete much of its rise in the hot oven itself.
+ Show details− Hide details
Ready when: Dough is puffy; poke test leaves slow-springing indent
Tip: Cold dough is more forgiving and harder to overproof; room-temperature final proof requires more attention. Baking from cold is recommended.
Preheat oven and scoreOven 475°F / 245°C
- About 45 minutes before you want to bake, place two Dutch ovens (4–5 quart / 4–5 L capacity each) on the middle and upper-middle racks of your oven.
- Preheat to 475°F (245°C).
- Do not use convection; it can dry out the crust.
- The ovens must preheat for a full 45 minutes to reach the temperature needed for proper oven spring and crust caramelization.
- When ready to bake, carefully remove one hot Dutch oven using thick oven mitts.
- Have a piece of parchment paper (about 8×8 inches / 20×20 cm) ready.
- Quickly invert a proofed loaf from its banneton onto the parchment, or directly into the Dutch oven if confident.
- Using a bread lame, sharp serrated knife, or clean razor blade, make one deep diagonal slash (about ½ inch / 1 cm deep) across the loaf, or make a cross pattern.
- Work quickly to avoid cooling the Dutch oven.
- Place the scored loaf (with parchment) into the Dutch oven, cover with the lid immediately, and return to the oven.
+ Show details− Hide details
Ready when: Oven and Dutch ovens are at 475°F (245°C); loaf is scored and loaded
Tip: Do not skip or shorten the preheat time. The sustained, even heat from preheated Dutch ovens is essential for crust development.
Bake covered, then uncoveredOven 475°F / 245°C
- With the lid on, bake for 20 minutes.
- The lid traps steam, which prevents the crust from setting too quickly and allows the loaf to expand (oven spring).
- After 20 minutes, using thick mitts and a kitchen towel to protect against hot steam, carefully remove the lid.
- Reduce the oven temperature to 450°F (232°C) and continue baking uncovered for 15–20 minutes until the crust is deep golden brown.
- The internal temperature should reach 205–210°F (96–99°C) when measured with an instant-read thermometer inserted into the thickest part of the loaf.
- The loaf should sound hollow when tapped on the bottom.
- Some darker-colored areas of the crust indicate proper caramelization.
- If browning too fast during the uncovered phase, reduce the temperature to 425°F (218°C).
+ Show details− Hide details
Ready when: Crust is deep golden brown (darker spots okay); loaf sounds hollow when tapped; internal temp 205–210°F (96–99°C)
Tip: The steam trapped by the covered lid is essential for crust development. Carefully removing the lid to avoid steam burns is important for safety.
Cool completely
- Using tongs, a thin spatula, or by grasping the parchment paper, carefully transfer the loaf from the Dutch oven to a wire cooling rack.
- Allow the bread to cool at room temperature for at least 1 full hour before slicing.
- During cooling, the crumb structure sets and stabilizes.
- Cutting into warm bread results in a gummy, compressed crumb.
- If baking a second loaf, repeat the preheat and baking steps with the remaining shaped loaf and the second Dutch oven, or place the first loaf back in the (now cooler) Dutch oven to keep it warm while the second bakes.
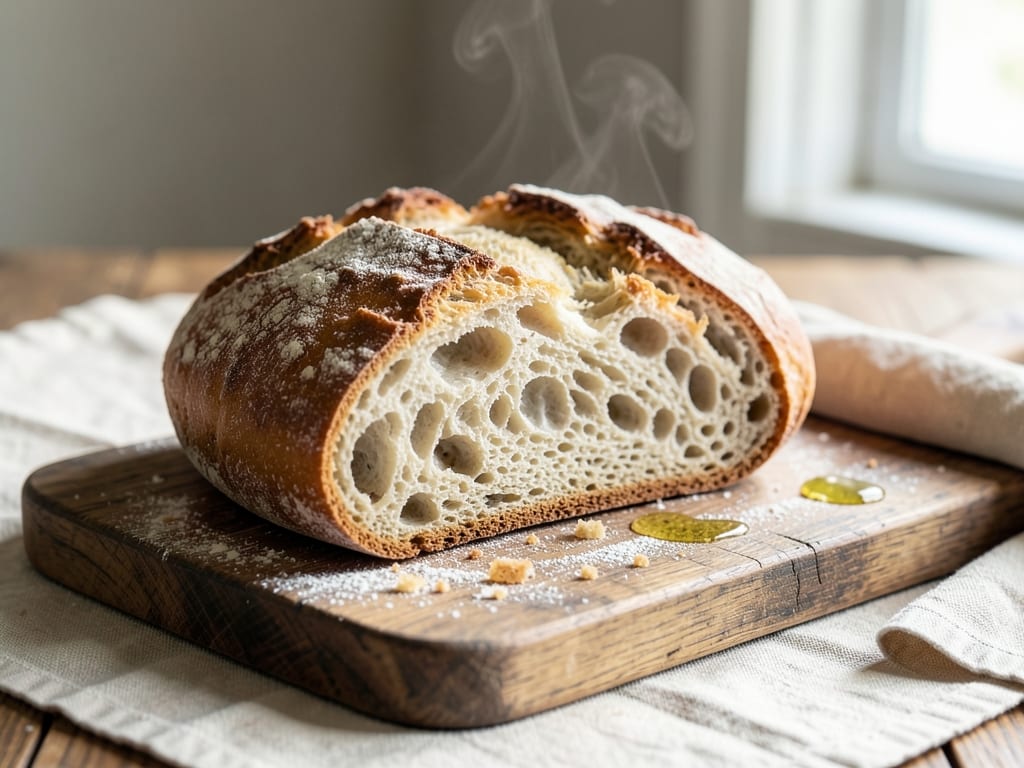
- A fully cooled pain de campagne should be crispy on the outside and have an open, chewy crumb with visible irregular holes.
+ Show details− Hide details
Ready when: Bread is cool enough to handle without steam; surface is crispy
Tip: Resisting the urge to slice immediately is worth it. Cutting too early makes the interior appear wet or gummy even though it is properly baked.
Good to know
Tips
- Dough temperature matters: cooler kitchens (68–70°F / 20–21°C) ferment slowly and forgivingly; warmer kitchens (75–78°F / 24–26°C) ferment quickly and require attention. Adjust fermentation times based on your kitchen. If very warm, refrigerate at 50°F (10°C) for slower cold fermentation.
- Don't skip stretches and folds during bulk fermentation—they build strength without kneading and are essential for the characteristic open crumb and structure of pain de campagne.
- Dutch ovens are essential for steam environment and crust development. A heavy enamel-lined cast-iron pot works in a pinch, but wide, shallow pans do not work well.
- Score deeply and confidently with a bread lame or sharp knife (at least ½ inch / 1 cm deep). Shallow or hesitant scoring causes the bread to spread out rather than rise upward in the oven.
Make ahead
Yes. Shape the loaves, place them seam-side up in bannetons or cloth-lined bowls, cover with plastic wrap, and refrigerate at 38–40°F (3–4°C) for 8–16 hours. Bake directly from the fridge following the final proof and baking steps, or bring to room temperature for a 30–60 minute final proof before baking. For a same-day bake (no overnight cold retard): reduce bulk fermentation to 5–6 hours (instead of 3.5–4.5), skip the cold retard, allow a room-temperature final proof of 1–2 hours, and bake. Same-day loaves will have less complex flavor but are still delicious and fully baked in about 8–9 hours total.
Storage & reheating
Room temperature: Keep in a paper bag or cloth bag for 2–3 days. After 24 hours, the crust softens; re-crisp it in a 350°F (175°C) oven for 5–10 minutes. Refrigerator: Not recommended (cold accelerates staling), but if necessary, wrap in plastic and use within 1 week. Freezer: Slice the bread first, wrap slices in plastic wrap or place in a freezer-safe bag, and freeze for up to 1 month. Toast directly from frozen, or thaw at room temperature for 1 hour and reheat in a 350°F (175°C) oven for 5 minutes to re-crisp the crust.
Substitutions
- bread flour (unbleached) → All-purpose flour. Can use all-purpose flour (about 120g per cup), but bread flour gives superior structure and chew due to higher protein content. If using all-purpose, reduce water by 10–15 ml to account for slightly lower protein.
- whole wheat flour → Spelt flour or einkorn flour. These flours add similar color and nuttiness. Note that spelt and einkorn absorb water differently; reduce water by 10–20 ml and monitor fermentation, as these flours ferment faster.
- rye flour → Additional whole wheat flour, or omit entirely. Omitting rye gives a lighter-colored, less complex loaf. Substituting an equal amount of whole wheat intensifies nuttiness. Rye is optional for a more traditional French pain de campagne.
- active sourdough starter (fed 4–8 hours prior) → Active rye or whole wheat sourdough starter. You can use whole wheat or rye starter instead of white flour starter for different flavor notes. Cannot substitute with commercial yeast (that would be a different recipe method).
More yeast breads
See all →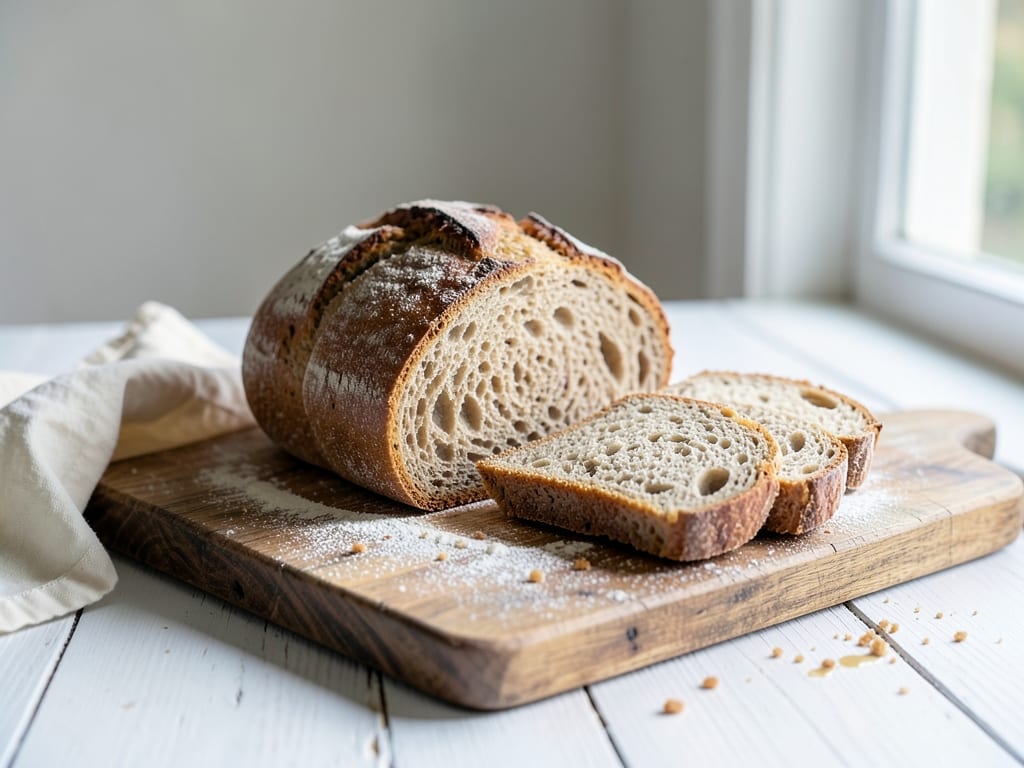
Find more like this
- Meal
- Dinner
- Cuisine
- French
- Method
- Oven
- Quick & Easy
- Make Ahead