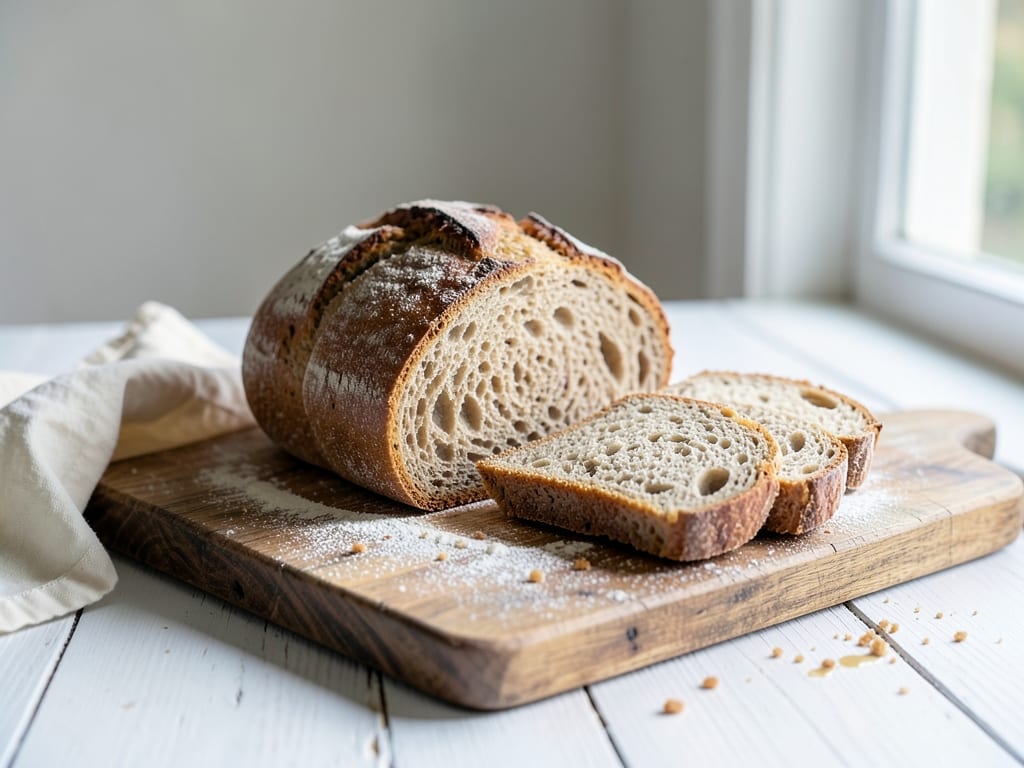
Sourdough Brioche
A luxurious enriched bread that marries the complex tang of sourdough with the tender, buttery crumb of classic brioche. Long cool fermentation develops deep sour notes while cold butter lamination creates a silky, fine-grained interior. Perfect for special breakfasts, French toast, or simply enjoyed warm with butter and jam.
- Prep
- 1 hr 20 min
- Cook
- 35 min
- Wait
- 19 hr 20 min
- Total
- 21 hr 15 min
- Makes
- 1 loaf (8-10 slices)
Steps
Before you start
- Use an active sourdough starter fed 4-8 hours before—it should be bubbly and at peak rise
- Cut 100g butter into cubes and chill for 30 minutes before starting
- Read the timeline: this recipe spans 1-2 days with overnight cold fermentation
- Keep your kitchen at 68-72°F (20-22°C) for steady, predictable fermentation
Mix flour, starter, water
- In a large mixing bowl, combine 300g (2.5 cups) bread flour, 100g (scant 1/2 cup) active sourdough starter, and 30ml (2 tablespoons) water.
- Stir with a wooden spoon until all flour is hydrated and no dry bits remain; the mixture will be shaggy and rough.
- Cover with plastic wrap and let rest at room temperature for 30 minutes.
- This autolyse develops flavor and improves gluten development.
+ Show details− Hide details
Ready when: Flour is fully hydrated, no dry bits remain, mixture is shaggy
Tip: Use a starter that's actively bubbling and risen to its peak (usually 4-8 hours after feeding)
Incorporate eggs and sugar
- After the autolyse rest, add 4 large eggs (150g of the 4 will go into dough; reserve the remaining egg for washing later) and 25g (2 tablespoons) granulated sugar to the flour mixture.
- Mix with your hands or a wooden spoon for 8-10 minutes until the eggs are fully incorporated and the dough comes together.
- If using a stand mixer, use the dough hook on medium speed for 8-10 minutes.
- The dough will be sticky and moist—this is correct for brioche.
+ Show details− Hide details
Ready when: Eggs are fully incorporated, dough is cohesive and glossy, clings to bowl sides
Tip: The dough should look wet and feel very soft; if it seems loose, you may have added an extra-large egg, but it should still hold together
Add salt and mix
- Add 5g (1 teaspoon) kosher salt to the dough and mix for another 8-10 minutes by hand or stand mixer on medium speed until fully incorporated and the dough feels smooth and slightly elastic.
- The dough will remain soft and sticky—this is normal for enriched brioche dough.
- Do not add more flour.
+ Show details− Hide details
Ready when: Salt is fully incorporated, dough is smooth and elastic, clings to the bowl
Tip: Avoid the urge to add flour—the dough should be soft and sticky at this stage
Laminate with cold butter
- Cut 100g (3.5 oz) cold unsalted butter into 1/2-inch cubes.
- Add the butter to the dough in 4-5 additions.
- After each addition, mix for 2-3 minutes with a stand mixer on medium speed (or knead by hand) until that batch is fully incorporated and the dough looks smooth again before adding the next batch.
- This process takes 12-15 minutes total.
- The dough will look briefly curdled and broken between additions—this is normal.
- By the end, you should have a smooth, creamy, glossy dough.
- If the dough gets warmer than 78°F (26°C), pause, cover, and chill for 15 minutes before continuing.
+ Show details− Hide details
Ready when: All butter is fully incorporated, dough is smooth, creamy, and glossy with no visible butter streaks
Tip: Go slowly with butter incorporation; rushing will break the emulsion. If the dough gets too warm, chill briefly to reset
Bulk fermentation with stretch and folds
- Transfer the dough to a clean, lightly oiled bowl.
- Cover loosely with plastic wrap or a damp towel.
- Ferment at room temperature (68-72°F / 20-22°C) for 4-6 hours.
- Every 60 minutes for the first 4 hours, perform stretch and folds: wet your hand, grab one side of the dough, pull it up and fold it over the top, rotate the bowl 90 degrees, and repeat 4-6 times (takes about 2-3 minutes).
- Do not punch down between folds—you are gently building strength.
- After folds are complete, let the dough rest undisturbed for the final 30-60 minutes.
- The dough should increase 50-75% in volume (not double), feel soft and pillowy, and show small bubbles at the surface.
- If your kitchen is warmer (above 72°F), reduce fermentation time; if cooler (below 68°F), extend it.
+ Show details− Hide details
Ready when: Dough is 50-75% larger, soft and pillowy with jiggle when bowl is moved, small bubbles visible at surface
Tip: Stretch and folds are critical—they build structure without deflating. Skip them and your crumb will be dense
Cold retard overnight
- After bulk fermentation, cover the bowl tightly with plastic wrap and place in the refrigerator.
- Let rest 8-12 hours, or up to 24 hours.
- Cold fermentation further develops the sour sourdough flavor, makes the dough easier to shape, and improves the final crumb structure.
- The dough will continue to rise slightly, even cold.
+ Show details− Hide details
Ready when: Dough is very cold and firm, may have risen slightly
Tip: Cold fermentation is crucial for sourdough character—do not skip or rush it
Pre-shape and rest
- Remove the dough from the refrigerator.
- Turn it out onto a lightly floured surface (use minimal flour—the dough should not stick much due to the butter).
- Gently pre-shape it into a round using bench scraper movements: fold the edges toward the center, rotating the dough a quarter turn between folds.
- Let the pre-shaped dough rest on the floured surface, uncovered, for 20 minutes to relax.
+ Show details− Hide details
Ready when: Dough is relaxed and slightly puffier than when first removed from fridge
Tip: Minimal handling keeps the dough cool and preserves the gas structure built during bulk fermentation
Shape and place in loaf pan
- After the 20-minute rest, gently flip the dough seam-side up.
- Shape it into a tight torpedo: press it into a rough rectangle, fold the top edge down toward you and press, fold again, and roll it toward you, sealing the final seam firmly with the heel of your hand.
- The shaped dough should be tight and about 9-10 inches long.
- Place seam-side up in a 9x5-inch (23x13 cm) loaf pan lined with parchment, or place seam-side up in an oiled banneton.
- Cover with plastic wrap.
- Proof at room temperature 2-3 hours until the dough springs back slowly (about 1/4 inch) when you gently press a finger into the side.
- Alternatively, cover and refrigerate 8-12 hours and bake directly from cold the next morning (add 5-10 minutes to bake time).
+ Show details− Hide details
Ready when: Dough is puffy and has increased 25-50% in volume; pressing a finger leaves a small indent that springs back slowly
Tip: Avoid over-proofing—if the dough looks very puffy or stretched, check for doneness earlier than 3 hours
Preheat oven and apply egg washOven 375°F / 190°C
- About 30-45 minutes before baking, preheat your oven to 375°F (190°C).
- About 15 minutes before baking, beat the reserved 1 large egg with 15ml (1 tablespoon) water to make the egg wash.
- If desired, score the top of the proofed dough with a sharp knife or lame (optional for brioche).
- Brush the top and sides generously with egg wash, let it dry for 1-2 minutes, then apply a second coat for a glossy, golden finish.
+ Show details− Hide details
Ready when: Oven reaches 375°F (190°C), egg wash is applied and dry
Tip: Two coats of egg wash give better color and shine; let the first coat set slightly before applying the second
Bake until golden brownOven 375°F / 190°C
- Place the loaf pan (or banneton on a baking sheet) in the preheated 375°F (190°C) oven.
- Bake for 30-35 minutes.
- The brioche should be deeply golden brown on top.
- After 25 minutes, check the color—if browning very quickly, tent with aluminum foil to prevent over-browning.
- The internal temperature should reach 195-200°F (90-93°C) measured at the thickest part (use an instant-read thermometer).
- The loaf should sound hollow when tapped on the bottom.
+ Show details− Hide details
Ready when: Deep golden brown on top and sides, internal temperature 195-200°F (90-93°C), sounds hollow when tapped on the bottom
Tip: Do not open the oven door for the first 20 minutes—it will cause the dough to collapse and won't rise properly
Cool before slicing
- Transfer the baked brioche to a cooling rack immediately (remove from loaf pan if using one).
- Let cool for at least 1 hour before slicing.
- The interior crumb continues to set as it cools, making it easier to slice cleanly.
- You can eat it warm (it will be softer and tear more easily), but once cooled, it slices with clean edges.
- Store cooled brioche in an airtight container at room temperature.
+ Show details− Hide details
Ready when: Bread is fully cooled, interior crumb is set and firm
Tip: Resist slicing too early—you will tear the crumb and it won't look as neat
Good to know
Tips
- Sourdough starter strength varies—if your dough ferments slower than expected, give it more time and trust the visual cues (size increase, poke test) over the clock.
- Temperature control is critical: ferment at 68-72°F (20-22°C) for best results. A warm kitchen speeds fermentation; a cool one slows it. Adjust timing accordingly.
- The cold butter lamination is key to the final texture and crumb. Do not rush it or allow the dough to overheat, or it will become greasy and the butter will not emulsify properly.
- This brioche is excellent for French toast: let it stale 1-2 days, slice thickly, dip in an egg-and-cream mixture, and pan-fry in butter until golden.
Make ahead
The dough can be cold-retarded for up to 24 hours before shaping. Alternatively, after shaping, cold-proof in the fridge overnight and bake directly from cold (add 5-10 minutes to bake time). Baked brioche keeps well and freezes excellently.
Storage & reheating
Room temperature: Store in a sealed container or bread bag for up to 3 days. Freezer: Wrap cooled brioche tightly in plastic wrap and foil; freeze up to 1 month. Thaw at room temperature for 2-3 hours, or unwrap and warm gently in a 300°F (150°C) oven for 10-15 minutes to refresh. Do not refrigerate—it stales quickly in the fridge.
Substitutions
- active sourdough starter → 1/2 teaspoon instant yeast plus 50g (1/4 cup) whole wheat flour mixed with 30ml water (added to the dough separately). You will lose the sour tang and complex fermentation flavor. Reduce bulk fermentation to 2-3 hours at room temperature. Not recommended unless sourdough starter is unavailable.
- unsalted butter, cold → 100g (3.5 oz) clarified butter or high-quality ghee. Ghee adds a nutty, caramelized flavor. The lamination and texture will be similar.
- large eggs → 90ml (6 tablespoons) aquafaba (liquid from canned chickpeas) whisked with 15g olive oil and a pinch of salt. Results in a lighter, less rich brioche with a slightly different texture, but still delicious and vegan.
- bread flour → All-purpose flour (12% protein instead of 13-14%). All-purpose has less protein and yields a softer, more tender crumb. The dough may be slightly stickier.
More yeast breads
See all →
Find more like this
- Meal
- Breakfast
- Cuisine
- French
- Main ingredient
- Eggs
- Diet
- VegetarianHalal
- Method
- Oven
- Quick & Easy
- 5 Ingredients or LessMake Ahead