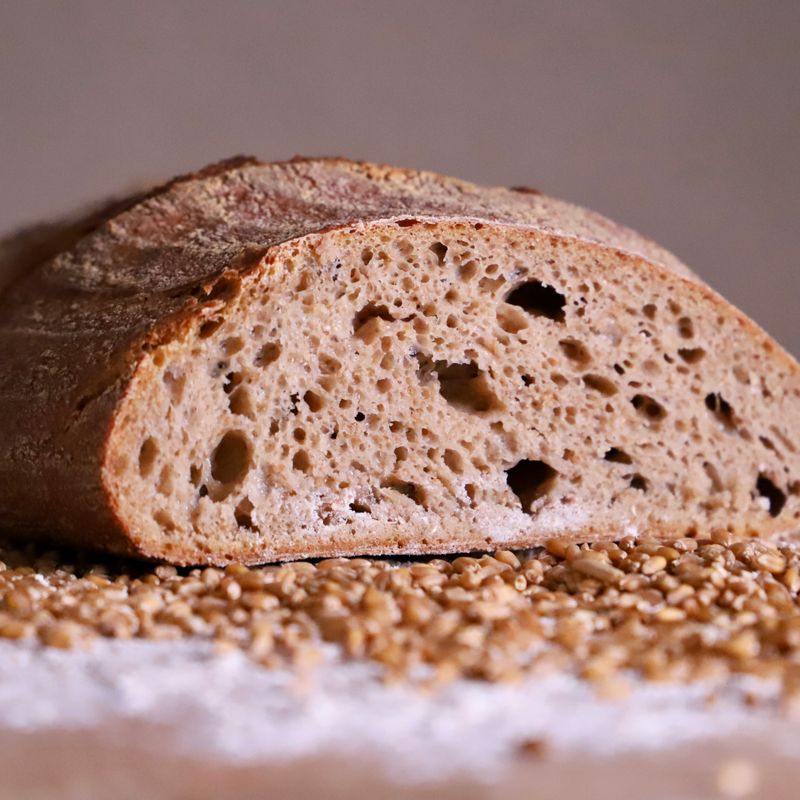
Sourdough Barley and Honey Rustic Loaf
A rustic Scandinavian-inspired sourdough loaf combining nutty barley flour with the subtle sweetness of honey. The long, cool fermentation develops complex flavors while the barley adds texture and earthiness. Perfect for breakfast toast, sandwiches, or serving alongside butter and preserves.
- Prep
- 30 min
- Cook
- 45 min
- Wait
- 18 hr
- Total
- 19 hr 15 min
- Makes
- 1 loaf (12 slices)
Steps
Before you start
- Your sourdough starter must be active and bubbly (feed it 4-8 hours before mixing)
- Read through the entire recipe—the bulk fermentation happens overnight
- Have a Dutch oven or covered baking vessel ready
- Room temperature should be 68–72°F (20–22°C) for proper fermentation timing
Mix dough components
- In a large mixing bowl, combine the active sourdough starter (150 g), water (330 ml at room temperature), bread flour (350 g), and barley flour (100 g).
- Stir with a dough scraper or wooden spoon until all flour is hydrated and no dry bits remain, about 2 minutes.
- The dough will be shaggy and rough.
- Cover the bowl with plastic wrap or a damp cloth.
+ Show details− Hide details
Ready when: Dough appears evenly moistened with no visible dry flour
Tip: Autolyse helps develop gluten naturally and improves final texture; don't skip this step.
Add salt and honey
- After the 30-minute rest, sprinkle the salt (10 g) and honey (15 g) over the dough.
- Using wet fingers or a dough scraper, pinch and fold the salt and honey into the dough for about 2–3 minutes until they are fully incorporated.
- The dough will feel tacky and loose.
+ Show details− Hide details
Ready when: Salt and honey are no longer visible on the dough surface
Tip: Wet your fingers to prevent sticking; this makes the folding easier and faster.
Bulk fermentation—part one
- Leave the dough uncovered in the bowl at room temperature (68–72°F/20–22°C).
- After 30 minutes, perform a coil fold (lift one edge of the dough and fold it over the center, rotate the bowl 90°, repeat 4 times).
- This strengthens the gluten without kneading.
- Return the dough to the bowl, cover, and let rest.
+ Show details− Hide details
Ready when: Dough looks slightly puffed and holds a fingerprint lightly
Tip: Coil folds are gentler than stretch-and-folds for sticky sourdough; they won't deflate the dough.
Bulk fermentation—part two
- Perform another coil fold at the 60-minute mark (30 minutes after the first fold).
- After folding, cover the bowl and continue bulk fermentation.
+ Show details− Hide details
Ready when: Dough is noticeably puffed and jiggles slightly when the bowl is gently shaken
Tip: If the room is cooler than 68°F (20°C), extend each rest by 10–15 minutes.
Bulk fermentation—part three
- Perform a final coil fold at the 90-minute mark.
- Cover the dough and let it rest for 90 minutes at room temperature until the bulk fermentation is complete.
- The dough should have increased in volume by roughly 50–75%, feel airy and pillowy, and show visible bubbles on the surface and sides of the bowl.
+ Show details− Hide details
Ready when: Dough has risen 50–75%, feels airy, and shows bubbles throughout; the windowpane test: stretch a small piece—it should stretch thin without tearing
Tip: Avoid over-fermenting; if the dough looks very puffy and has started to collapse slightly, it's reached peak ripeness.
Shape the loaf
- Lightly flour a work surface (use barley flour or bread flour).
- Turn the dough out gently onto the floured surface.
- Using a dough scraper, gently pre-shape the dough into a round by folding the edges toward the center, rotating the dough as you go.
- Let it rest uncovered for 20 minutes.
+ Show details− Hide details
Ready when: Dough surface is slightly taut and holds its round shape
Tip: Gentle handling prevents degassing; avoid pressing or kneading the dough during shaping.
Final shape and proof setup
- Flour a banneton basket or a bowl lined with a floured cloth.
- Flip the dough over so the seam side faces up.
- Gently drag the dough toward you along the floured surface to build surface tension, then flip it seam-side down into the banneton.
- Cover the banneton loosely with plastic wrap.
+ Show details− Hide details
Ready when: Dough sits in the banneton with gentle tension on the surface
Tip: Good surface tension helps the loaf rise up rather than spreading; proper shaping is essential.
Cold proof overnight
- Place the covered banneton in the refrigerator at 38–40°F (3–4°C) for 12–16 hours.
- This long, cool fermentation develops deep flavor and makes scoring easier.
- You can prepare this step in the evening and bake the loaf the next morning.
+ Show details− Hide details
Ready when: Dough is chilled through; a gentle poke leaves a slow-spring indentation
Tip: Cold proofing is forgiving; leaving the dough a few extra hours won't hurt.
Preheat oven and Dutch ovenOven 475°F / 245°C
- About 60 minutes before baking, remove the dough from the refrigerator and leave it on the countertop to allow it to come slightly closer to room temperature (it doesn't need to fully warm).
- Meanwhile, preheat your oven to 475°F (245°C) with a Dutch oven (5-quart/4.7-liter capacity) inside for at least 45 minutes.
- The pot must be very hot to create steam and oven spring.
+ Show details− Hide details
Ready when: Oven is fully preheated and the Dutch oven is very hot (use caution)
Tip: A properly preheated Dutch oven is critical for oven spring and crust development; don't skip this step.
Score and bake coveredOven 475°F / 245°C
- Carefully remove the hot Dutch oven from the oven (use heavy oven mitts).
- Remove the dough from the banneton by inverting it onto parchment paper placed on the Dutch oven's bottom.
- Using a bread lame or very sharp knife, score the top with a bold slash about ½ inch (1.3 cm) deep at a 30–45° angle.
- Return the covered Dutch oven to the oven and bake at 475°F (245°C) for 25 minutes.
- The dough will expand and steam will build inside the pot.
+ Show details− Hide details
Ready when: Loaf has expanded and the dough begins to set; you'll see slight browning under the lid
Tip: Cold dough straight from the fridge will oven spring beautifully; the score guides the loaf's expansion.
Uncover and finish bakingOven 475°F / 245°C
- Remove the lid from the Dutch oven carefully (hot steam will escape).
- Continue baking at 475°F (245°C) for another 18–22 minutes.
- The loaf is done when it has a deep golden-brown crust and sounds hollow when tapped on the bottom.
- The internal temperature should read 205–210°F (96–99°C) on an instant-read thermometer inserted into the center.
+ Show details− Hide details
Ready when: Deep golden-brown crust, hollow sound when tapped on bottom, internal temperature 205–210°F (96–99°C)
Tip: Color is a reliable guide, but use the thermometer for certainty—avoid underbaking sourdough.
Cool completely
- Remove the loaf from the Dutch oven and place it on a wire rack in a warm, airy spot.
- Resist slicing for at least 1 hour—the crumb continues to set as it cools.
- The loaf is fully ready to cut after 2–3 hours.
- If sliced while warm, the crumb will appear gummy, but it will firm up completely as it cools.
+ Show details− Hide details
Ready when: Loaf is warm to the touch and feels light; fully set when completely cool to room temperature
Tip: Patience with cooling is essential—slicing early will cause the crumb to appear wet, though it will dry as it cools.
Good to know
Tips
- Feed your starter 4–8 hours before mixing so it is at peak activity (bubbly, doubled, with a dome on top). A weak starter produces a dense, flat loaf.
- Room temperature is crucial: 68–72°F (20–22°C) is ideal. Warmer kitchens ferment faster; cooler ones take longer. Adjust rest times accordingly.
- The cold proof is forgiving and flexible—you can refrigerate the dough for 12–20 hours without damage. This schedule works well for morning baking.
- Barley flour lowers the loaf's rise slightly compared to all-white-flour breads. This is normal and intentional; the crumb will still be open and airy. Expect a loaf that is sturdy and satisfying, perfect for toast and sandwiches.
Make ahead
Prepare the dough through the cold proof step the evening before baking. Remove from the refrigerator 60 minutes before baking to begin the final proof and preheat the oven. This makes fresh sourdough possible on a morning schedule.
Storage & reheating
Room temperature (70°F/21°C): wrapped tightly in a cotton cloth or paper bag for up to 3 days. Refrigerator (38°F/3°C): wrapped in plastic wrap for up to 5 days; reheat gently in a 325°F (163°C) oven for 10 minutes. Freezer: wrapped airtight in plastic wrap and foil for up to 2 months; thaw at room temperature for 3–4 hours, then reheat at 325°F (163°C) for 15 minutes. Sliced loaf freezes well; thaw and toast slices directly from frozen.
Substitutions
- barley flour → whole wheat flour or rye flour (use the same 100 g weight). Both offer earthiness and nutty flavor; rye will create a slightly denser, darker crumb. Adjust water by +10 ml if using rye, as it absorbs more moisture.
- raw or pasteurized honey → malt syrup, maple syrup, or agave nectar (use 15 g). Each adds subtle sweetness and complexity. Malt syrup is closest to honey's effect on fermentation and crust color.
- bread flour (unbleached preferred) → all-purpose flour (use the same 350 g weight). The loaf will have slightly less oven spring and a more tender crumb. Add 5 ml water to compensate for all-purpose flour's lower protein content.
More yeast breads
See all →
Find more like this
- Meal
- Breakfast
- Cuisine
- Mediterranean
- Method
- Oven
- Quick & Easy
- Make AheadFreezer Friendly