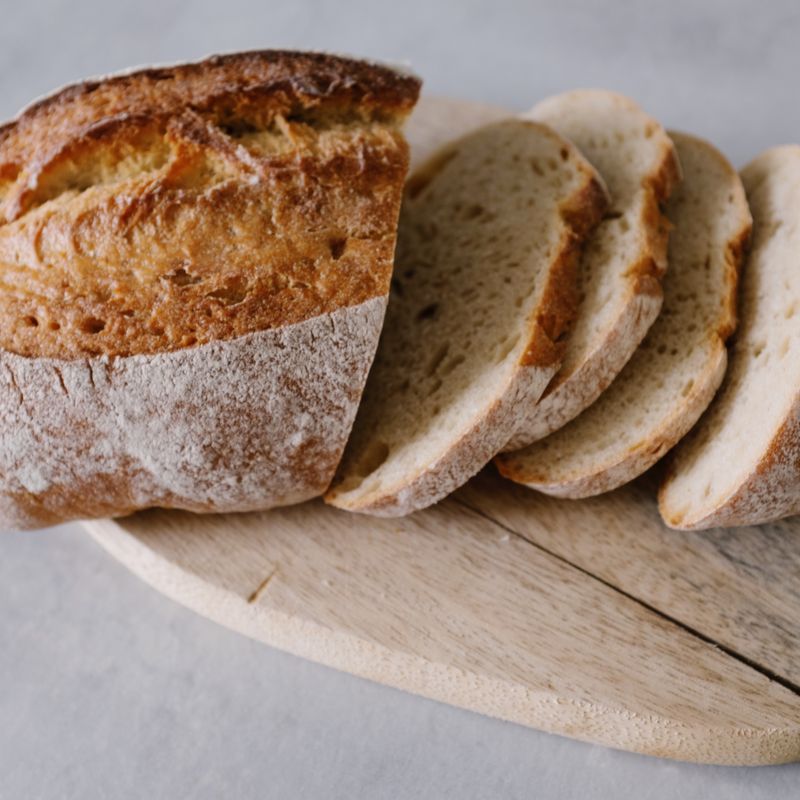
Sourdough Everyday White Loaf
A straightforward, naturally leavened sourdough loaf with a soft crumb and subtle tang. Built on a simple bulk fermentation method, this loaf uses a modest amount of starter and a long cold fermentation to develop flavor without complex shaping or overnight fridge time. Perfect for sandwiches, toast, or eating fresh.
- Prep
- 20 min
- Cook
- 45 min
- Wait
- 10 hr 15 min
- Total
- 11 hr 20 min
- Makes
- 1 loaf (12–14 slices)
Steps
Before you start
- Ensure your sourdough starter is fed and bubbly at least 4–6 hours before mixing (peak activity, not sluggish)
- Have all ingredients at room temperature (68–72 °F / 20–22 °C)
- Use filtered or non-chlorinated water if possible
- Read the bulk fermentation timing; it varies by room temperature
Mix dough
- In a large bowl, combine 100 g active sourdough starter, 350 ml room-temperature water, and 500 g all-purpose flour.
- Stir with your hand or a wooden spoon until no dry flour remains and the mixture is shaggy and rough, about 2–3 minutes.
- The dough should feel wet and loose.
- Cover the bowl with a damp cloth or loose plastic wrap.
+ Show details− Hide details
Ready when: No dry flour visible, mixture is shaggy
Tip: Do not knead yet. The gluten will develop through folding during bulk fermentation.
Autolyse rest
- Let the dough rest, covered, at room temperature for 30 minutes.
- This allows the flour to fully hydrate and gluten to begin developing without mechanical mixing.
+ Show details− Hide details
Ready when: Dough looks slightly more cohesive and feels less lumpy
Tip: Skipping or shortening this step weakens gluten development; do not rush.
Add salt and incorporate
- Sprinkle 10 g fine sea salt over the dough.
- Wet your hand with water and pinch the salt into the dough while squeezing and folding the dough onto itself for about 3–4 minutes.
- The dough will become smoother and firmer as the salt dissolves and distributes.
- When the salt is fully incorporated, the dough should feel tighter and less shaggy.
+ Show details− Hide details
Ready when: Salt is no longer visible on the surface; dough is cohesive and elastic
Tip: Wet hands prevent sticking. If salt sits on top, it can dissolve unevenly and create salty pockets.
Bulk fermentation with folds
- Cover the bowl.
- Over the next 3–4 hours at room temperature (68–72 °F / 20–22 °C), perform 4 sets of coil folds or stretch-and-folds, spaced roughly 30 minutes apart.
- For each fold: wet your hand, reach down to the side of the dough, stretch it up and over the center, then rotate the bowl 90° and repeat 4 times (one fold every 90°).
- The dough should gradually rise, become airy, and feel less dense.
- By the end, it should be roughly 50–70% larger (not doubled).
- If your kitchen is cold (below 68 °F / 20 °C), extend bulk fermentation by 1–2 hours.
+ Show details− Hide details
Ready when: Dough is visibly larger, jiggles gently when bowl is tapped, small bubbles visible at the edge
Tip: Folds strengthen the gluten network and ensure even fermentation. Do not skip them or the loaf will be flat and dense.
Pre-shape and rest
- Turn the dough out onto a lightly floured work surface.
- Gently pre-shape it into a round or oval by folding the edges toward the center and lightly rolling it to tighten the surface.
- Avoid degassing.
- Let it rest, uncovered, for 15–20 minutes.
- The dough will relax slightly.
+ Show details− Hide details
Ready when: Dough surface looks smooth and feels slightly firm but still springy
Tip: Resist over-handling; overworking now will result in a dense crumb.
Final shape
- Shape the dough into a boule (round loaf) or batard (oval loaf).
- For a boule: fold the top third down and press gently, fold the sides in slightly, then roll the dough toward you, creating surface tension.
- For a batard: fold the top third down, press, fold the sides in, then roll tightly toward you into a log.
- Place seam-side down in a banneton or a bowl lined with a well-floured kitchen towel.
- Cover loosely with plastic wrap.
+ Show details− Hide details
Ready when: Loaf is taut on the surface with no visible seams
Tip: Surface tension holds the loaf's shape during oven spring. Too loose and it will spread; too tight and it will burst unevenly.
Cold proof
- Refrigerate the shaped loaf in the banneton or bowl, covered, for at least 12 hours and up to 48 hours.
- Cold fermentation slows yeast activity, allowing flavor to develop and making the loaf easier to score.
- A longer proof deepens the sour tang.
+ Show details− Hide details
Ready when: Dough is firm and cold to the touch; a gentle poke slowly springs back halfway
Tip: You can skip the cold proof if your kitchen is warm, but 12 hours cold fermentation improves flavor and oven spring significantly.
Preheat Dutch oven and ovenOven 500°F / 260°C
- Place a 5–6 quart Dutch oven with its lid in the oven.
- Preheat to 500 °F (260 °C) for 45–60 minutes.
- The vessel must be very hot for proper oven spring.
+ Show details− Hide details
Ready when: Oven thermometer reads 500 °F (260 °C), Dutch oven is too hot to touch
Tip: A cold Dutch oven will trap steam poorly and result in a pale, thick crust. Allow full preheat time.
Score loaf
- Remove the proofed loaf from the fridge.
- If using a banneton, carefully flip the loaf onto a piece of parchment paper, seam-side up.
- Using a bread lame or very sharp knife at a 30–45° angle, cut one bold slash ¼ inch (6 mm) deep across the top of the loaf, or two or three parallel slashes 4 inches (10 cm) apart.
- Do this quickly; the dough is cold and will cooperate better if you don't hesitate.
+ Show details− Hide details
Ready when: Score is clean and neat, about ¼ inch deep
Tip: A shallow, confident slash controls oven spring; a tentative or ragged cut can cause irregular expansion or tearing.
Bake coveredOven 500°F / 260°C
- Carefully remove the hot Dutch oven from the oven.
- Place the parchment with the loaf inside, lower it into the Dutch oven, and cover with the lid.
- Return to the oven and bake at 500 °F (260 °C) for 20 minutes.
- The steam trapped in the covered pot creates a crispy, golden crust.
+ Show details− Hide details
Ready when: Steam visible inside the Dutch oven; loaf has risen and is pale golden
Tip: Use oven mitts or folded towels; the Dutch oven and lid are extremely hot. Lowering the bread in on parchment prevents burns.
Bake uncoveredOven 450°F / 230°C
- Carefully remove the lid (steam will escape—stand back).
- Reduce oven temperature to 450 °F (232 °C).
- Bake uncovered for 20–25 minutes more, until the loaf is deep golden brown all over, including the sides and bottom.
- The crust should sound hollow when tapped on the bottom.
+ Show details− Hide details
Ready when: Loaf is mahogany to deep brown; internal temperature reaches 205–210 °F (96–99 °C); hollow sound when tapped on bottom
Tip: If the loaf is browning too fast, tent it loosely with foil. If it seems pale, bake an extra 3–5 minutes. Color indicates proper crust caramelization and crumb development.
Cool completely
- Remove the loaf from the Dutch oven and place it on a wire rack.
- Let it cool at room temperature for at least 1 hour (preferably 2–3 hours) before slicing.
- The interior continues to set during cooling, and premature slicing will result in a gummy crumb.
+ Show details− Hide details
Ready when: Loaf is cool to the touch; knife cuts through crust cleanly without compressing the crumb
Tip: Patience here yields a tender, open crumb. Cutting while warm will squish the interior and make it appear wet or dense.
Good to know
Tips
- Temperature control is critical: room temperature of 68–72 °F (20–22 °C) gives a predictable bulk fermentation of 3–4 hours. Warmer kitchens (above 75 °F / 24 °C) will finish sooner; cooler kitchens may need 1–2 extra hours. Adjust the number and timing of folds accordingly.
- A stiff, sluggish starter will produce a slow, flat loaf. Feed your starter 4–6 hours before mixing and bake when it is visibly bubbly and has at least doubled. A hungry starter means less leavening power.
- The poke test: At the end of bulk fermentation or cold proof, gently poke the dough with a floured finger about ½ inch (1 cm). It should slowly spring back about halfway. If it springs back fully, it needs more time; if it doesn't spring back at all, it has over-proofed and may collapse in the oven.
- A Dutch oven is essential for a home oven. It traps steam, which creates oven spring (height) and a crispy crust. Baking on a baking sheet alone will yield a dense loaf with a pale, thick crust.
Make ahead
You can shape the loaf and refrigerate it for up to 48 hours before baking. This is the standard workflow. You can also prepare the dough through the end of bulk fermentation, refrigerate it overnight, and shape it the next morning before proofing.
Storage & reheating
Room temperature: Keep the loaf in a paper bag or bread box for up to 3 days; the crust will soften. Refrigerator: Wrap in an airtight bag and refrigerate for up to 1 week; reheat gently in a 350 °F (175 °C) oven for 5 minutes. Freezer: Wrap tightly and freeze for up to 3 months; thaw at room temperature for 3–4 hours or reheat directly in a 350 °F (175 °C) oven for 15–20 minutes, wrapped in foil to prevent over-browning.
Substitutions
- all-purpose flour → bread flour (13% protein). Bread flour develops gluten faster and produces a slightly more open crumb and chewier crust. Use the same weight (500 g). Reduce bulk fermentation time by 15–20 minutes.
- filtered or non-chlorinated water → tap water (if non-chlorinated or left to sit for 1 hour). Chlorine can inhibit fermentation. If using tap water, let it sit in an open container for at least 1 hour, or use filtered water.
- active sourdough starter, fed and at peak (bubbly, doubled or tripled) → rye or whole-wheat starter (same weight, 100 g). Whole-grain starters ferment faster and impart a nuttier flavor. Reduce bulk fermentation by 20–30 minutes and watch for proper volume increase.
More yeast breads
See all →


Find more like this
- Meal
- Breakfast
- Method
- Oven
- Quick & Easy
- 5 Ingredients or Less