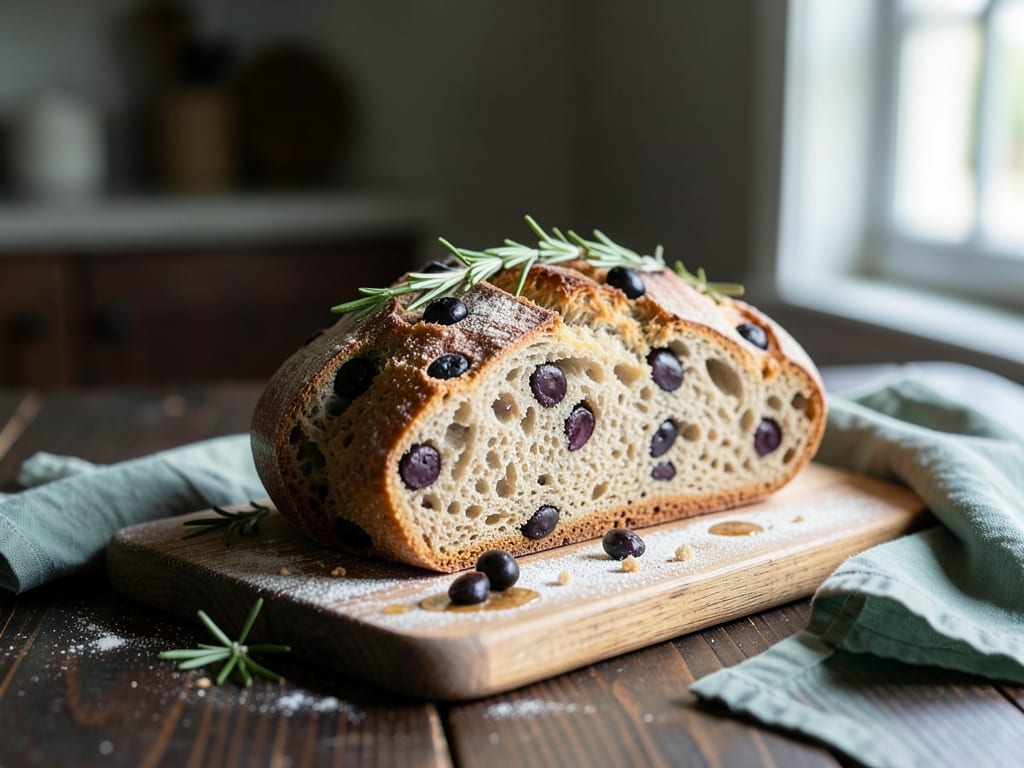
Sourdough Olive and Rosemary Loaf
A crackly-crusted, open-crumbed sourdough studded with briny Kalamata olives and fragrant fresh rosemary. Folded in gently and baked in a Dutch oven, it is perfect with soup, cheese, or simply olive oil.
- Prep
- 37 min
- Cook
- 43 min
- Wait
- 18 hr 40 min
- Total
- 20 hr
- Makes
- 1 round loaf (10 slices)
Steps
Before you start
- Feed your starter 4–8 hours before mixing so it is bubbly, domed and has at least doubled. A sluggish starter is the most common cause of a dense loaf.
- This is a two-day schedule: mix and fold in the morning (about 5 hours), shape in the afternoon, refrigerate overnight (12 hours), and bake the next day. Plan the bake time accordingly.
- Dough temperature matters: aim for a kitchen around 75–78°F (24–26°C). In a cooler kitchen, bulk fermentation will take longer.
- Pat the olives very dry on paper towels. Wet olives make the dough slack and hard to shape.
Mix and autolyse
- In a large bowl, whisk the water and starter until the starter mostly dissolves and the water looks milky.
- Add the bread flour and whole wheat flour.
- Mix with a wet hand or a spatula until no dry flour remains and the dough is a shaggy mass.
- Cover the bowl and rest.
+ Show details− Hide details
Ready when: No dry flour pockets remain; dough looks rough and shaggy
Tip: Keep the salt out for now; it can slow the starter and gluten development during this rest.
Add salt, first fold
- Sprinkle the salt over the dough and add a splash of water (about 1 tbsp) if you like.
- Wet your hand and pinch and squeeze the dough for about 1 minute to work in the salt.
- Then perform a set of stretch and folds: grab one edge, stretch it up gently, and fold it over the center; turn the bowl a quarter turn and repeat 8–10 times.
- Cover.
+ Show details− Hide details
Ready when: Salt is no longer gritty and the dough feels smoother and tighter
Tip: Wet your hands each time to keep the dough from sticking.
Fold in olives and rosemary
- Scatter about half the olives and half the rosemary over the dough.
- Perform a set of stretch and folds, tucking the add-ins inside as you fold.
- Add the remaining olives and rosemary and fold again until well distributed, about 10 folds total.
- Cover.
+ Show details− Hide details
Ready when: Olives and rosemary are evenly spread, with no clumps
Tip: Be gentle once the olives are in; aggressive handling tears the gluten and smears the dough with olive color.
Third fold
- With wet hands, do one more set of stretch and folds, 6–8 pulls around the bowl.
- The dough should feel smoother, bouncier and hold its shape more.
- Cover again.
+ Show details− Hide details
Ready when: Dough resists stretching and springs back slightly
Finish bulk fermentation
- Leave the covered dough undisturbed at 75–78°F (24–26°C).
- Total bulk fermentation, counted from adding the salt, is about 4 hours.
- The dough is ready when it has grown 50–75%, looks puffy and domed at the edges, and shows bubbles on the surface and sides.
+ Show details− Hide details
Ready when: Dough has grown 50–75%, jiggles when the bowl is shaken, and has bubbles around the edges
Tip: Judge by the dough, not the clock. In a cool kitchen it may need 1–2 more hours.
Pre-shape and rest
- Lightly flour your counter and scrape the dough out.
- Using a bench scraper, fold the edges toward the center to form a loose round, then flip it seam-side down and drag it toward you to build surface tension.
- Let it rest uncovered for 25 minutes.
+ Show details− Hide details
Ready when: Dough is a slightly flattened, relaxed round
Tip: Push any olives that poke out of the surface back inside; they burn in the oven.
Final shape
- Dust a banneton generously with the rice flour.
- Flip the dough over so the smooth side is down.
- Fold the bottom third up, the sides in, and the top down to make a tight parcel.
- Roll it seam-side down and drag to tighten, then flip it seam-side up into the banneton.
- Pinch the seam closed if it opens.
+ Show details− Hide details
Ready when: Surface is taut and the dough holds a rounded shape
Tip: Don't skimp on rice flour; it prevents sticking far better than wheat flour.
Cold proof overnight
- Cover the banneton with a shower cap or plastic bag and refrigerate for 12–14 hours.
- The dough will look puffy and, when you press a floured finger into it, the dent should spring back slowly.
+ Show details− Hide details
Ready when: A floured fingertip dent springs back slowly and only partway
Tip: Bake straight from the fridge; cold dough is easier to score.
Preheat Dutch ovenOven 475°F / 245°C
- About 45 minutes before baking, place the empty Dutch oven with its lid in the oven and preheat to 475°F (245°C).
- Cut a piece of parchment paper large enough to lift the loaf with a 2-inch overhang on each side.
+ Show details− Hide details
Ready when: Oven reaches 475°F (245°C) and the pot has heated for a full 45 minutes
Tip: Use oven mitts; the pot will be dangerously hot.
Score and bake coveredOven 475°F / 245°C
- Turn the dough out onto the parchment (seam-side down now) and dust lightly with rice flour if needed.
- Score the top with one confident ½-inch (1 cm) deep slash or a cross.
- Use the parchment to lower the loaf into the hot Dutch oven, cover, and bake at 475°F (245°C) for 20 minutes.
+ Show details− Hide details
Ready when: Loaf has risen noticeably and the surface is pale but set
Tip: Score firmly and quickly; a hesitant cut drags and tears the wet dough.
Uncover and finishOven 450°F / 230°C
- Carefully remove the lid.
- Reduce the oven to 450°F (230°C) and bake another 23 minutes, until the crust is deep golden-brown and the loaf sounds hollow when tapped on the bottom.
- The internal temperature should read 205–210°F (96–99°C).
+ Show details− Hide details
Ready when: Deep golden-brown crust, hollow sound when tapped, internal temperature of 205–210°F (96–99°C)
Tip: If the olives or rosemary on top darken too fast, tent loosely with foil.
Cool completely
- Lift the loaf out using the parchment and set it on a wire rack.
- Cool for at least 1 hour before slicing; the crumb is still setting and will seem gummy if cut early.
- You may hear the crust crackle as it cools.
+ Show details− Hide details
Ready when: Loaf feels barely warm to the touch on the bottom
Tip: Resist slicing early; the interior is still cooking from residual steam.
Good to know
Tips
- Pat the olives dry and chop them into large pieces so they distribute well without tearing the gluten.
- If you don't have a Dutch oven, bake on a preheated baking stone with a pan of boiling water on the lower rack for steam.
- For a more sour loaf, extend the cold proof to 16–18 hours.
- Use a scale. Sourdough is sensitive to hydration, and cups vary a lot.
Make ahead
"The shaped dough can stay in the fridge for up to 18 hours for a tangier loaf. The baked loaf can be made a day ahead and refreshed in a 350°F (175°C) oven for 8–10 minutes."
Storage & reheating
"Room temperature: store cut-side down on a board or in a paper bag or bread box for up to 3 days. Fridge: not recommended as it stales the crumb faster. Freezer: slice, wrap tightly, and freeze up to 3 months; toast slices from frozen, or reheat a whole loaf at 350°F (175°C) for 15–20 minutes."
Substitutions
- pitted Kalamata olives → Green olives such as Castelvetrano. Milder and buttery; pat very dry as with Kalamatas.
- fresh rosemary leaves → 1 tbsp (3 g) dried rosemary or fresh thyme leaves. Use half the amount if dried, crushing it between your fingers first.
- whole wheat flour → More bread flour (50 g). The loaf will be slightly lighter in color and flavor.
- rice flour → Equal parts all-purpose flour and cornstarch. Helps prevent sticking, though rice flour works best.
More yeast breads
See all →
Find more like this
- Meal
- Dinner
- Cuisine
- Mediterranean
- Method
- Oven