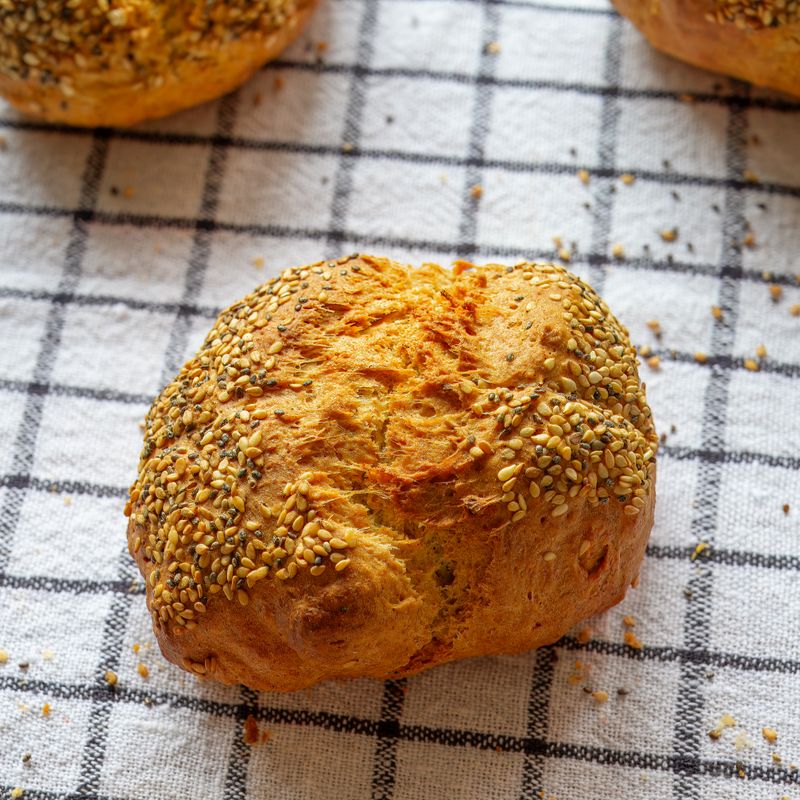
Healthy Sourdough Discard Chia Seed Pudding Bread
A nutrient-rich sourdough loaf that transforms discard into a moist, seed-studded bread. Chia seeds soak in almond milk to create a pudding base, enriching the dough with omega-3s and fiber. Maple syrup adds subtle sweetness and a tender crumb. Perfect for breakfast toast or snacking.
Steps
Before you start
- Have active sourdough discard at room temperature (unfed, bubbly state)
- Prepare chia pudding 30 minutes before mixing dough
- Preheat oven to 450°F (232°C) with a Dutch oven inside for 45 minutes
- Weigh ingredients for accuracy—volume measurements will vary
Make chia pudding base
- In a small bowl, combine chia seeds and almond milk.
- Stir well to combine and prevent clumping.
- Let sit for 30 minutes at room temperature, stirring occasionally, until the mixture becomes thick and gel-like.
- This creates the moisture and nutritional base for the dough.
+ Show details− Hide details
Ready when: Mixture is thick and cohesive, with no pools of liquid
Tip: Prepare this while your sourdough discard comes to room temperature.
Combine wet ingredients
- In a large mixing bowl, whisk together the room-temperature sourdough discard, the prepared chia pudding, maple syrup, and lukewarm water.
- Mix until well combined and no lumps of discard remain.
- The mixture should look like thick pancake batter.
+ Show details− Hide details
Ready when: Wet mixture is smooth and fully incorporated
Tip: Use room-temperature discard for even fermentation; cold discard will slow rise.
Mix dry ingredients
- In a separate bowl, whisk together bread flour, whole wheat flour, ground flaxseed, and sea salt.
- Break up any lumps of flax.
+ Show details− Hide details
Ready when: Dry mix is evenly combined with no lumps
Tip: Weighing flour gives the most reliable results; volume can vary by 10%.
Form shaggy dough
- Pour the dry ingredients into the wet mixture and stir with a dough scraper or sturdy wooden spoon for 2–3 minutes until all flour is hydrated.
- You will have a thick, rough dough with no dry streaks.
- Do not knead yet.
+ Show details− Hide details
Ready when: All flour is incorporated and no dry streaks remain
Tip: Avoid overworking at this stage; rest is more important than kneading in sourdough.
Autolyse rest
- Cover the bowl loosely with a damp kitchen towel and let the dough rest at room temperature (68–72°F / 20–22°C) for 30 minutes.
- This allows the flour to fully hydrate and makes the dough easier to work with.
+ Show details− Hide details
Ready when: Dough appears slightly puffy and more cohesive
Tip: A warm kitchen speeds hydration; a cool kitchen may need up to 40 minutes.
Laminate and add seeds
- Wet your hand lightly.
- Fold the dough up from the sides and stretch it gently over itself 6–8 times (a coil fold).
- If adding sunflower seeds and pumpkin seeds, scatter half of them over the surface, fold the dough over them, then add the remaining seeds and fold again to distribute evenly.
- The dough should feel slightly extensible and smooth.
+ Show details− Hide details
Ready when: Dough is evenly folded and seeds are distributed throughout
Tip: Wet hands prevent sticking; lamination builds strength without heavy kneading.
Bulk ferment (first rise)
- Return the dough to the bowl, cover with a damp towel, and let it rest at room temperature for 90–120 minutes.
- After 30 and 60 minutes, perform a gentle coil fold (fold the dough over itself from all sides) to build strength.
- The dough should increase by 30–50% in volume.
- It will feel airy but still hold shape.
+ Show details− Hide details
Ready when: Dough has risen noticeably, jiggles slightly when bowl is moved, and has visible bubbles at edges
Tip: If your kitchen is cool (under 68°F / 20°C), add 30 minutes to bulk fermentation time.
Shape into round boule
- Flour your work surface lightly.
- Turn the dough out gently, being careful not to deflate it too much.
- Shape into a round boule by folding the edges under and toward the center, rolling it toward you to create surface tension.
- The dough should feel taut and hold a round shape.
- Place seam-side up in a flour-dusted banneton or bowl lined with a kitchen towel.
+ Show details− Hide details
Ready when: Dough is shaped into a tight, round boule with a seam on top
Tip: Surface tension holds the loaf's shape during baking; overhandling will deflate your rise.
Final proof (cold retard)
- Cover the banneton with plastic or a shower cap and place in the refrigerator for 12–18 hours (overnight works well).
- This slow, cold fermentation develops flavor and makes scoring easier.
- The dough will firm up and rise slightly more.
+ Show details− Hide details
Ready when: Dough is cold, firm, and a gentle poke springs back slowly
Tip: You can also do a 2–3 hour room-temperature final proof if time is short, but flavor will be less developed.
Preheat oven and prepare Dutch ovenOven 450°F / 230°C
- About 1 hour before baking, remove the dough from the refrigerator and set it on the counter.
- Preheat your oven to 450°F (232°C) with a 4–5 quart Dutch oven (lid on) inside for 45 minutes.
- The Dutch oven must be very hot so steam traps properly in the loaf.
+ Show details− Hide details
Ready when: Oven thermometer reads 450°F (232°C); Dutch oven is hot to the touch
Tip: A cold Dutch oven will cool the oven and prevent proper oven spring; allow full preheat time.
Score and load into Dutch ovenOven 450°F / 230°C
- Using a very sharp knife or bread lame, score the top of the cold dough with a single deep slash (about ¼ inch / 0.6 cm deep) or an X pattern.
- Carefully remove the hot Dutch oven from the oven and place on a heat-safe surface.
- Line the bottom with parchment paper, then gently tip the dough onto the parchment, seam-side down.
- The dough should be cold and hold its shape well.
- Place the Dutch oven, covered with its lid, back in the oven.
+ Show details− Hide details
Ready when: Dough is scored and loaded into the hot Dutch oven; lid is on
Tip: Work quickly to preserve the oven temperature; parchment prevents sticking and makes removal easy.
Bake covered (steam phase)Oven 450°F / 230°C
- Bake covered at 450°F (232°C) for 25 minutes.
- The trapped steam will inflate the dough dramatically (oven spring).
- You should see the loaf puff up and hear crackling sounds as the crust sets.
+ Show details− Hide details
Ready when: Loaf has puffed significantly and scored area has opened
Tip: Do not open the oven during this phase; steam loss will collapse your rise.
Bake uncovered until goldenOven 450°F / 230°C
- Carefully remove the Dutch oven lid (watch for steam).
- Continue baking uncovered at 450°F (232°C) for 15 minutes.
- The loaf will deepen in color and the crust will become a rich golden-brown.
- You can brush the top with honey if desired for extra shine and a touch of sweetness.
+ Show details− Hide details
Ready when: Crust is deep golden brown; loaf sounds hollow when tapped on bottom
Tip: If the crust is darkening too fast, reduce heat to 425°F (218°C) for the final 10 minutes.
Cool completely on rack
- Remove the loaf from the Dutch oven using parchment as a handle and transfer to a wire cooling rack.
- Let it rest at room temperature for at least 1 hour (preferably 2 hours) before slicing.
- The interior continues to set during cooling, and the crust will firm up.
+ Show details− Hide details
Ready when: Loaf is cool to the touch and no longer steaming; interior temp is 205–210°F (96–99°C)
Tip: Cutting into warm bread compresses the crumb; patience here yields a better texture.
Good to know
Tips
- Chia seeds add moisture and nutrition without making the dough heavy; their gel binds the crumb beautifully and keeps the loaf fresh longer.
- Cold retarding overnight is optional but highly recommended—it develops complex sourdough flavor and makes the dough easier to score and shape.
- This recipe tolerates temperature swings well; in a warm kitchen (72°F / 22°C), reduce fermentation times by 15–20 minutes. In a cool kitchen, add 20–30 minutes.
- Flaxseed and seeds can absorb extra water; if your dough feels very stiff after mixing, add 1–2 tablespoons more water and fold it in gently.
Make ahead
Dough can be shaped and proofed in the refrigerator for up to 18 hours. Baked loaf can be frozen whole or sliced for up to 3 months.
Storage & reheating
Room temperature (in a paper bag or bread box): 2–3 days. Refrigerator (wrapped in plastic): up to 5 days; reheat gently in a 300°F / 150°C oven for 10 minutes. Freezer (whole loaf or slices in an airtight container or freezer bag): up to 3 months. Thaw at room temperature and toast if desired.
Substitutions
- unsweetened almond milk → oat milk, cashew milk, or any unsweetened plant milk. Neutral-flavored alternatives work equally well; avoid sweetened versions as they will oversweeten the loaf.
- pure maple syrup → raw honey, brown rice syrup, or coconut nectar (same amount). Honey and coconut nectar are slightly sweeter; reduce by ¼ teaspoon if using either for a more savory loaf.
- bread flour or all-purpose flour → all-purpose flour or spelt flour. All-purpose will yield a slightly less chewy crumb. Spelt is more delicate; reduce water by 1–2 tablespoons as it absorbs more liquid.
- whole wheat flour → rye flour, einkorn flour, or additional bread flour. Rye adds earthiness and moisture; use the same amount. Einkorn is delicate; reduce water by 1 tablespoon. Extra bread flour makes a milder, less nutty loaf.
More yeast breads
See all →



Find more like this
- Meal
- Breakfast
- Method
- Oven
- Quick & Easy
- Make Ahead