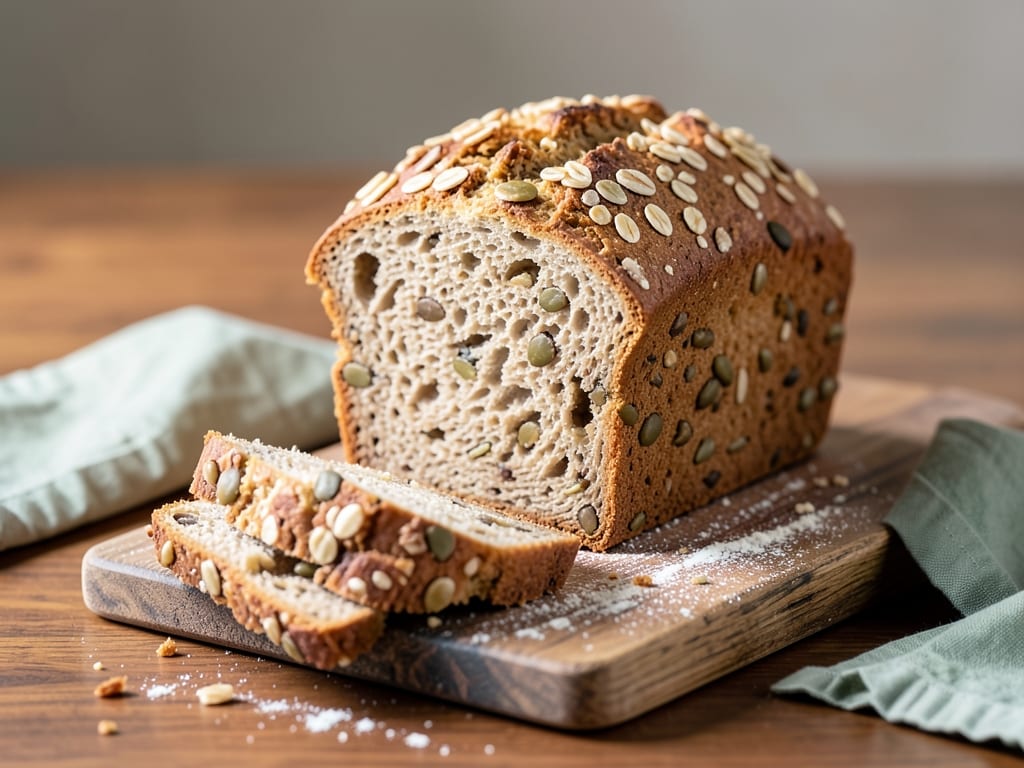
Vegan Sourdough Pumpkin Seed and Oat Bread
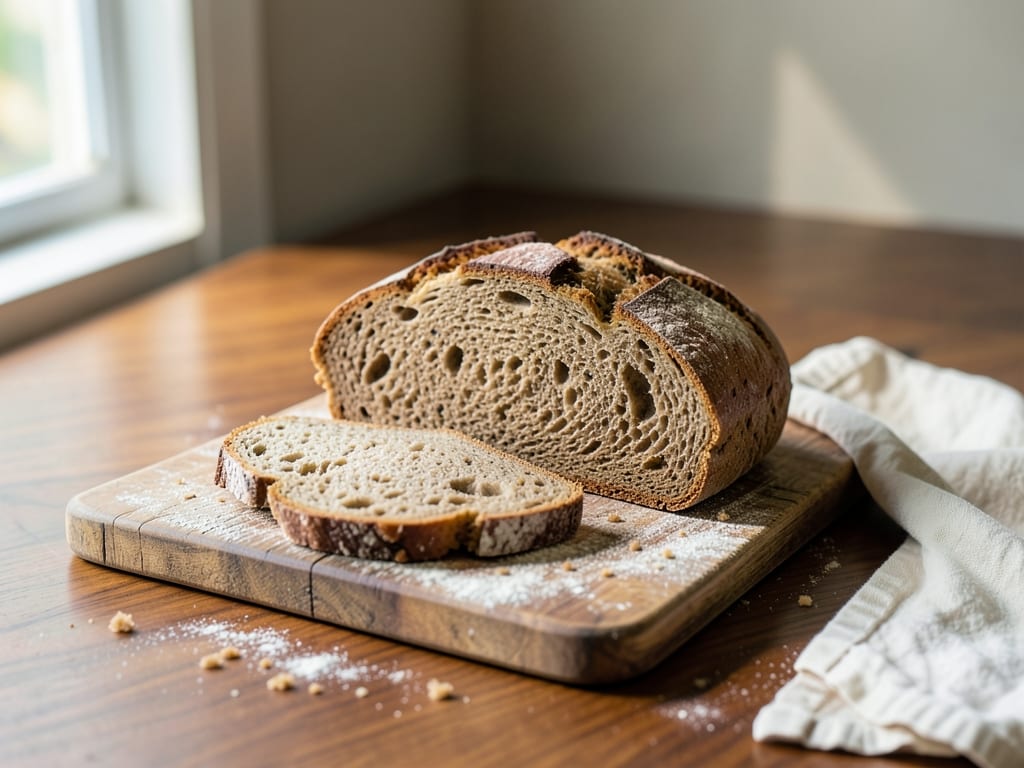
A tall, chewy sourdough loaf with a soft, moist oat-soaked crumb, toasty pumpkin seeds throughout, and a crackly crust crowned with oats and seeds. Fully vegan, with a long cold proof for deep flavor.
- Prep
- 51 min
- Cook
- 45 min
- Wait
- 21 hr 25 min
- Total
- 23 hr 1 min
- Makes
- 1 round loaf (about 10 slices)
Steps
Before you start
- Feed your starter 4–8 hours before you begin so it is bubbly, doubled and passes the float test (a spoonful floats in water).
- Read the timing: the dough needs about 5 hours of bulk fermentation, then 12–16 hours in the fridge. Start in the morning to bake the next morning.
- Your kitchen should be around 75°F (24°C). In a cooler kitchen, bulk fermentation will take longer, so judge by the dough, not the clock.
- Weigh ingredients with a kitchen scale for reliable results. Cup measures are approximate.
Toast seeds, soak oats
- Toast the 75 g (½ cup) pumpkin seeds in a dry small skillet over medium heat for 4–5 minutes, stirring constantly, until they puff, pop and smell nutty.
- Tip onto a plate to cool.
- Put the 60 g (⅔ cup) rolled oats in a heatproof bowl, pour over the 120 ml (½ cup) boiling water, stir and cover.
- Leave until the mixture is thick and cooled to room temperature.
+ Show details− Hide details
Ready when: Seeds are puffed, lightly golden and fragrant; oat soaker is thick, porridge-like and no longer warm
Tip: Don't walk away from the skillet; pepitas go from toasted to bitter quickly.
Mix and rest dough
- In a large bowl, whisk the 280 ml lukewarm water with the 100 g starter and 20 g maple syrup until mostly dissolved.
- Add the 400 g bread flour, 60 g whole wheat flour and the cooled oat soaker.
- Mix with a wet hand or spatula until no dry flour remains and the dough is shaggy and sticky.
- Cover the bowl and rest.
+ Show details− Hide details
Ready when: No dry flour pockets; dough looks rough and shaggy
Tip: Wet your hands before touching the dough to stop it sticking.
Add salt and seeds
- Sprinkle the 10 g salt over the dough and add the cooled toasted pumpkin seeds.
- Wet your hand and squeeze, fold and pinch the dough for about 3 minutes, folding the edges into the center, until the salt has dissolved and the seeds are evenly spread.
- Cover.
+ Show details− Hide details
Ready when: No gritty salt is felt and seeds are evenly distributed through the dough
Tip: Make sure the seeds are fully cool; warm seeds can speed up fermentation unevenly.
Bulk ferment with folds
- Keep the dough at about 75°F (24°C), covered.
- Over the first 90 minutes, do 3 sets of stretch and folds spaced 30 minutes apart: wet your hand, grab one edge of the dough, stretch it up gently and fold it over the center; turn the bowl a quarter turn and repeat 4 times.
- After the third set, leave the dough undisturbed, covered, for another 2½–3 hours.
+ Show details− Hide details
Ready when: Dough has grown about 50–75% in volume, is jiggly, domed at the edges, and shows bubbles on the surface and at the sides of the bowl
Tip: Oat dough ferments a little slower than white dough. Go by volume and bubbles, not by the clock.
Pre-shape the dough
- Lightly flour a work surface and turn the dough out.
- Using a dough scraper, fold the edges into the center to form a loose round, then flip it seam-side down.
- Drag it toward you on the surface to build tension.
- Cover with the inverted bowl or a towel and let it rest.
+ Show details− Hide details
Ready when: Dough holds a loose round shape and has relaxed and spread slightly
Tip: Use as little flour as possible on the counter so the dough can grip it.
Final shape and topping
- Dust the banneton generously with the 10 g rice flour.
- Mix the topping seeds and topping oats on a plate.
- Dampen the top of the dough lightly with a wet hand.
- Flip the dough over so it's seam-side up, fold the sides to the center like an envelope, then roll it into a tight round.
- Lightly moisten the smooth top with a wet hand and press it into the oat and seed mixture.
- Place it in the banneton topping-side down, seam-side up, and pinch the seam closed.
+ Show details− Hide details
Ready when: Dough surface is taut and smooth, and the topping is firmly stuck to it
Tip: If the topping doesn't stick, mist the dough surface with a little water.
Cold proof overnight
- Cover the banneton with a plastic bag or shower cap and refrigerate for 12–16 hours.
+ Show details− Hide details
Ready when: A floured finger pressed into the dough leaves a dent that springs back slowly and only partway
Tip: If the dent fills in immediately, let it sit at room temperature for 30 minutes before baking.
Preheat Dutch ovenOven 500°F / 260°C
- At least 45 minutes before baking, put the Dutch oven with its lid on in the oven's center rack and preheat to 500°F (260°C).
- Cut a sheet of parchment to fit under the loaf with a little overhang for lifting.
+ Show details− Hide details
Ready when: Oven reaches 500°F (260°C) and the pot has heated for the full 45 minutes
Tip: Use oven mitts; the pot and lid will be extremely hot.
Score and bake coveredOven 450°F / 230°C
- Turn the cold dough out onto the parchment so the topping side is up.
- Score the top with a razor blade, one confident slash about ½ inch (1 cm) deep.
- Carefully lift the parchment into the hot Dutch oven, cover, and reduce the oven to 450°F (230°C).
- Bake covered for 25 minutes.
+ Show details− Hide details
Ready when: Loaf has risen tall, with the score opened into an ear, and is pale golden
Tip: Score straight away after unmolding; cold dough cuts cleanly, but it softens quickly at room temperature.
Bake uncoveredOven 450°F / 230°C
- Remove the lid and bake the loaf for another 20 minutes at 450°F (230°C) until the crust is deep golden brown and the oats and seeds on top are toasted.
- Check the internal temperature with an instant-read thermometer.
+ Show details− Hide details
Ready when: Deep golden-brown crust, hollow sound when tapped on the bottom, and an internal temperature of 205–210°F (96–99°C)
Tip: If the top is browning too fast, tent loosely with foil.
Cool completely
- Use the parchment to lift the loaf onto a wire rack.
- Cool for at least 1 hour before slicing.
+ Show details− Hide details
Ready when: Loaf feels barely warm to the touch on the bottom
Tip: You may hear the crust crackling as it cools; that's normal.
Good to know
Tips
- If the dough feels too sticky to handle, wet your hands rather than adding extra flour; oats make the dough stickier at first but it firms up through the folds.
- Without a Dutch oven, bake on a preheated baking stone or steel with a tray of boiling water on the rack below, and remove the tray after 20 minutes.
- Use a starter at its peak; an underactive starter gives a dense loaf.
- For a stronger sourdough tang, extend the cold proof to 16–18 hours.
Make ahead
"The dough can stay in the fridge for up to 24 hours total during the cold proof. For a quicker morning, you can also shape the loaf in the evening, so it is ready to bake straight from the fridge."
Storage & reheating
"Room temperature: wrap the cooled loaf in a clean towel or store cut-side down in a bread bag for up to 4 days. Fridge: not recommended, as it dries the bread out. Freezer: slice and freeze in an airtight bag for up to 3 months; toast slices straight from frozen, or refresh a whole loaf in a 350°F (175°C) oven for 10–15 minutes."
Substitutions
- raw pumpkin seeds (pepitas) → sunflower seeds. Toast them the same way; the flavor is milder and the seeds smaller.
- maple syrup → agave syrup or brown sugar. Use the same weight. Do not use honey if you want to keep the loaf vegan.
- whole wheat flour → rye flour or more bread flour. Rye adds an earthy flavor; extra bread flour gives a lighter crumb.
- white rice flour → all-purpose flour. Rice flour sticks less, but all-purpose works if you use a generous amount.
More sourdough
See all →
Find more like this
- Meal
- Dinner
- Method
- Oven
- Quick & Easy
- Make Ahead