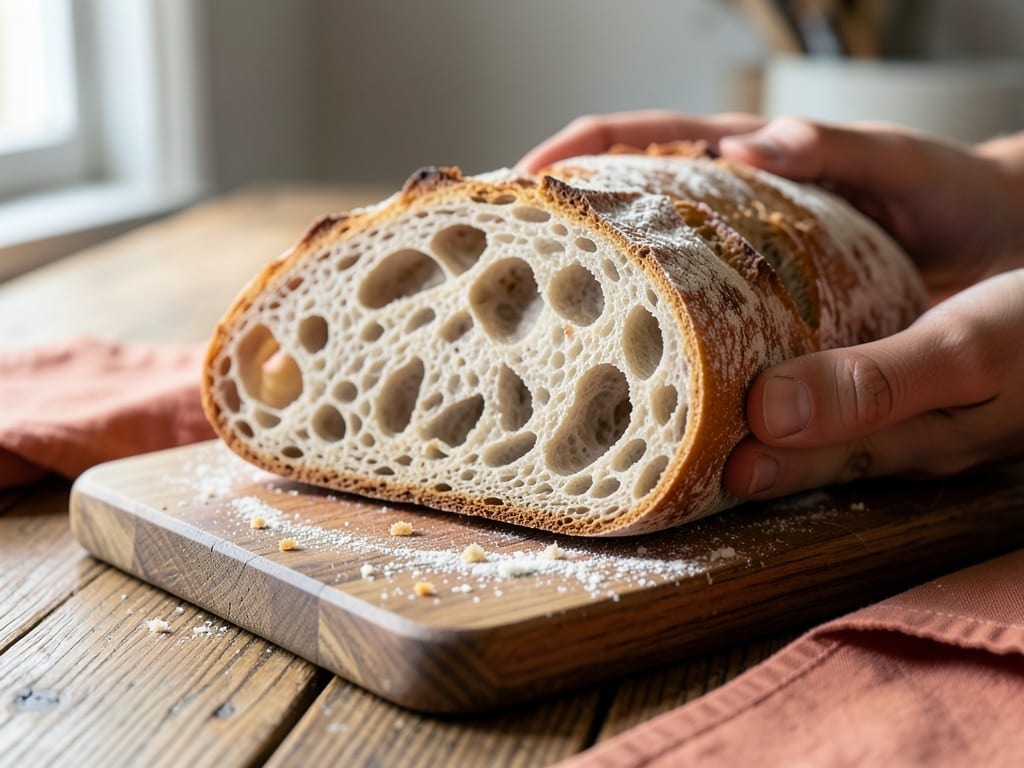
Sourdough Pan de Cristal
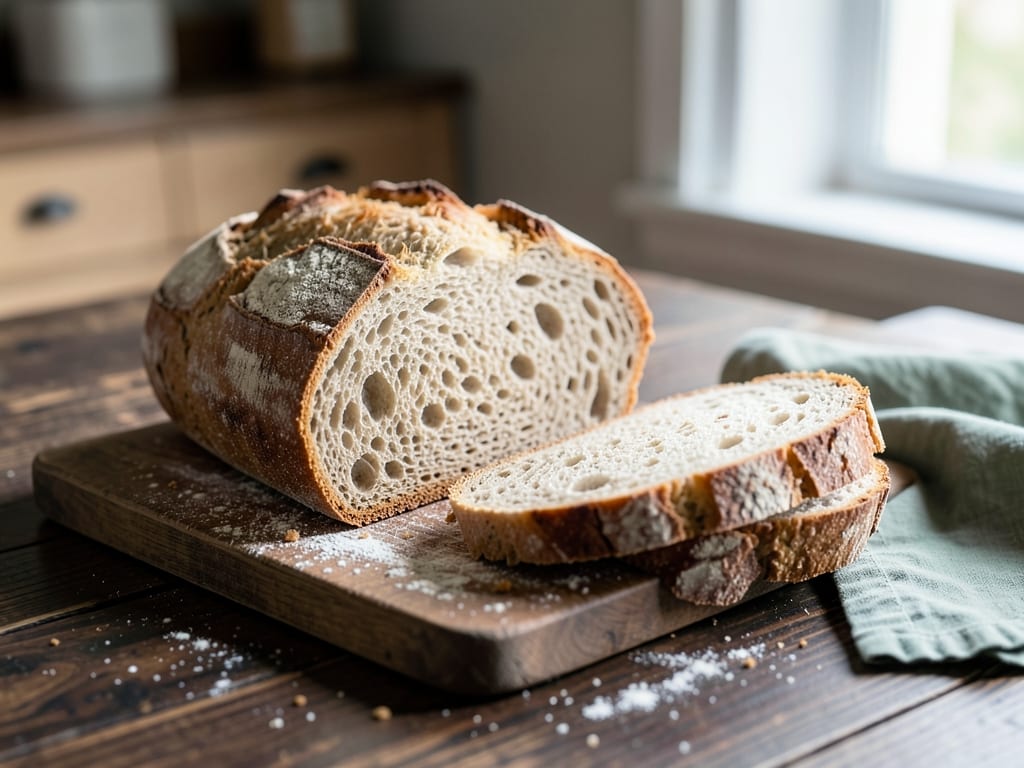
A Spanish artisan bread with a gossamer-thin, crispy crust and an open, irregular crumb filled with large irregular air pockets. Pan de cristal ('crystal bread') is prized for its shatteringly crisp exterior and tender, airy interior. This version uses a high-hydration dough, traditional sourdough fermentation, and an optional overnight cold proof, developing deep flavor and that signature crystalline crust. Best eaten the day it's baked.
- Prep
- 30 min
- Cook
- 40 min
- Wait
- 15 hr 50 min
- Total
- 17 hr
- Makes
- 1 loaf (8 slices)
Steps
Before you start
- Have your sourdough starter active and bubbly, fed 4–8 hours before mixing. If it's weak or inactive, feed it and wait longer.
- Use bread flour for best structure and crust; all-purpose flour will work but may yield a denser crumb.
- This dough is intentionally very sticky—do not add extra flour. Sticky dough is how pan de cristal achieves its open crumb.
- Prepare a banneton proofing basket or a bowl lined with a kitchen towel for the final proof.
- Plan ahead: this recipe spans 1–2 days with an overnight cold proof. A faster room-temperature proof (2–4 hours) is possible if you're in a hurry.
Mix and autolyse
- Pour 350 ml room-temperature water into a large mixing bowl.
- Add 500 g bread flour and 100 g active sourdough starter.
- Using your hand or a wooden spoon, mix until all flour is fully hydrated and no dry flour remains—the dough will be shaggy, sticky, and uneven.
- Cover the bowl with a lid or damp towel and let rest undisturbed at room temperature for 30 minutes.
- During this autolyse, gluten networks begin developing without salt, which would otherwise inhibit this process.
+ Show details− Hide details
Ready when: All flour is hydrated; dough is shaggy, sticky, and uniform
Tip: If your sourdough starter doesn't smell or look active (bubbly, risen 2–3× its original size), it needs 2–4 more hours of fermentation after feeding. A weak starter produces slow fermentation and weak dough.
Dissolve salt and oil
- After the 30-minute autolyse, sprinkle 10 g kosher salt and 5 ml olive oil over the dough.
- Using your hand, gently pinch and fold the dough in the bowl for 3–4 minutes: reach under the dough with your fingers, fold it up and over the top, rotate the bowl 90°, and repeat.
- Continue until salt and oil are fully incorporated—the dough will feel noticeably smoother and more cohesive.
- This mixing distributes salt evenly, which is crucial for flavor and fermentation control.
- Cover the bowl again.
+ Show details− Hide details
Ready when: Salt and oil are fully mixed in; dough is visibly smoother and more elastic than before
Bulk ferment with coil folds
- Perform a series of coil folds to build strength in this high-hydration dough.
- A coil fold: reach under one side of the dough, stretch it upward, and fold it over the center; rotate the bowl 90°; repeat 3–4 more times (total of 4 folds per set).
- Do a full set of coil folds every 30 minutes for a total of 4–5 sets (this takes 2–2.5 hours).
- After the final set of folds, leave the dough undisturbed.
- Continue bulk fermentation at room temperature (68–75°F / 20–24°C) for an additional 2–3 hours, or until the dough has increased 50–75% in volume.
- It should look airy and jiggly with visible bubbles on the surface.
- Watch the dough, not the clock: cooler kitchens (65°F / 18°C) take 6+ hours total; warmer kitchens (75°F / 24°C) finish sooner.
+ Show details− Hide details
Ready when: Dough has increased 50–75% in volume, feels airy and jiggly when you gently shake the bowl, shows visible bubbles on top, and has small pockets of gas when you gently stretch a section open
Tip: Coil folds are gentler than slap-and-folds for sticky dough; they build strength without degassing. If your kitchen is cooler than 70°F (21°C), add 1–2 hours to total bulk time. If warmer (75°F / 24°C+), check after 3 hours—it may be ready sooner.
Pre-shape and bench rest
- Turn the dough out very gently onto a lightly oiled work surface (oil prevents sticking without deflating the dough).
- Using a bench scraper or your hands, very gently pre-shape the dough into a round by dragging it toward you 4–5 times, building light surface tension on top—do not be aggressive or you'll tear the dough and lose gas.
- Let it rest uncovered for 15–20 minutes.
- The gluten will relax, making final shaping much easier.
+ Show details− Hide details
Ready when: Dough has relaxed and feels soft; surface is smooth and gently rounded
Tip: Avoid aggressive handling with high-hydration dough. Tears and rough treatment will collapse your air structure. Gentle is always better.
Shape and cold proof
- Gently flip the pre-shaped dough over so the seam-side faces up (if not already).
- Fold one edge up and over the center; press down lightly.
- Rotate the bowl 90° and repeat 4 more times (5 folds total), creating a round package with tension on top.
- Flip it over (seam-side down) and place into a banneton (seam-side up) or bowl lined with a floured towel.
- Cover with plastic wrap or a shower cap.
- For best results, refrigerate for 8–16 hours overnight.
- Alternatively, for a faster timeline, let it proof uncovered at room temperature for 2–4 hours until noticeably puffy and springs back slowly when poked with a floured finger.
- The cold overnight proof is recommended: it develops deeper flavor, makes handling easier, and gives you a 2–4 hour window to bake the next day.
+ Show details− Hide details
Ready when: Cold proof (from fridge): gently poke with a floured finger—dough springs back slowly with a slight indent remaining. Room temp: dough is visibly puffy, springs back slowly, and retains a poke indent.
Tip: Cold overnight proof is ideal for pan de cristal: it slows fermentation (building flavor) and gives a forgiving baking window. Room-temp proof works but requires closer watching—high-hydration dough can over-proof quickly at 72°F (22°C)+.
Preheat and scoreOven 500°F / 260°C
- Place your Dutch oven (with its lid) in the oven and preheat to 500°F (260°C) for 45 minutes.
- A fully preheated, scorching-hot vessel is essential for steam, crust, and oven spring.
- About 5 minutes before the oven reaches temperature, remove your dough from the fridge (if cold-proofed) and let it sit on the counter while the oven finishes.
- Gently turn the dough onto parchment paper, seam-side down.
- Using a sharp bread knife, lame, or razor, score the top confidently: either a single 3-inch diagonal slash (1/4 inch deep) or a cross pattern.
- Score deeply and decisively—timid, shallow scores will close up during oven spring, and you'll lose the crispy ears and visual contrast.
+ Show details− Hide details
Ready when: Oven thermometer reads 500°F (260°C); steam or heat shimmers from the Dutch oven when you briefly open it
Tip: Don't skip the full 45-minute preheat. An under-preheated vessel yields pale, soft crust instead of the deep-golden, crispy crust that defines pan de cristal. Use an oven thermometer if your oven's display is unreliable.
Bake covered, steam phaseOven 500°F / 260°C
- Carefully remove the scorching-hot Dutch oven using thick oven mitts or folded kitchen towels.
- Quickly and carefully slide the parchment-sling with dough into the Dutch oven—it will sizzle and steam furiously.
- Immediately cover with the lid, sealing in the steam.
- Place the Dutch oven back in the preheated 500°F (260°C) oven.
- Bake for 25 minutes.
- The trapped steam keeps the dough's surface moist, allowing it to expand freely (oven spring) and develop a thin, crispy crust.
- Do not lift the lid during these 25 minutes—you'll release the steam and ruin your crust.
+ Show details− Hide details
Ready when: Timer reaches 25 minutes; you may see thin steam escaping from the lid's edge
Tip: Use thick, dry oven mitts—a wet or thin mitt is dangerous with a screaming-hot Dutch oven. The dough will stick slightly to the parchment; this is fine. It will pull free as the crust sets.
Finish baking uncoveredOven 450°F / 230°C
- Remove the Dutch oven from the oven and carefully lift off the hot lid—steam will escape; protect your hands and face.
- Reduce the oven temperature to 450°F (232°C).
- Place the Dutch oven back in the oven, uncovered.
- Bake for an additional 12–15 minutes until the crust is a deep, rich golden-brown or caramel color—it should be quite dark, never pale.
- To check doneness, tap the bottom of the loaf with a wooden spoon: it should sound hollow, like tapping a melon.
- Alternatively, insert an instant-read thermometer into the center of the loaf; it should read 205–210°F (96–99°C).
- The loaf will smell deeply toasty and aromatic.
+ Show details− Hide details
Ready when: Crust is deep golden-brown or caramel-colored; loaf sounds hollow when tapped on the bottom; internal temperature reads 205–210°F (96–99°C)
Tip: Every oven is different. If after 12 minutes your crust is still light golden, add 2–3 more minutes. Pan de cristal should have a very dark, thin, crispy crust—pale crust won't crackle or shatter. Watch for deep color.
Cool completely
- Using a long-handled wooden spoon or bench scraper, gently lift and transfer the loaf out of the Dutch oven onto a wire cooling rack.
- (Alternatively, slide the parchment and loaf directly onto the rack, then slide the loaf off the parchment after a few minutes.) The loaf continues baking as it cools.
- Allow it to cool for at least 1 hour at room temperature before slicing.
- This cooling time is critical: steam trapped inside the crumb gradually escapes, and the crumb structure sets and firms.
- If you slice into a warm loaf, the interior will be gummy and compress.
- The crust will crackle audibly as it cools—this is normal and desirable.
- Pan de cristal is best enjoyed the same day it's baked while the crust is still crispy and shatteringly thin.
+ Show details− Hide details
Ready when: Bread is cool to the touch; crust crackles slightly when bent; you can hold it comfortably in your hands
Tip: Resist slicing while warm. If you must taste it, wait at least 30 minutes. The warm interior tastes gummy and underdeveloped; the true flavor and texture emerge only after complete cooling.
Good to know
Tips
- Dough temperature matters: if your kitchen is cold (under 65°F / 18°C), all fermentation stages take much longer. In winter, consider using warm water or proofing in a warm spot (like an oven with just the light on) to speed up fermentation to realistic timelines.
- Pan de cristal relies on steam for its signature thin, crispy crust and oven spring. Don't skip the 45-minute preheat, don't open the Dutch oven during the covered phase, and do use a fully preheated vessel. This is where the magic happens.
- An instant-read thermometer is your best friend for sourdough consistency. Bake to 205–210°F (96–99°C) internal temperature for predictable, repeatable results across different ovens and environmental conditions.
- If your loaf splits or tears during scoring, don't worry—it's still delicious to eat. Next time, score more deeply and confidently. A bold, 1/4-inch-deep score encourages the dough to expand where you want it and creates beautiful ears.
Make ahead
Pan de cristal is best served the same day it's baked while the crust is still crispy. However, the dough can be shaped and refrigerated for 8–16 hours overnight, then baked the next morning. This overnight cold proof actually improves flavor through extended fermentation and can be more convenient for a morning bake.
Storage & reheating
Room temperature (2–3 days): Store in a paper bag or linen towel to maintain crispness. Avoid plastic, which traps steam and softens the crust. Refrigerator (up to 1 week): In an airtight container or bag; the crust will soften. Reheat at 375°F (190°C) for 10–15 minutes to re-crisp. Freezer (up to 3 months): Wrap the cooled loaf in plastic wrap, then foil. Thaw at room temperature 2–3 hours, then reheat at 375°F (190°C) for 20–25 minutes to restore crispness and crust quality.
Substitutions
- bread flour → All-purpose flour. All-purpose flour has less gluten than bread flour. Use 10–15% more water (375–400 ml total) to compensate for a weaker network. The crumb may be slightly less open and the crust slightly less crispy, but the loaf will still be excellent.
- active sourdough starter → Store-bought liquid sourdough starter or sourdough concentrate. Use the amount specified on the packaging; fermentation timing and strength may vary from homemade starters. Results will still be very good.
- water → Filtered or bottled water. Tap water is fine, but if yours is heavily chlorinated, filtering may improve fermentation. Chlorine can inhibit yeast and bacterial activity.
- extra-virgin olive oil → Canola oil, sunflower oil, or melted butter. Olive oil is traditional and adds flavor. A neutral oil works but won't enhance taste. Omit the oil entirely for a crisper, drier crust, if you prefer.
More sourdough
See all →
Find more like this
- Meal
- Dinner
- Cuisine
- Spanish
- Method
- Oven
- Quick & Easy
- 5 Ingredients or LessMake Ahead