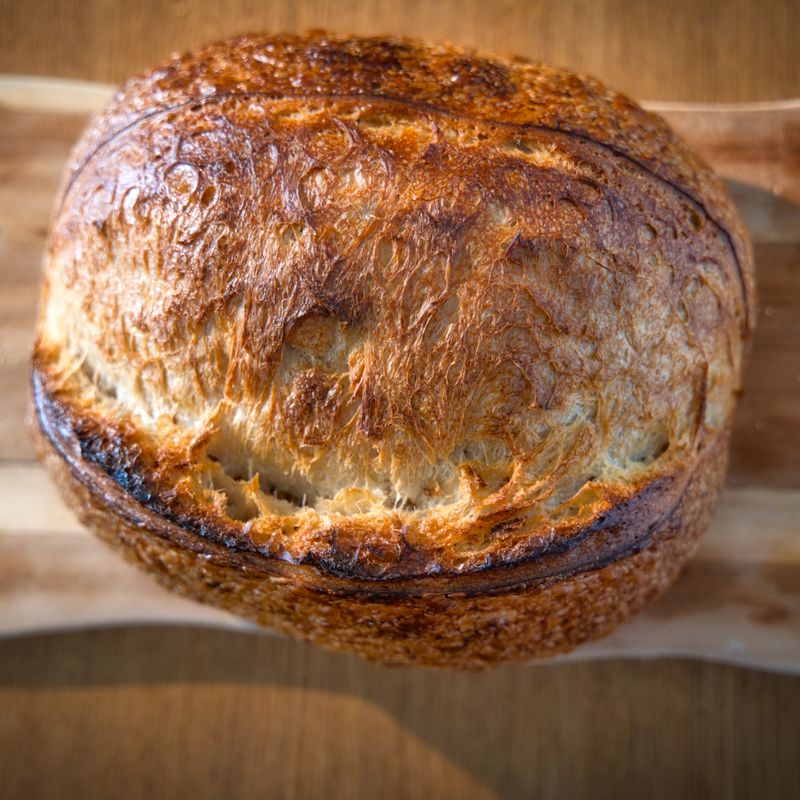
Sourdough Levantine Shrak Thin Bread
Shrak is a legendary Levantine flatbread traditionally stretched so thin you can almost see through it and cooked on a convex griddle. This sourdough version uses wild yeast for deep flavor and superior fermentation structure, making the dough easier to stretch and giving the bread a subtle tang and excellent keeping quality. The extended cold fermentation develops the gluten network, and the high hydration creates the characteristic open crumb and tender texture.
- Prep
- 30 min
- Cook
- 16 min
- Wait
- 9 hr
- Total
- 9 hr 46 min
- Makes
- 4 breads (serves 4–8 people)
Steps
Before you start
- Ensure your sourdough starter is active and bubbly, ideally fed 4–6 hours before use (it should at least double within a few hours of feeding).
- Use bread flour or high-protein all-purpose flour (at least 12% protein) for extensibility and structure.
- Clear a large work surface for stretching—at least 24 inches wide.
Mix the dough
- In a large bowl, combine the active sourdough starter, bread flour, and lukewarm water.
- Using your hands or a dough scraper, mix until all flour is hydrated and no dry streaks remain.
- The dough will be shaggy and slightly sticky.
- Let rest for 20 minutes at room temperature (autolyse) to allow the flour to fully absorb the water.
+ Show details− Hide details
Ready when: All flour is moistened and dough holds together loosely
Tip: Don't add salt yet—it will tighten the dough and interfere with the autolyse.
Add salt and oil
- Sprinkle the fine sea salt and 2 tablespoons of olive oil over the rested dough.
- Using wet fingers, pinch and fold the dough on itself about 15–20 times, working the salt and oil in and beginning to develop gluten.
- The dough should feel slightly firmer and more cohesive.
+ Show details− Hide details
Ready when: Salt and oil are fully incorporated; dough is stronger and less sticky
Tip: Use wet fingers to prevent sticking and to help the dough come together. This is not a long knead—just enough to combine.
Bulk ferment with folds
- Place the dough in a clean bowl and cover with a damp cloth.
- Let it rest at room temperature (68–72°F / 20–22°C) for 4 hours.
- Perform 4 sets of stretch-and-folds during the first 2 hours: every 30 minutes, wet your hand, grab one side of the dough, stretch it up and fold it over the center, rotate the bowl 90 degrees, and repeat until you've folded from all four sides.
- This builds strength without vigorous kneading.
- After 2 hours (two stretch-and-folds in), the dough should feel smooth and slightly puffy.
- Continue fermenting without folds for the remaining 2 hours.
+ Show details− Hide details
Ready when: Dough is 50–75% larger, passes poke test (indent slowly springs back halfway), and has a slightly domed top
Tip: Stretch-and-folds are essential for building strength in high-hydration dough without deflating it. Don't skip them.
Shape into rounds
- Turn the dough onto an unfloured surface and divide it into 4 equal pieces using a dough scraper or bench knife (aim for roughly 200 g each, if weighing).
- Working with one piece at a time, gently pre-shape each into a loose round by pulling the edges up and under, creating tension on the surface.
- Place each round seam-side down on parchment paper or a cloth towel, spacing them 2 inches apart.
+ Show details− Hide details
Ready when: Four loose, smooth rounds with gentle surface tension
Tip: Don't overwork the dough—gentle shaping preserves the gas developed during bulk fermentation.
Cold retard overnight
- Cover the shaped rounds with an inverted bowl or plastic wrap and refrigerate for 12–18 hours at 38–40°F (3–4°C).
- This long, cold fermentation develops flavor, makes the dough much easier to stretch, and allows the gluten to fully relax.
+ Show details− Hide details
Tip: If time is short, retard for at least 8 hours. Overnight is ideal—the dough stretches much better when cold and rested.
Remove dough and let warm slightly
- Remove the dough rounds from the refrigerator and let them sit uncovered at room temperature for 10–15 minutes to take the chill off.
- They should still feel cold but be pliable enough to stretch without tearing.
+ Show details− Hide details
Ready when: Dough is still cool but feels supple and not brittle
Tip: Don't let them warm fully to room temperature—cold dough stretches much better than warm dough for shrak.
Stretch the dough thin
- Pour the 3 tablespoons of olive oil into a small shallow bowl.
- Working with one dough round at a time, dip both sides lightly into the oil, then place it on your work surface.
- Using your fingertips and palms (not a rolling pin), gently stretch the dough from the center outward, working all sides evenly.
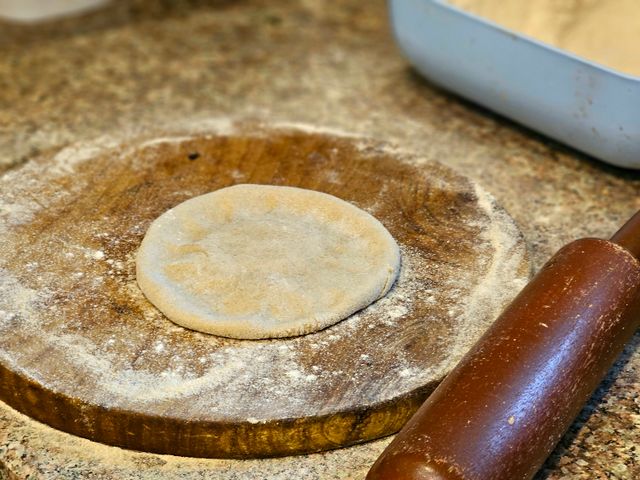
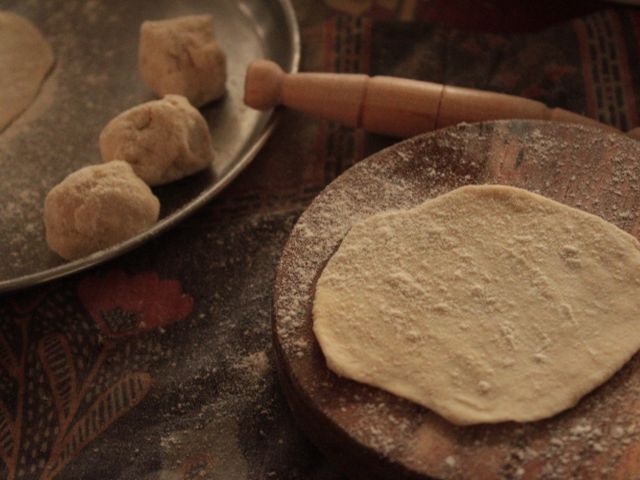
- Lift it carefully and drape it over your knuckles if you're experienced, or continue stretching on the counter, aiming for a 10–12 inch round that is nearly transparent in places (you should almost be able to see your hand through the thinnest spots).
- The edges will be thicker; this is correct.
- Work slowly and gently—if the dough tears, patch it with a scrap of oil-brushed dough.
+ Show details− Hide details
Ready when: Dough is stretched to 10–12 inches, thin and translucent, with no thick spots
Tip: If the dough springs back aggressively, let it rest 2 minutes before resuming—a brief rest will relax the gluten. Use the oil; it is essential for stretching and prevents tearing.
Preheat griddle or skilletOven 400°F / 205°C
- While you finish stretching the first bread, preheat a 10-inch cast-iron skillet or flat griddle over medium-high heat (around 400°F / 200°C) for 3–4 minutes.
- The pan should be very hot but not smoking; a drop of water should sizzle and evaporate in 1–2 seconds.
+ Show details− Hide details
Ready when: Pan is evenly hot; a water drop sizzles immediately
Tip: A properly heated pan ensures quick cooking and even browning. If the pan is too cool, the bread will be soft and pale; if too hot, the bottom burns before the bread cooks through.
Cook first bread on griddle
- Carefully lift the first stretched dough round and gently lay it onto the hot skillet.
- It will immediately begin to puff and bubble.
- Cook for 3–4 minutes, watching for golden-brown spots to appear on the bottom.
- Once the bottom is golden and lightly charred in a few spots, flip carefully and cook the other side for 2–3 minutes until also golden and spotted.
- The bread should puff up dramatically and feel light and airy.
- Transfer to a clean kitchen towel and cover loosely to keep warm.
+ Show details− Hide details
Ready when: Both sides are golden brown with light charred spots; bread is puffed and airy
Tip: Don't press down on the bread while cooking—let it puff naturally. If it's browning too fast, lower the heat slightly.
Cook remaining breads
- Repeat the stretching and cooking process with the remaining three dough rounds, working one at a time.
- Keep cooked breads wrapped loosely in the towel to stay warm and soft.
+ Show details− Hide details
Ready when: All four breads are cooked, golden, and puffed
Tip: Between breads, check the pan temperature—if it's cooling, allow it to reheat for 1 minute. Consistency in heat ensures even results.
Finish with herbs and oil (optional)
- While the breads are still warm, brush lightly with additional olive oil and sprinkle with zaatar blend and/or fresh chopped mint or parsley if desired.
- Serve immediately with labneh, hummus, or fresh salads.
+ Show details− Hide details
Tip: Apply toppings while bread is warm so they adhere. The hot bread also releases the aromas of the herbs.
Good to know
Tips
- Cold-retarded dough is the key to shrak: it stretches far more easily and has a more developed, complex flavor than room-temperature dough.
- Paper-thin translucent dough is the goal, but slightly thicker areas or small tears are normal and don't affect the final result. Embrace the rustic nature of the bread.
- The sourdough tang pairs beautifully with fresh herbs, labneh, cheese, and cooked vegetables. Shrak is as much a vehicle for fillings as it is a bread.
- If your sourdough starter is weaker or less active, allow an extra 1–2 hours of bulk fermentation, as long as the dough still passes the poke test and hasn't over-fermented (which would be slack and sticky).
Make ahead
Dough can be shaped and retarded in the fridge for up to 24 hours before cooking. The cold fermentation only improves the flavor and extensibility. After cooking, breads are best eaten fresh but can be wrapped and stored for 1 day, then reheated gently (see storage).
Storage & reheating
Room temperature (in a sealed container or wrapped in cloth): 1 day. Refrigerator: wrap cooled breads in plastic wrap or store in an airtight container for up to 3 days. Reheat gently in a dry skillet over medium heat for 1–2 minutes per side, or wrap in foil and warm in a 300°F (150°C) oven for 5–8 minutes until soft. Freezer: wrap each bread individually in plastic wrap and foil; freeze for up to 1 month. Thaw at room temperature for 1 hour, then reheat as above.
Substitutions
- bread flour → all-purpose flour with 11–13% protein. All-purpose flour works well if bread flour is unavailable. Choose a higher-protein brand for the best stretch and structure.
- zaatar blend (dried thyme, sumac, sesame, salt) → dukkah (Egyptian spice blend) or sumac and dried thyme. Zaatar is traditional, but other Middle Eastern spice blends work beautifully. Make your own with dried thyme, sumac, and toasted sesame seeds.
- fresh mint or parsley → fresh cilantro, oregano, or dill. Fresh herbs are optional but wonderful. Use whatever is available and aromatic.
- olive oil → neutral oil (vegetable, canola, or light olive oil). Extra virgin olive oil adds flavor, but any neutral oil will work for stretching and cooking.
More flatbread doughs
See all →
Find more like this
- Meal
- Dinner
- Cuisine
- Palestinian
- Quick & Easy
- 5 Ingredients or LessMake Ahead