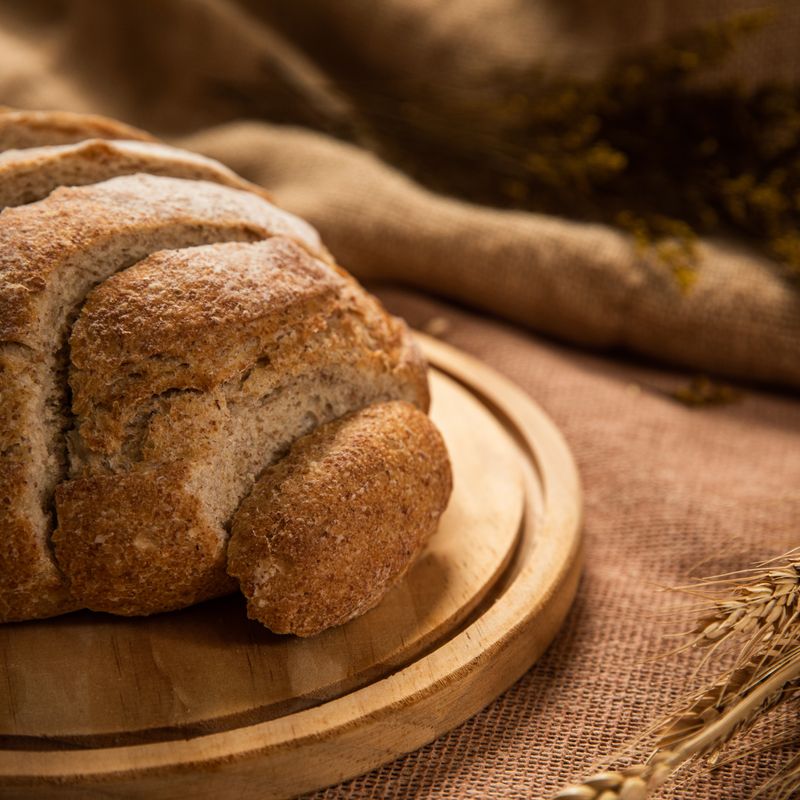
Sourdough Hemp Heart and Flax Seed Loaf
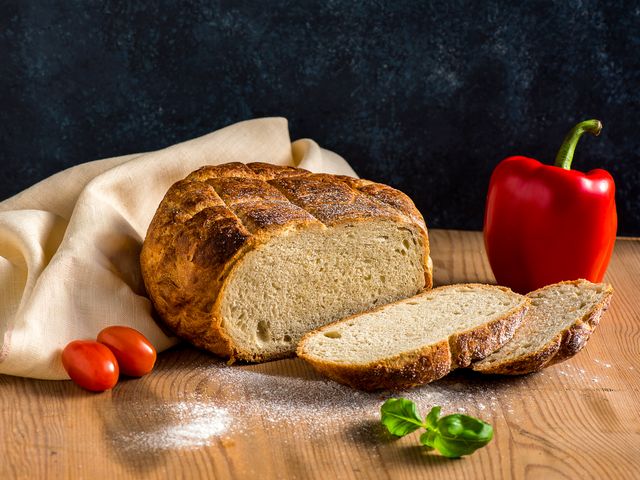
A nutty, protein-rich sourdough loaf studded with hemp hearts and flax seeds. The long fermentation develops complex flavor while the seeds add texture, nutrition, and a subtle earthy taste. This is a naturally leavened bread that takes time but rewards with an open crumb, chewy texture, and impressive nutritional profile.
- Prep
- 20 min
- Cook
- 45 min
- Wait
- 18 hr
- Total
- 19 hr 5 min
- Makes
- 1 loaf (10–12 slices)
Steps
Before you start
- Ensure your sourdough starter is active and bubbly, fed 4–8 hours before (or overnight at room temperature)
- Toast the hemp hearts and flax seeds lightly in a dry pan for 1–2 minutes to enhance their nutty flavor (optional but recommended)
- Use bread flour or all-purpose flour for a stronger gluten network; whole wheat adds nutrition but more water absorption
- Plan ahead: bulk fermentation takes 4–5 hours, final proof 8–12 hours or overnight
Prepare seeds and dough mixture
- In a small bowl, combine the hemp hearts and flax seeds with 60 ml (¼ cup) of warm water.
- Let them soak for 15 minutes to soften slightly and become easier to incorporate.
- Meanwhile, in a large mixing bowl, combine the active sourdough starter, bread flour, whole wheat flour, and 380 ml (1½ cups) of room-temperature water.
- Mix with your hands or a stand mixer on low speed until all dry flour is hydrated.
- The dough should look shaggy and slightly tacky.
+ Show details− Hide details
Ready when: All flour is hydrated; dough is shaggy but cohesive
Tip: Don't overwork the dough at this stage; rough mixing prevents gluten overdevelopment before autolyse.
Autolyse rest
- Cover the bowl with a damp kitchen towel or plastic wrap and let the dough rest at room temperature (68–72°F / 20–22°C) for 30 minutes.
- This allows the flour to fully absorb water and begins gluten development.
+ Show details− Hide details
Ready when: Dough is noticeably more cohesive and slightly elastic
Tip: A warm kitchen will speed this step; a cool one may require a few extra minutes.
Mix in salt and soaked seeds
- After the rest, add the fine sea salt and the drained soaked seeds (with any remaining water) to the dough.
- Using wet hands or a dough hook on low-medium speed, mix for 3–4 minutes until the salt is fully dissolved and the seeds are evenly distributed throughout.
- The dough will feel smoother and more elastic.
+ Show details− Hide details
Ready when: Salt is fully dissolved; seeds are evenly dispersed; dough feels smooth and slightly tacky
Tip: Wet hands prevent sticking when mixing by hand. Adding salt after the autolyse strengthens the dough without inhibiting initial fermentation.
Bulk fermentation with stretch-and-folds
- Return the dough to the bowl.
- Over the next 2–2.5 hours, perform 4 sets of stretch-and-folds at 30-minute intervals.
- For each stretch-and-fold: wet your hand, grab the bottom of the dough, stretch it up and fold it over the top, rotate the bowl 90°, and repeat 4 times (total of 4 folds per set).
- After the final set, let the dough rest without folding until it has increased by 50–70% in volume, which should take another 60–90 minutes.
- The dough will look puffy, jiggly, and hold a slight indent when poked.
+ Show details− Hide details
Ready when: Dough increased 50–70% in volume; holds a slight indent when poked; has a smooth, domed surface
Tip: Stretch-and-folds strengthen the dough without intensive kneading and are essential for sourdough open crumb. Room temperature matters: cooler kitchens (65–68°F / 18–20°C) need longer bulk fermentation.
Pre-shape and bench rest
- Lightly flour a work surface.
- Turn the dough out (gentle handling—do not deflate) and pre-shape it into a round by tucking the edges toward the center, rotating as you go, until it forms a taut surface.
- Let it rest on the floured surface for 20–25 minutes.
- This resting period allows the gluten to relax.
+ Show details− Hide details
Ready when: Dough has relaxed slightly and is no longer under tension
Tip: Don't over-flour or the final loaf will have a floury crust; use just enough to prevent sticking.
Final shape
- Flip the pre-shaped round seam-side up.
- Cup your hands around it and gently pull it toward you 3–4 times to build surface tension.
- Flip it seam-side down.
- Working from the top, fold the top third of the dough toward you, press lightly, then fold the bottom third up and seal with the heel of your hand.
- Roll the dough toward you, sealing the seam with light pressure.
- The final loaf should be taut on top and sealed on the bottom.
+ Show details− Hide details
Ready when: Seam is sealed; surface is taut and smooth
Tip: A well-sealed seam prevents the loaf from splitting open in an uncontrolled way during baking. Surface tension helps the loaf rise up rather than out.
Final proof (cold retard)
- Place the shaped dough seam-side up in a floured banneton or a bowl lined with a floured kitchen towel.
- Cover loosely with plastic wrap and place in the refrigerator at 38–40°F (3–4°C) for 8–12 hours (or up to 16 hours).
- The cold fermentation slows yeast activity, develops sourness, and makes the dough easier to score.
- The dough does not need to rise much in the fridge; it will continue to ferment gently.
+ Show details− Hide details
Ready when: Dough has risen slightly (20–30%) in the fridge; poke test shows slow spring-back (not fully springing back)
Tip: A long, cold final proof is the hallmark of excellent sourdough flavor. You can also do a room-temperature proof for 4–5 hours if you're in a hurry, but cold proof is superior.
Preheat oven and scoreOven 475°F / 245°C
- About 30–45 minutes before baking, remove the dough from the fridge and preheat your oven to 475°F (245°C).
- Place your Dutch oven (covered) in the oven to preheat as well.
- Invert the banneton onto a piece of parchment paper, so the seam side is now down.
- Using a bread lame or sharp serrated knife, score the top of the loaf with one or two confident slashes, ¼ inch (6 mm) deep at a 30–45° angle.
- This guides the oven spring and creates the characteristic "ear."
+ Show details− Hide details
Ready when: Oven and Dutch oven are fully preheated; dough is ready to bake
Tip: A wet lame or knife (dipped in water) scores more cleanly. Hesitant scoring can tear the dough; use a swift, confident motion.
Bake coveredOven 450°F / 230°C
- Carefully lift the parchment with the scored dough and transfer it into the hot Dutch oven.
- Cover the Dutch oven with its lid.
- Reduce the oven temperature to 450°F (232°C) and bake for 25–30 minutes.
- This initial covered phase traps steam, allowing the dough to spring up without the crust setting too quickly.
+ Show details− Hide details
Ready when: Dough has risen noticeably and the lid is slightly steamy
Tip: The Dutch oven traps steam that is released from the dough, creating the crust texture. Don't peek during this phase.
Bake uncoveredOven 475°F / 245°C
- Remove the lid from the Dutch oven.
- Increase the oven temperature to 475°F (245°C) and bake uncovered for 15–18 minutes, until the loaf is deep golden brown.
- The crust should be firm and sound hollow when tapped on the bottom.
- An instant-read thermometer inserted into the center should read 205–210°F (96–99°C).
+ Show details− Hide details
Ready when: Loaf is deep golden brown; sounds hollow when tapped; internal temperature is 205–210°F (96–99°C)
Tip: If the loaf is browning too quickly, tent it loosely with foil. A well-baked loaf will sound slightly crispy, not dull.
Cool completely
- Transfer the loaf to a wire cooling rack (still on parchment is fine).
- Let it cool at room temperature for at least 1 hour before slicing.
- The interior continues to cook and set during this time.
- Resist the urge to slice early; a warm loaf's interior is still too moist and will compress under the knife.
+ Show details− Hide details
Ready when: Loaf is completely cool to the touch; the bottom is no longer steamy
Tip: A perfectly cooled loaf will have a crisp, thin crust and a tender, open crumb. The flavor also improves as it cools.
Slice and serve
- Once cool, slice the loaf using a serrated bread knife with a gentle sawing motion.
- Store leftovers as directed in the storage section.
- Enjoy with butter, your favorite spread, or simply toasted.
+ Show details− Hide details
Ready when: Slices are clean and the crumb is open and chewy
Tip: A sharp serrated knife is essential; a dull knife will compress the crumb and create ragged slices.
Good to know
Tips
- Always use an active, bubbly starter that has been fed 4–8 hours prior. A sluggish starter will result in a slow rise and bland flavor.
- Room temperature affects fermentation time dramatically. At 68–70°F (20–21°C), bulk fermentation takes 4–5 hours; at 72–75°F (22–24°C), it may take 3–4 hours. Aim for consistent temperatures.
- The poke test is your best guide: gently poke the dough during bulk and final proof. If it springs back slowly (not immediately), it's ready; if it springs back quickly, it needs more time; if it doesn't spring back at all, it may be overproofed.
- Seeds can be toasted separately in a dry pan over medium heat for 1–2 minutes before soaking. This enhances their nutty flavor, though it's optional. Let them cool before adding to the dough.
Make ahead
You can prepare the dough through the bulk fermentation stage on one day and transfer it to cold proof in the fridge overnight (or up to 16 hours). This is ideal for a fresh loaf for breakfast or lunch the next day. Alternatively, after the loaf is completely cooled, wrap it tightly in plastic wrap or place it in a bread box and store at room temperature for 2–3 days before slicing.
Storage & reheating
Room temperature (68–72°F / 20–22°C): Store in a bread box or wrapped loosely in paper for up to 3 days. The crust will soften slightly. Refrigerator (38–40°F / 3–4°C): Place in an airtight container or wrap tightly in plastic wrap for up to 7 days. The crumb may become slightly denser; slice and toast before serving. Freezer (0°F / –18°C): Wrap the completely cooled loaf in plastic wrap, then place in a freezer bag and freeze for up to 3 months. Thaw at room temperature (still wrapped) for 2–3 hours, or slice while frozen and toast directly. The texture and flavor remain excellent.
Substitutions
- raw hemp hearts (shelled hemp seeds) → sunflower seeds or pumpkin seeds (raw or lightly toasted). Hemp hearts have a mild, nutty taste; sunflower and pumpkin seeds are slightly earthier. Use the same weight (75 g). Both will provide similar texture and nutrition.
- whole flax seeds → sesame seeds or poppy seeds. Flax seeds are slightly gelatinous when hydrated; sesame and poppy seeds are crunchier. Use the same weight (50 g) for consistency.
- whole wheat flour → rye flour or spelt flour. Both add nutty complexity. Rye absorbs more water; reduce the main water by 20 ml (⅛ cup) if substituting. Spelt is closer to wheat in hydration.
- bread flour → all-purpose flour. All-purpose flour has lower protein (10–12%) than bread flour (12–14%), resulting in a slightly denser crumb but still excellent loaf. No hydration adjustment needed.
More yeast breads
See all →


Find more like this
- Meal
- Breakfast
- Method
- Oven
- Quick & Easy
- Make AheadFreezer Friendly