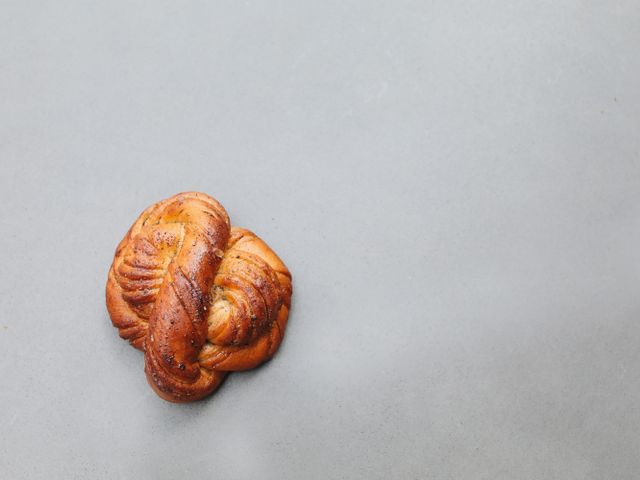
French Brioche Feuilletée Rolls
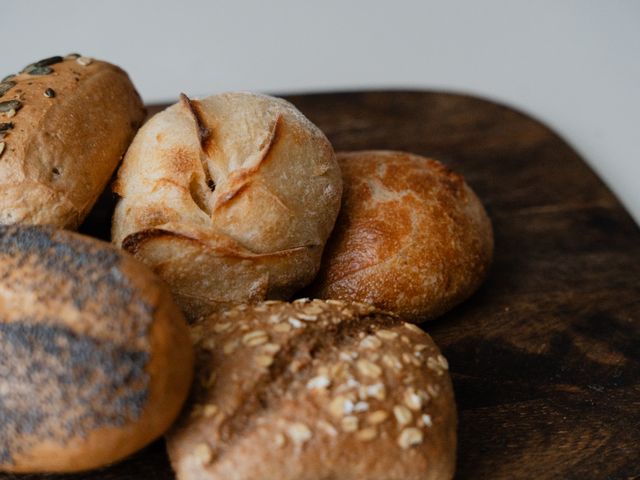
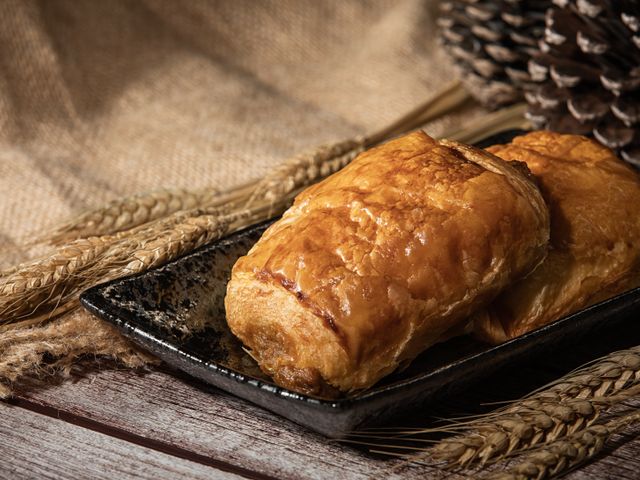
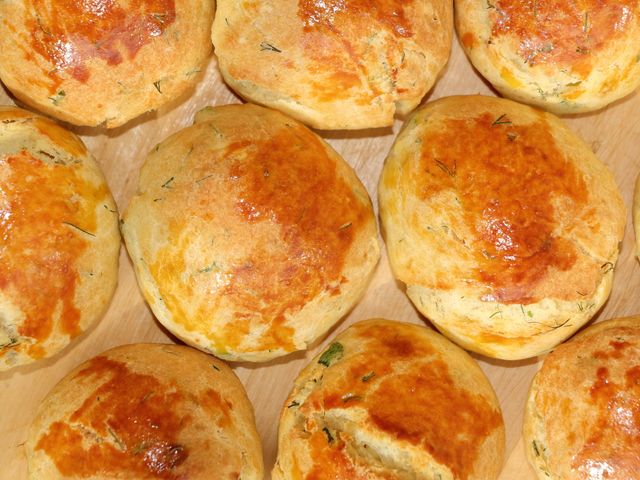
Light, buttery laminated brioche rolls with delicate pastry-like layers. These French-style rolls combine a tender brioche dough with a butter lamination technique, creating a sophisticated cross between a croissant and an enriched bread roll. Brushed with egg wash and topped with pearl sugar for a subtle crunch, they're perfect for breakfast, brunch, or as an elegant side to dinner.
- Prep
- 45 min
- Cook
- 25 min
- Wait
- 4 hr 45 min
- Total
- 5 hr 55 min
- Makes
- 12 rolls
Steps
Before you start
- Remove butter from the refrigerator 1 hour before lamination so it's cold but pliable
- Have all equipment ready: precise kitchen scale, dough scraper, and pastry bench
- Read through the entire lamination process to understand the fold sequence
- Clear at least 3 hours for the full process including multiple rest periods
Mix the dough
- In the bowl of a stand mixer fitted with the dough hook, combine flour, salt, instant yeast, and granulated sugar.
- Add the warmed milk and egg yolks, then vanilla extract.
- Mix on low speed for 2 minutes until the mixture comes together, then increase to medium speed and knead for 8–10 minutes.
- The dough should be soft, slightly sticky, and shiny, but hold its shape.
- Add the cold butter cubes one at a time while mixing on medium speed, letting each cube incorporate fully before adding the next (about 3–4 minutes total).
- The dough will be very soft and somewhat slippery.
+ Show details− Hide details
Ready when: Dough is soft, shiny, and holds its shape when you lift the hook
Tip: Add butter slowly to prevent it from splattering or the dough from breaking. The dough will look slippery and soft—this is correct for brioche.
First rise in bulk
- Transfer the dough to a clean bowl lightly oiled or lined with plastic wrap (no need to oil if using plastic).
- Cover tightly with plastic wrap and let rest at room temperature (68–72°F / 20–22°C) for 60 minutes.
- The dough should increase by about 25–30% in volume; it will not double because lamination begins while it's still quite soft.
+ Show details− Hide details
Ready when: Dough is puffy and about 25–30% larger, with visible air pockets
Tip: Do not let the dough rise longer than 60–70 minutes or it will become too warm and soft for lamination. Cold dough is essential for clean butter layers.
Prepare lamination butter
- While the dough rests, remove the lamination butter from the refrigerator and let it sit for 20–30 minutes until it is cold but pliable.
- It should bend without cracking.
- Place it on a sheet of parchment paper and, using the heel of your hand or a dough scraper, shape and flatten it into a rough 5×5-inch (13×13 cm) square, about ¼ inch thick.
- Return to the refrigerator until you're ready to use it.
+ Show details− Hide details
Ready when: Butter bends without cracking and is soft enough to spread but still cold
Tip: Butter that's too hard will shatter during folding; too soft will smear. Aim for the consistency of a cold room-temperature stick.
First fold (create butter layer)
- Turn the chilled dough out onto a lightly floured work surface.
- Using your fingertips, gently press and stretch the dough into a 10×8-inch (25×20 cm) rectangle, with the long side facing you.
- Remove the lamination butter square from the parchment and place it in the center of the dough.
- Fold the left third of the dough over the butter, then fold the right third over the top, creating an envelope.
- Gently press the edges to seal.
- Rotate the dough 90 degrees so a seam faces you.
- Using a rolling pin, gently roll the dough to a 10×8-inch rectangle again, maintaining even thickness and trying not to break through the layers.
- If the dough becomes warm or slippery, slide it onto a parchment-lined baking sheet, cover with plastic wrap, and chill for 15 minutes.
+ Show details− Hide details
Ready when: Dough is a smooth rectangle with butter visible at the edges when you look at the side
Tip: Keep your work surface floured but not wet. Use a dough scraper to help lift and fold. If you see butter peeking through, chill immediately or it will smear.
Second fold (roll and rest)
- Fold the dough in thirds again: fold the bottom third up toward the center, then fold the top third down over it, creating a letter fold.
- Press gently to seal.
- Rotate 90 degrees.
- Lightly roll the dough to a 10×8-inch rectangle once more.
- Place on a parchment-lined baking sheet, cover with plastic wrap, and refrigerate for 30 minutes.
+ Show details− Hide details
Ready when: Dough is smooth and holds its shape; butter is no longer visible at the edges
Tip: The dough should be cool to the touch before you refrigerate. If still warm, chill for 5–10 minutes on the counter first.
Third fold (final lamination)
- Remove the dough from the refrigerator.
- Gently roll it out to a 10×8-inch rectangle.
- Perform one more letter fold (bottom third up, top third down), rotate 90 degrees, and lightly roll to a 10×8-inch rectangle.
- Place back on the parchment-lined baking sheet, cover with plastic wrap, and refrigerate for at least 20 minutes (up to 2 hours is fine).
+ Show details− Hide details
Ready when: Dough is firm, cold, and shows fine layers when folded
Tip: You now have roughly 27 layers of butter and dough. Do not fold more than 3 times or the layers will become too thin and stick together.
Cut and shape rolls
- Remove the dough from the refrigerator and place on a lightly floured work surface.
- Using a sharp knife or dough scraper dipped in water, cut the dough in half lengthwise, then cut each half into 6 pieces, creating 12 roughly 2-inch (5 cm) wide rectangles.
- You may also roll each piece slightly into a ball if you prefer a rounder shape, though rectangles showcase the lamination better.
- Place the rolls on two parchment-lined baking sheets (6 rolls per sheet), spacing them about 2 inches apart.
+ Show details− Hide details
Ready when: 12 evenly sized rolls are cut and placed on sheets
Tip: Use a sharp, wet knife to cut cleanly without crushing the layers. Dull knives compress the dough and ruin the lamination.
Final proof (second rise)
- Cover the baking sheets loosely with plastic wrap and let the rolls proof at room temperature (68–72°F / 20–22°C) for 60–80 minutes.
- The rolls should increase by about 50% in volume and feel light and airy when gently pressed with one finger.
- They should not double in size or they will spread too much during baking.
+ Show details− Hide details
Ready when: Rolls are puffy and spring back slowly when poked; they increase by about 50% in height
Tip: Avoid letting them overproof. They should still hold their shape and not collapse when you touch them. If your kitchen is very warm, proof for 50–60 minutes only.
Preheat oven and prepare egg washOven 400°F / 205°C
- About 15 minutes before baking, preheat the oven to 400°F (200°C).
- While the oven heats, prepare the egg wash by whisking together the egg yolk and water in a small bowl until smooth and well combined.
+ Show details− Hide details
Ready when: Oven is preheated to 400°F (200°C)
Tip: Make egg wash just before use so it doesn't separate or dry out.
Brush and topOven 400°F / 205°C
- Using a pastry brush, lightly brush each roll with the egg wash, covering all visible surfaces but avoiding the baking sheet.
- Sprinkle pearl sugar (if using) over each roll, pressing very lightly so it adheres.
- Place the baking sheets in the preheated oven.
+ Show details− Hide details
Ready when: Rolls are evenly brushed and pearl sugar is distributed
Tip: Do not over-brush with egg wash or the rolls will be shiny but less crisp. One thin, even coat is best.
Bake until goldenOven 400°F / 205°C
- Bake at 400°F (200°C) for 22–26 minutes, until the rolls are deep golden brown on all sides.
- Rotate the baking sheets halfway through (at about 12 minutes) for even browning.
- The rolls should sound hollow when tapped on the bottom, and the internal temperature should reach 190–195°F (87–90°C) if you use a meat thermometer.
+ Show details− Hide details
Ready when: Rolls are deep golden brown, sound hollow when tapped, and reach 190–195°F (87–90°C) internally
Tip: If the rolls brown too quickly, lower the oven temperature to 375°F (190°C) for the remaining time, but do not cover with foil as it will soften the crust.
Cool and serve
- Transfer the rolls to a wire cooling rack and let them rest for at least 10 minutes before serving.
- They will continue to set and firm up as they cool.
- The butter will set and the flaky, laminated layers will become more pronounced.
+ Show details− Hide details
Ready when: Rolls are cool enough to handle and feel firm but tender
Tip: Do not eat them piping hot or the butter will be too soft and the layers may seem soggy. Warm is perfect.
Optional: Recrisp before servingOven 300°F / 150°C
- If the rolls have been stored and lost some crispness, you may refresh them by wrapping in foil and warming in a 300°F (150°C) oven for 5–8 minutes, then unwrapping and allowing them to cool for 2 minutes.
- This restores the pastry-like crunch without overbaking.
+ Show details− Hide details
Ready when: Rolls are warm and smell buttery; exterior is crisp when tapped
Tip: Do not skip the unwrapping step or steam will soften the crust again.
Store as needed
- Once cool, place any leftover rolls in an airtight container lined with parchment paper, separating layers if necessary to prevent sticking.
- Keep at room temperature for up to 2 days, in the refrigerator for up to 5 days, or frozen for up to 1 month (wrapped well in plastic wrap or foil).
- Reheat gently as described above.
+ Show details− Hide details
Ready when: Rolls are stored safely in an airtight container
Tip: Rolls are best enjoyed fresh or within 24 hours, when the layers are most flaky. Freezing and reheating still works, but some delicacy is lost.
Troubleshooting: Lamination issues
- If your rolls are dense or show few layers: the dough was likely too warm during folding (chill more between folds), the butter was too soft (keep it at 60–65°F / 15–18°C), or you did not apply enough pressure when rolling to seal the butter in.
- If butter is leaking out: the dough may have been too soft or the rolling pressure was uneven (fold more carefully and chill more).
- If rolls spread too much: you overproofed them (shorten the final rise) or the oven temperature was too low (verify with an oven thermometer).
Good to know
Tips
- Precision and temperature are critical for lamination. Use a kitchen scale and keep dough and butter at consistent cool temperatures. Invest in a good instant-read thermometer to verify milk temperature and final internal temperature of baked rolls.
- The lamination process takes time, but the rest periods are essential—they relax the gluten, prevent shrinkage, and allow the butter to stay evenly distributed. Do not rush or skip the chilling steps.
- If you live in a very warm kitchen (above 75°F / 24°C), work with smaller batches, use cooler milk, and increase refrigeration time between folds. Lamination is harder in summer.
- These rolls are beautiful and impress guests, but they are also more forgiving than croissants because the dough is enriched with egg and butter from the start. Minor imperfections in folding will not ruin the final product.
Make ahead
Lamination can be completed up to 8 hours ahead: after the third fold (Step 6), wrap the dough sheet tightly in plastic wrap and refrigerate overnight. The next morning, proceed directly to Step 7 (cutting and shaping). The rolls can also be shaped and proofed for 30 minutes, then wrapped and frozen for up to 2 weeks; bake directly from frozen, adding 8–10 extra minutes to the baking time and watching for even browning.
Storage & reheating
Room temperature: up to 2 days in an airtight container. Refrigerator: up to 5 days in an airtight container or wrapped in foil; reheat wrapped in foil at 300°F (150°C) for 5–8 minutes. Freezer: up to 1 month wrapped tightly in plastic wrap and foil; thaw at room temperature for 2–3 hours, then reheat at 300°F (150°C) for 8–10 minutes wrapped in foil. Baked rolls freeze better than shaped, unproofed dough.
Substitutions
- instant (bread) yeast → active dry yeast. Use the same weight (5 g) but dissolve it in the warm milk for 5 minutes before adding to the mixer to activate it fully.
- pearl sugar (or coarse sanding sugar) → coarse sanding sugar or demerara sugar. Pearl sugar is ideal for its size and crunch, but coarse sugar works and will dissolve slightly more during baking. Use the same amount.
- large egg yolks → whole large eggs (use 2 instead of 3). The rolls will be slightly less rich, but the structure and lamination will remain good. Reduce milk slightly to 0.5 cup (120 ml) so the dough is not too wet.
- pure vanilla extract → omit or replace with a pinch of ground cardamom or nutmeg. Vanilla adds a subtle sweetness; omitting it creates a more savory brioche. Cardamom is traditional in some Scandinavian laminated brioche styles.