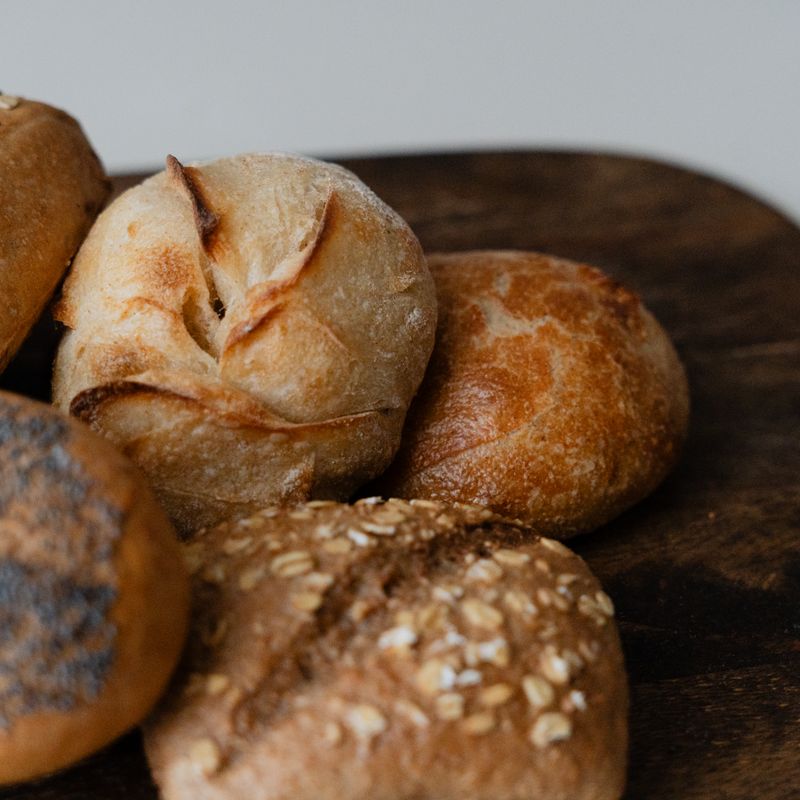
French Pains aux Cèréales (Multigrain Rolls)
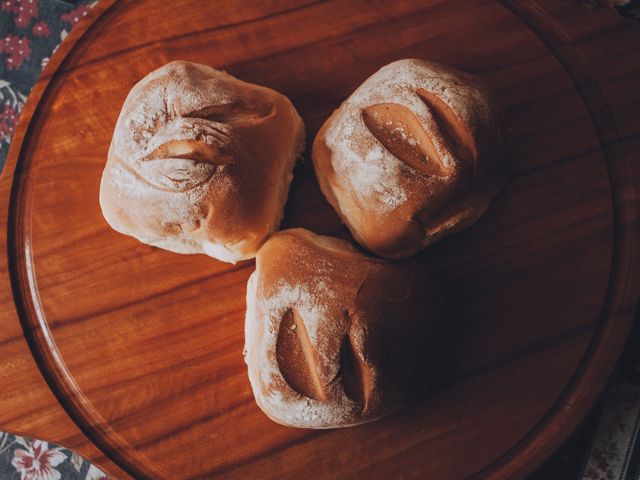
Rustic French multigrain rolls studded with oats, rye flour, and flax seeds. These artisan-style rolls have a tender crumb, chewy crust, and nutty flavor from a blend of whole grains and seeds. Perfect for breakfast or alongside dinner, they're made with a natural fermentation method that develops complex taste.
- Prep
- 20 min
- Cook
- 25 min
- Wait
- 2 hr 35 min
- Total
- 3 hr 20 min
- Makes
- 8 rolls
Steps
Before you start
- Remove eggs from refrigerator 30 minutes before baking to bring to room temperature
- Preheat oven to 425°F (220°C) about 15 minutes before the rolls finish their final rise
- Prepare a large mixing bowl and a baking sheet lined with parchment paper
Mix dry ingredients
- In a large bowl, whisk together 300 g bread flour, 90 g rye flour, 50 g rolled oats, 30 g flax seeds, optional 30 g sunflower seeds, 5 g instant yeast, and 7 g sea salt.
- Whisk for 1 minute to aerate and distribute the yeast evenly throughout the dry mixture.
+ Show details− Hide details
Ready when: Mixture is evenly combined with visible flax and oat pieces throughout
Tip: Whisking helps distribute the yeast evenly, which leads to more consistent rise across all rolls
Add water and butter
- Pour 260 ml room-temperature water into the dry mixture.
- Add 30 g soft unsalted butter.
- Using a stand mixer with dough hook, mix on medium-low speed for 5 minutes until a shaggy dough forms.
- The mixture will look rough and slightly wet.
+ Show details− Hide details
Ready when: Dough comes together into a slightly sticky mass with no dry flour visible at the bottom of the bowl
Tip: If mixing by hand, stir with a wooden spoon until you cannot mix further, then knead by hand for 2 minutes
Knead dough
- Continue mixing on medium speed for 6–7 minutes.
- The dough should become smoother, more elastic, and slightly tacky but not sticky (it will not be as smooth as white bread dough due to the whole grains).
- Stop the mixer and feel the dough; it should be soft and hold together when squeezed.
+ Show details− Hide details
Ready when: Dough is elastic, pulls away from the sides of the bowl, and springs back when poked
Tip: Multigrain doughs are naturally wetter than white bread doughs; resist adding extra flour even if it feels sticky
First rise
- Transfer dough to a lightly oiled bowl.
- Cover with a damp kitchen towel or plastic wrap.
- Let rise at room temperature (68–72°F / 20–22°C) for 60 minutes.
- The dough should increase in volume by about 50–75% but does not need to double.
+ Show details− Hide details
Ready when: Dough is visibly puffed and feels airy; poke test—your finger leaves an indent that springs back slowly
Tip: A cooler room temperature (around 68°F) slows fermentation and improves flavor; do not rush this step with heat
Shape rolls
- Turn dough out onto a lightly floured work surface.
- Using a bench scraper, divide dough into 8 equal portions (each about 85 g).
- For each piece, gently shape by cupping your hands and rolling it toward you on the work surface to create surface tension, then place seam-side down on a parchment-lined baking sheet, spacing rolls 2 inches (5 cm) apart.
+ Show details− Hide details
Ready when: Rolls are roughly ball-shaped with smooth, taut surfaces and no visible seams on top
Tip: Do not overwork or squeeze the dough; gentle shaping preserves the airy crumb structure you built during the rise
Second riseOven 425°F / 220°C
- Cover the shaped rolls loosely with a damp towel.
- Let rise at room temperature for 45–55 minutes.
- Rolls should increase by about 50%, feel pillowy when gently pressed, and a poke should leave a slow-springing indent.
- Meanwhile, preheat oven to 425°F (220°C) about 10 minutes before rolls finish rising.
+ Show details− Hide details
Ready when: Rolls are visibly puffy and gentle pressure leaves an indent that slowly springs back halfway
Tip: Avoid over-proofing; if rolls look too soft or collapse when poked, they are over-proofed and will bake flat
Apply egg wash
- In a small bowl, beat 1 egg with 1 tablespoon water.
- Remove damp towel from rolls.
- Using a pastry brush, gently brush the entire surface of each roll with egg wash, being careful not to deflate them.
+ Show details− Hide details
Ready when: Rolls have a thin, even glossy coating of egg wash
Tip: Apply egg wash gently so you do not push air out of the dough; light strokes are better than heavy brushing
Bake rollsOven 425°F / 220°C
- Place baking sheet in the preheated 425°F (220°C) oven.
- Bake for 22–25 minutes until rolls are deep golden brown on top and the bottoms are firm and golden.
- The internal temperature should reach 205–210°F (96–99°C) when measured in the center of a roll.
- For the last 5 minutes of baking, if the tops are browning too quickly, tent with a piece of foil to prevent burning.
+ Show details− Hide details
Ready when: Rolls are deep golden brown, firm to the touch, and sound hollow when tapped on the bottom; internal temperature 205–210°F
Tip: Do not open the oven door during the first 15 minutes; this lets steam escape and prevents proper crust development
Cool rolls
- Remove baking sheet from oven and transfer rolls to a wire rack.
- Cool for at least 15 minutes before serving.
- The crust will firm up and the interior will set as they cool.
- For best texture, allow at least 30 minutes of cooling before slicing.
+ Show details− Hide details
Ready when: Rolls are cool enough to handle comfortably and the crust has set firm
Tip: Slicing warm rolls will compress the crumb; wait until fully cooled for the best texture and appearance
Good to know
Tips
- Water temperature matters: room-temperature (70°F / 21°C) water ensures predictable fermentation; cold water will slow the rise, warm water will speed it
- The multigrain blend absorbs water differently than white bread flour; the dough will be noticeably softer and more open-crumbed. Trust the texture, not comparison to white bread dough
- For a more rustic crust, spray the rolls and oven walls with water right after placing them in the oven, then again after 8 minutes of baking. This creates steam and encourages crust development
- If you prefer rolls with a softer crust, brush them lightly with melted butter immediately after baking while still warm
Storage & reheating
Store cooled rolls in an airtight container at room temperature for up to 2 days. For longer storage, wrap in plastic wrap and freeze for up to 3 weeks. Thaw at room temperature for 1–2 hours, or reheat frozen rolls in a 350°F (175°C) oven for 10–12 minutes until warmed through and crispy.
Substitutions
- rye flour → spelt flour or whole wheat flour. Use the same weight (90 g); these flours create a similar nutty flavor and slightly denser crumb, though spelt is a bit milder
- flax seeds → sesame seeds or poppy seeds. Use the same weight (30 g); sesame adds a toasted note and crunch, while poppy seeds are more delicate and slightly sweet
- rolled oats → steel-cut oats or quick oats. Steel-cut oats add chewiness and texture; quick oats will result in a slightly smoother crumb. Use the same weight but increase water by 1–2 tablespoons for steel-cut oats
- instant (bread) yeast → active dry yeast or fresh yeast. Use 1.75 teaspoons active dry yeast or 8 g fresh yeast; active dry yeast requires slightly longer rising times (add 10–15 minutes to each rise)