French Couronne Rolls
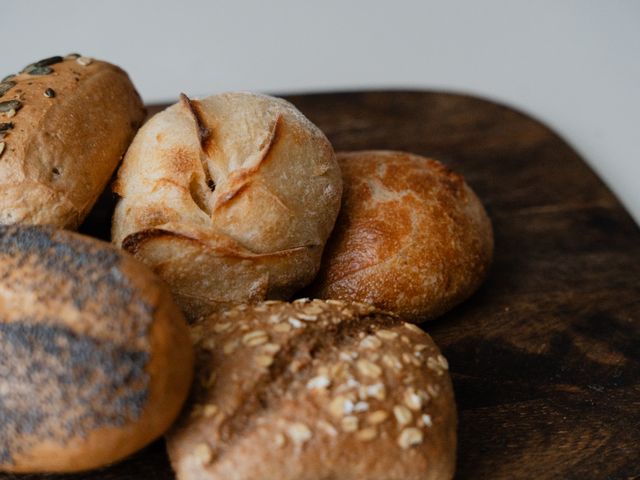
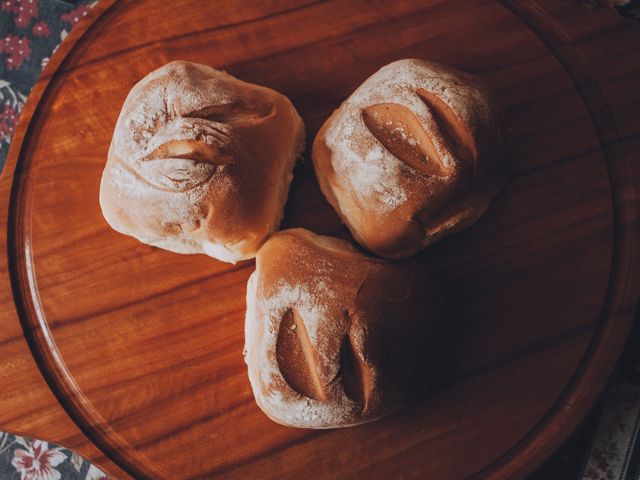
Couronne rolls are traditional French crown-shaped artisan rolls with an open, airy crumb and a crusty, seed-studded exterior. Each roll is hand-shaped into a distinctive ring, creating a visually striking presentation perfect for dinner, sandwiches, or sharing. Made with a simple, long-fermented dough that develops deep flavor, these rolls are baked until golden and crispy.
Steps
Before you start
- Read the full recipe—the dough requires long fermentation (8 hours or overnight) for flavor development
- Gather a bench scraper or dough card, a 10×14-inch (25×36 cm) rimmed baking sheet, and either a spray bottle or Dutch oven for steam
- Weigh your ingredients on a kitchen scale for accuracy with dough hydration
Mix the dough
- In a large bowl, combine 420 g bread flour, 295 ml warm water (75–80°F / 24–27°C), and 1.7 g instant yeast.
- Stir with a wooden spoon or your hand until all flour is incorporated and a shaggy dough forms, about 2 minutes.
- Cover the bowl with a damp kitchen towel and let rest for 20 minutes.
- Add 10 g fine sea salt to the dough and knead by hand for 8–10 minutes, folding and slapping it against the bowl until smooth and slightly tacky.
- The dough should pull away from the bowl edges but stick slightly to your fingers.
+ Show details− Hide details
Ready when: Dough is smooth, slightly tacky, and passes the windowpane test (stretch a small piece—it should thin without tearing)
Tip: Warm water speeds fermentation; cold water slows it. Adjust water temperature to aim for a final dough temperature of 75–78°F (24–26°C) for overnight fermentation.
Bulk ferment
- Transfer the dough to a clean bowl (lightly oil it if you prefer).
- Cover with a damp towel and let rise at cool room temperature (68–72°F / 20–22°C) for 8 hours, or overnight.
- The dough will roughly double and smell pleasantly sour.
+ Show details− Hide details
Ready when: Dough has increased by 50–80% in volume, jiggles slightly when the bowl is tapped, and smells tangy
Tip: If your kitchen is warmer (75°F / 24°C), reduce fermentation to 6–7 hours to prevent over-proofing. A refrigerator dough can also be shaped cold directly from the fridge.
Divide and pre-shape
- Lightly flour your work surface.
- Turn the dough out onto it and divide into 8 equal pieces (each roughly 85–90 g) using a bench scraper.
- Gently pre-shape each piece into a loose round by folding the edges to the center and flipping seam-side down.
- Let rest uncovered for 10 minutes.
+ Show details− Hide details
Ready when: Rounds are loose balls; they do not need to be tight
Tip: Avoid aggressive shaping that squeezes out gas. Gentle handling preserves the bubbles and open crumb structure.
Shape into couronne rings
- Pat each round gently into a 4-inch (10 cm) disk.
- Using your thumb and index fingers, poke a hole in the center and gently stretch the dough into a ring, roughly 4–5 inches (10–13 cm) in outer diameter with a 1.5–2-inch (4–5 cm) hole.
- The ring should be even and fairly uniform.
- Transfer each shaped roll to a parchment-lined baking sheet, spacing them about 2 inches (5 cm) apart.
- You'll fit all 8 rolls on one sheet.
+ Show details− Hide details
Ready when: Each roll is ring-shaped with a clean, open center hole
Tip: If dough springs back and won't stretch, rest it for 2–3 minutes and try again. Over-eager shaping tears the dough and releases gas.
Final proof
- Cover the shaped rolls loosely with a damp kitchen towel or plastic wrap.
- Proof at room temperature (68–72°F / 20–22°C) for 2–3 hours until they're visibly puffed—they should increase by about 50% in volume and feel airy when gently poked.
- They should not be fully doubled (avoid over-proofing, which causes flat, gummy rolls).
+ Show details− Hide details
Ready when: Rolls are noticeably puffed, pass the poke test (indent springs back slowly), and do not collapse when touched
Tip: If your kitchen is warm (75°F / 24°C or higher), reduce proofing to 1.5–2 hours. Overproofed dough will collapse in the oven and bake gummy.
Prepare oven and seed mixtureOven 450°F / 230°C
- About 30 minutes before baking, preheat your oven to 450°F (232°C).
- If using a Dutch oven for steam, place it in the oven to preheat as well.
- In a shallow bowl, combine 50 g sesame seeds, 35 g poppy seeds, and 35 g flax seeds (if using).
- In another small bowl, whisk together 1 large egg and 1 tbsp water to make an egg wash.
+ Show details− Hide details
Tip: Preheating the oven ensures the dough gets an immediate burst of heat, creating oven spring and a crispy crust.
Apply egg wash and seeds
- Brush each proofed roll generously with egg wash on the top and outer edge.
- Working quickly, dip the top of each roll into the seed mixture, pressing gently so seeds adhere.
- Tap off excess seeds.
- The rolls should have a visible, golden seed coating on top.
+ Show details− Hide details
Ready when: Each roll has an even, golden seed coating
Tip: Egg wash helps seeds stick and browns them beautifully. Apply it just before baking to prevent it from drying out and becoming chalky.
Bake with steamOven 450°F / 230°C
- Place the baking sheet in the preheated 450°F (232°C) oven.
- Immediately create steam: either spray the oven walls and rolls generously with water (3–4 quick bursts from a spray bottle), or carefully place the preheated Dutch oven lid over the rolls on the baking sheet to trap steam.
- Bake for 10 minutes with steam, then remove the steam source (spray bottle or Dutch oven lid) and bake for another 10–12 minutes until the rolls are deep golden brown on top and the seeds are toasted.
+ Show details− Hide details
Ready when: Rolls are deep golden brown, seeds are toasted (dark brown, fragrant), and the crust sounds hollow when tapped on the bottom (internal temp should reach 205–210°F / 96–99°C)
Tip: Steam in the first 10 minutes prevents the crust from setting too quickly, allowing the rolls to expand fully. Without steam, they'll be dense and pale.
Cool
- Transfer the baking sheet to a wire rack or place the rolls directly on a rack.
- Cool for at least 30 minutes before serving.
- The crust will crisp up further as they cool.
- Rolls can be eaten warm or at room temperature.
+ Show details− Hide details
Ready when: Rolls are cool enough to handle comfortably and are no longer steaming
Tip: Resist cutting into a roll immediately after baking. The interior is still setting and will be gummy if cut too soon.
Good to know
Tips
- Use a kitchen scale to weigh ingredients for consistent results. This dough's hydration (70%) is moderate; by weight, precision prevents gumminess or dryness.
- The long, cool fermentation (8 hours overnight) is key to flavor and texture. Overnight dough is also very forgiving and flexible for scheduling—you can shape and proof the next day on your timeline.
- Steam during baking is essential for a crispy, well-browned crust. If you don't have a Dutch oven, a spray bottle works perfectly—just use quick bursts to avoid shocking the oven.
- Shape the couronne gently to preserve air bubbles. Over-worked dough produces dense, gummy rolls. If dough springs back while shaping, rest it 2–3 minutes and retry.
Make ahead
Prepare the dough up to 8 hours (or overnight) ahead and refrigerate. Shape and proof directly from the cold dough (add 30–40 minutes to the final proof time), or remove from the fridge 1 hour before shaping. Fully baked rolls can be cooled and frozen for up to 3 months; reheat from frozen in a 350°F (175°C) oven for 8–10 minutes until warmed through and re-crisped.
Storage & reheating
Room temperature: up to 2 days in an airtight container or paper bag. Refrigerator: up to 5 days in an airtight container; refresh in a 350°F (175°C) oven for 5 minutes. Freezer: up to 3 months wrapped individually in plastic wrap, then placed in a freezer bag. Thaw at room temperature for 2 hours or reheat directly from frozen in a 350°F oven for 8–10 minutes.
Substitutions
- bread flour (or all-purpose flour) → all-purpose flour. Works well; the rolls will be slightly softer and less chewy. Adjust hydration by reducing water by 15 ml if the dough feels very sticky.
- sesame seeds → sunflower seeds, pumpkin seeds, or more poppy seeds. Use any seeds or a mix totaling 50 g. Nut seeds (sunflower, pumpkin) toast slightly darker and faster.
- instant (bread) yeast → 0.5 tsp active dry yeast (rehydrate in warm water for 5 minutes first) or 6 g fresh (compressed) yeast. Active dry yeast is slightly less potent; fresh yeast can be crumbled directly into the flour.
- warm water (75–80°F / 24–27°C) → whole milk mixed with water (e.g., 150 ml milk + 145 ml water). Enriches the dough and makes rolls slightly softer and richer. Reduces hydration slightly due to milk solids.