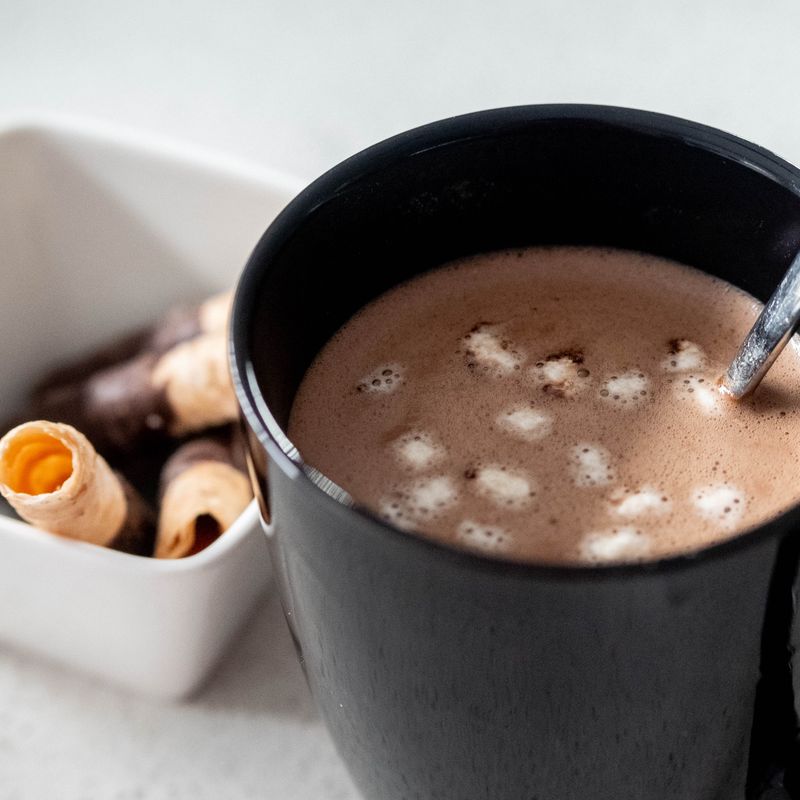
French Bâtard Mini Loaf Rolls
Rustic French bâtard rolls—small, oblong mini loaves with a crispy crust and tender, open crumb. Hand-shaped dough ferments long and slow for deep flavor, then bakes until golden. Perfect for serving alongside soup, alongside cheese boards, or split for sandwiches. Makes 6 individual rolls that look impressive on any table.
- Prep
- 30 min
- Cook
- 25 min
- Wait
- 3 hr
- Total
- 3 hr 55 min
- Makes
- 6 mini bâtard rolls
Steps
Before you start
- Read the recipe top to bottom—this dough benefits from a long, cool fermentation that builds flavor
- Position a rack in the upper third of your oven
- Have a Dutch oven or covered baking vessel ready (or use a baking stone with a pan of hot water for steam)
Mix the dough
- In a large mixing bowl, combine 3 cups (375 g) bread flour, 1.25 cups (300 ml) room-temperature water, and ½ teaspoon (3 g) instant yeast.
- Stir with your hand or a wooden spoon until all flour is hydrated and a shaggy, sticky dough forms.
- Do not add salt yet.
- Cover the bowl with a damp towel or plastic wrap and let rest for 20 minutes at room temperature (this rest period, called autolyse, hydrates the flour and develops gluten naturally).
+ Show details− Hide details
Ready when: Dough is homogeneous and sticky
Tip: Room-temperature water slows fermentation, allowing flavor to develop over time—resist using warm water for speed.
Add salt and oil
- After the 20-minute rest, sprinkle 1½ teaspoons (9 g) fine sea salt and 1½ tablespoons (22 ml) olive oil over the dough.
- Using wet fingers or a dough whisk, gently squeeze and fold the dough for 3–4 minutes until the salt and oil are fully incorporated.
- The dough will soften and become slightly less sticky as the oil is worked in.
- Cover again.
+ Show details− Hide details
Ready when: Salt and oil are fully distributed; dough is smooth and supple
Tip: Wet your fingers to prevent the dough from sticking to you—this makes the folding easier and more effective.
Bulk fermentation—first 90 minutes
- Set a timer for 90 minutes.
- Over this time, perform a series of "stretch and folds" to build dough strength without traditional kneading.
- At 30 minutes, 60 minutes, and 90 minutes into fermentation, wet your hand, reach under the dough, pull one side up and fold it over the top, rotate the bowl 90 degrees, and repeat 4 times (one complete series).
- The dough should feel slightly stronger and less sticky after each set of folds.
- By the end, it should be cohesive and hold its shape loosely.
+ Show details− Hide details
Ready when: Dough has increased in volume by 30–50% and feels airy and slightly puffy
Tip: Stretch-and-fold is gentler than kneading and creates more open crumb—don't skip these folds, as they're essential for structure.
Cold fermentation (overnight)
- After the final set of stretch-and-folds, cover the bowl tightly with plastic wrap.
- Place it in the refrigerator (38–40°F / 3–4°C) for 12–18 hours.
- Cold fermentation develops deep flavor and makes the dough easier to shape.
- You can proceed straight to shaping when ready, or allow the dough to come to room temperature for 1 hour before shaping if you prefer a slightly faster final proof.
+ Show details− Hide details
Ready when: Dough has risen noticeably in the bowl (not necessarily doubled) and smells tangy and fermented
Tip: Cold fermentation is forgiving—even if you leave the dough overnight, it won't over-proof as easily as room-temperature dough.
Remove and prepare for shaping
- Remove the dough from the refrigerator and let it sit at room temperature for 30 minutes.
- This takes the chill off and makes shaping easier.
- Line a baking sheet with parchment paper.
- If using a banneton or proofing basket, dust it lightly with flour and set it nearby.
+ Show details− Hide details
Ready when: Dough feels pliable, not cold
Tip: A 30-minute rest prevents the dough from shrinking back as you shape—patience here pays off.
Shape the bâtards
- Turn the dough out onto a lightly floured work surface.
- Using a bench scraper, divide it into 6 equal pieces (each piece should weigh about 3 oz / 85 g).
- Pre-shape each piece into a loose round by gently pulling the edges toward the center and flipping seam-side down.
- Let them rest for 10 minutes.
- Then, take the first round, gently press it into a small oval about 4 inches long.
- Starting from one short end, fold the dough over itself and roll it forward, sealing gently with the heel of your hand until you form a tight, oblong bâtard shape about 4–5 inches (10–13 cm) long and 2 inches (5 cm) wide.
- Repeat with remaining pieces.
- Place each bâtard seam-side down on the parchment-lined baking sheet, spacing them about 2 inches (5 cm) apart.
+ Show details− Hide details
Ready when: Six even, oblong rolls with visible tension in the surface; seams are hidden underneath
Tip: Tension matters—roll each bâtard firmly enough to create a tight exterior, which helps it rise upward rather than spreading sideways.
Final proof
- Cover the shaped bâtards loosely with plastic wrap or a damp towel (if uncovered, they may develop a skin).
- Let them proof at room temperature (68–72°F / 20–22°C) for 60–75 minutes.
- You're looking for a gentle rise—the rolls should increase in volume by about 50% and feel light and airy when gently poked.
- If you poke one and the indent springs back halfway, it's ready.
- If it springs back completely, it needs more time; if it doesn't spring back at all, it may be over-proofed.
+ Show details− Hide details
Ready when: Rolls have risen 40–50%, feel airy, and a gentle poke leaves a slowly-closing indent
Tip: Final proof timing varies by room temperature and dough age—watch the dough, not the clock. A slightly under-proofed roll is better than an over-proofed one.
Preheat the ovenOven 475°F / 245°C
- About 15 minutes before the bâtards finish proofing, position your oven rack in the upper third and preheat to 475°F (245°C).
- If using a Dutch oven for steam, place it inside to preheat as well.
- If not using a Dutch oven, place a shallow pan on the oven floor or lowest rack to hold hot water for steam during baking.
+ Show details− Hide details
Ready when: Oven fully preheated (listen for the oven beep or check indicator light)
Tip: A hot oven is crucial for oven spring—don't skip preheating. Steam in the first few minutes ensures a crispy crust.
Score and load the ovenOven 475°F / 245°C
- When the oven reaches 475°F (245°C) and the bâtards are fully proofed, carefully score each roll with a sharp bread knife or lame, making a single diagonal slash about ¼ inch (6 mm) deep across the top of each bâtard, angling the knife at 30 degrees.
- This guides the roll to expand upward rather than sideways.
- Using the parchment as a sling, carefully transfer the baking sheet into the Dutch oven (if using), or onto the oven rack if baking directly on a stone with steam from a pan below.
- If using a Dutch oven with lid, cover it with the hot lid immediately.
+ Show details− Hide details
Ready when: Bâtards are scored with visible slashes; they're loaded into the oven
Tip: Score just before baking—the cut should be confident and clean, not tentative, to open properly during the oven spring.
Bake with steamOven 475°F / 245°C
- Bake covered (in the Dutch oven) for 15 minutes at 475°F (245°C).
- The steam trapped inside will help the rolls expand and develop a glossy, crispy crust.
- After 15 minutes, carefully remove the Dutch oven lid (watch for steam).
- If baking without a Dutch oven, pour hot water into the preheated pan on the oven floor now (or boil water and pour it carefully into a preheated pan placed at the bottom of the oven for steam).
+ Show details− Hide details
Ready when: Rolls are visibly taller; scores have opened; the visible surface is pale golden
Tip: Be very careful when removing the hot Dutch oven lid—the steam is extremely hot and can cause burns.
Finish baking and crispingOven 475°F / 245°C
- Bake uncovered for another 8–12 minutes at 475°F (245°C), until the bâtards are deep golden brown on all sides and the crust sounds hollow when tapped on the bottom.
- If the rolls are browning too quickly on top, rotate the baking sheet halfway through this phase.
- Total baking time is about 23–27 minutes.
- The internal temperature of a fully baked roll should be 205–210°F (96–99°C) if checked with an instant-read thermometer inserted into the center (optional).
+ Show details− Hide details
Ready when: Crust is deep golden brown; bottom sounds hollow when tapped; internal temperature is 205–210°F (96–99°C)
Tip: Underbaked rolls will be gummy inside—bake fully to develop a crispy crust and dry interior crumb.
Cool before serving
- Transfer the baked bâtards to a wire cooling rack.
- Resist the urge to eat them immediately—allow them to cool for at least 30 minutes at room temperature.
- During this time, the interior crumb sets and becomes less gummy.
- For the best texture, cool them for 1 hour.
- Once cooled, they can be served warm or at room temperature, split lengthwise, or torn by hand.
+ Show details− Hide details
Ready when: Rolls are no longer steaming; they feel firm and sound crispy when squeezed gently
Tip: Cutting into a warm roll releases moisture and can make it gummy—the 30-minute rest is essential for clean slicing.
Good to know
Tips
- Long, cool fermentation is the secret to flavor and an open crumb. Don't rush this recipe by using warm water or skipping the overnight cold fermentation.
- Steam in the first half of baking is essential—it allows the rolls to expand freely before the crust sets, creating a crispy exterior and preventing a thick, dense crust.
- Stretch-and-fold during bulk fermentation is gentler than machine mixing and builds just enough gluten structure for an open, irregular crumb.
- If you don't have a Dutch oven, a large covered baking vessel (like a stainless-steel bowl inverted over the baking sheet) works, or place a pan of boiling water on the oven floor for steam.
Make ahead
You can make the dough 1–2 days ahead. Mix through the bulk fermentation (step 3), then refrigerate. When ready to bake, remove the dough, let it come to room temperature for 1 hour, shape, and proceed with the final proof. Alternatively, shape the rolls, freeze them on a baking sheet for 2 hours, then wrap in a freezer bag and freeze for up to 1 month. Bake from frozen, adding 5–7 minutes to the bake time.
Storage & reheating
Room temperature (covered): Rolls stay fresh for 1–2 days in a bread box or under a towel. Refrigerator: Wrap cooled rolls in plastic and store for up to 4 days; reheat by wrapping in foil and warming in a 350°F (175°C) oven for 8–10 minutes. Freezer: Wrap cooled rolls individually in plastic wrap, then place in a freezer bag for up to 3 months. To reheat, thaw at room temperature for 2 hours or overnight, then warm as above.
Substitutions
- bread flour → all-purpose flour. All-purpose flour will produce a softer, less open crumb and a lighter color. Use the same weight (375 g). The texture will be tender but less rustic.
- instant dry yeast → active dry yeast. Use the same weight (3 g). Active dry yeast works, though it may take 10–15% longer to ferment. Rehydrate it first by mixing with a little water.
- extra-virgin olive oil → neutral oil (vegetable, canola, or grapeseed oil). Neutral oils work fine and won't affect the final flavor noticeably. Use the same volume (22 ml). Avoid strongly flavored oils like toasted sesame oil.
- filtered or bottled water, room temperature (70°F / 21°C) → tap water (if filtered or unchlorinated). Chlorinated tap water can inhibit fermentation slightly. If your tap water is heavily chlorinated, let it sit overnight or use filtered/bottled water. Metric amounts stay the same.
More rolls & buns
See all →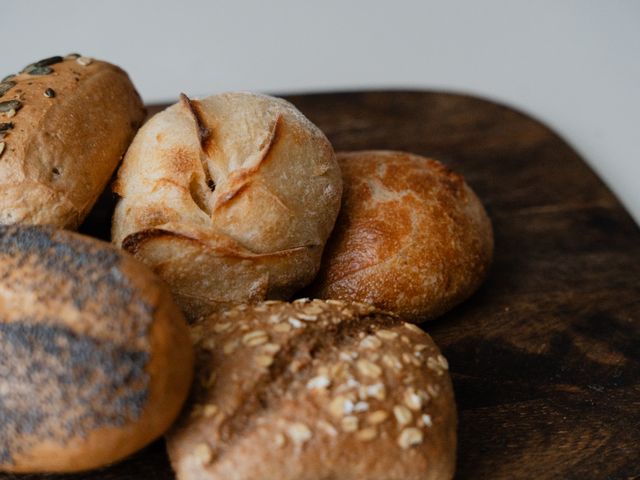

Find more like this
- Meal
- Lunch
- Cuisine
- French
- Method
- Oven
- Quick & Easy
- 5 Ingredients or Less