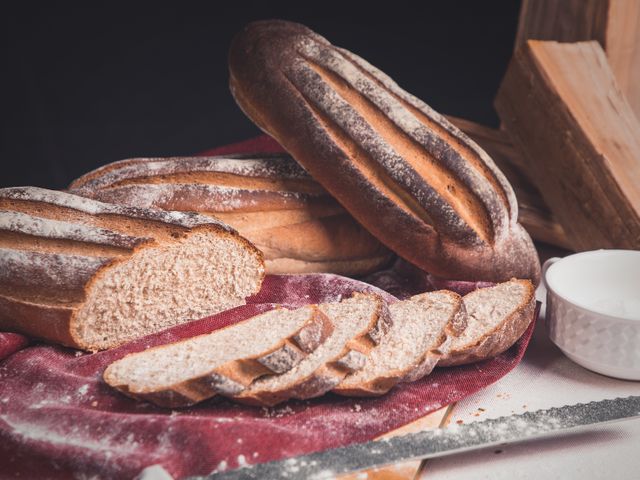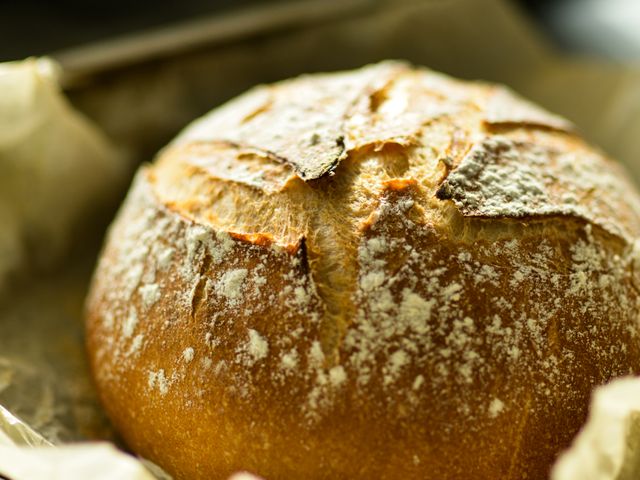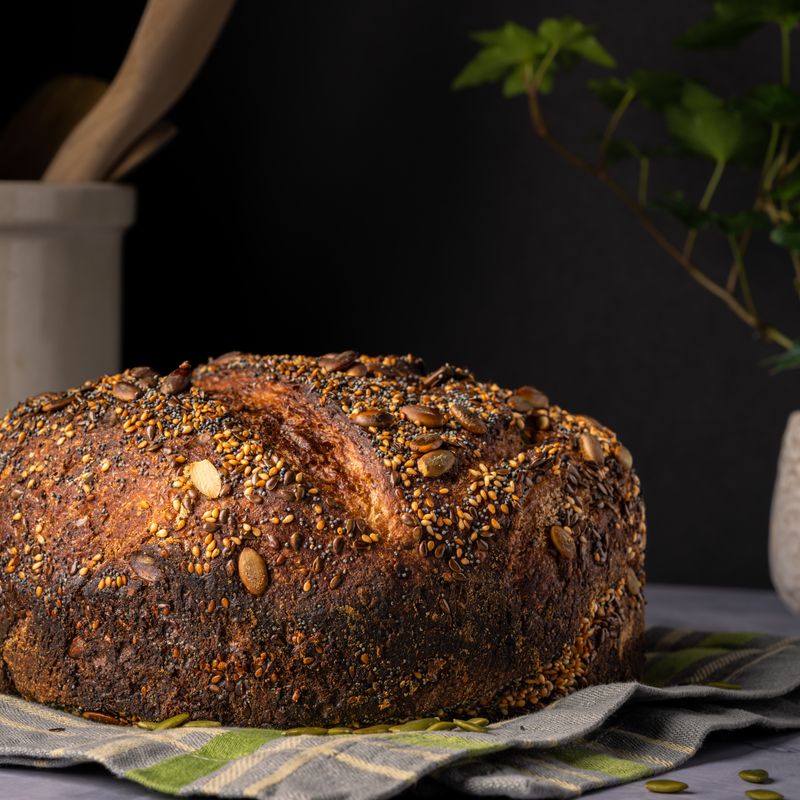
Sourdough Seeded Everything Loaf
A rustic, crusty sourdough loaf studded with sesame, poppy, and flax seeds, developed over 18 hours via long fermentation. The slow rise builds complex flavor while the seeds add nuttiness and texture. Perfect for slicing, toasting, or serving alongside soups and stews.
- Prep
- 20 min
- Cook
- 35 min
- Wait
- 18 hr
- Total
- 18 hr 55 min
- Makes
- 1 loaf (12–14 slices)
Steps
Before you start
- Ensure your sourdough starter is active and bubbly (fed 4–8 hours before mixing)
- Place a Dutch oven or covered baking vessel in your oven to preheat
- Room temperature should be 68–72°F (20–22°C) for optimal fermentation
- Have a banneton or bowl lined with a flour-dusted kitchen towel ready
Mix dough base
- In a large mixing bowl, combine the active sourdough starter (120 g), bread flour (500 g), and room-temperature water (310 ml).
- Stir with a dough whisk or your hand until all flour is hydrated and no dry pockets remain.
- The mixture should look shaggy and moist.
- Cover the bowl loosely with plastic wrap or a damp towel.
+ Show details− Hide details
Ready when: All flour is visibly incorporated, dough is cohesive
Tip: An autolyse (resting period without salt) strengthens gluten naturally and improves flavor development
Add salt and seeds
- After the 30-minute autolyse, add fine sea salt (11 g), sesame seeds (50 g), poppy seeds (30 g), and flax seeds (30 g) to the dough.
- Wet your hand or dampen the dough slightly to help the salt and seeds incorporate evenly.
- Mix by squeezing and folding the dough against the side of the bowl for 2–3 minutes until everything is evenly distributed.
- The dough will feel slightly tacky but cohesive.
+ Show details− Hide details
Ready when: Seeds are evenly distributed throughout, salt is fully incorporated, dough is uniform in color
Tip: Toasting the sesame seeds beforehand brings out their nutty flavor and prevents them from remaining raw in the crust
Bulk ferment – stretch and fold
- Cover the bowl again.
- Over the next 4 hours, perform 4 sets of 'stretch and folds' at 1-hour intervals.
- For each set: wet your hand, grab one side of the dough, stretch it up and fold it over the center; rotate the bowl 90° and repeat 3 more times.
- Each stretch-and-fold takes 30–45 seconds.
- After 4 hours and the final fold, the dough should be noticeably puffier, smoother, and hold gas (you'll see bubbles when you peek under the cover).
- It should increase 50–70% in volume.
+ Show details− Hide details
Ready when: Dough is puffy, jiggles when the bowl is tapped, has visible bubbles, increased 50–70% in volume
Tip: Stretch and folds are crucial for seeded doughs, which ferment slightly slower than plain dough due to the added ingredients; they also help distribute seeds evenly
Shape and proof
- Lightly flour a work surface.
- Turn the dough out onto it (it will be soft and wet; don't punch it down).
- Using a bench scraper, gently pull one long edge toward you and fold it 2/3 of the way over the dough.
- Repeat from the opposite side, then fold the top and bottom thirds inward to create a round bundle.
- Flip it seam-side down and, with cupped hands, drag the dough toward you a few times to build surface tension.
- Place the shaped dough seam-side up in a flour-dusted banneton or a bowl lined with a kitchen towel.
- Cover loosely with plastic wrap.
+ Show details− Hide details
Ready when: Dough is formed into a smooth round, seam-side up in the banneton, surface is taut
Tip: Handle gently to avoid degassing; the dough is already full of air from bulk ferment
Cold overnight proof
- Cover the banneton with plastic wrap and refrigerate at 38–40°F (3–4°C) for 12–16 hours.
- The cool temperature slows fermentation, allowing acids and flavors to develop while making the dough easier to score.
- The dough should increase another 30–50% in volume.
+ Show details− Hide details
Ready when: Dough has increased 30–50% in volume, is cold and firm, a gentle poke springs back slowly
Tip: A long cold fermentation is the secret to deep, tangy sourdough flavor; if your kitchen is very warm, even 12 hours is plenty
Preheat oven and Dutch ovenOven 500°F / 260°C
- Remove the dough from the refrigerator.
- Place your Dutch oven (lid on) in the oven and preheat to 500°F (260°C) for at least 45 minutes.
- The vessel must be very hot to create steam and oven spring.
- You can check readiness by carefully opening the door—if steam forms on the inside, the oven is ready.
+ Show details− Hide details
Ready when: Dutch oven is very hot, oven has reached 500°F (260°C), steam visible when door is cracked
Tip: A properly preheated Dutch oven is essential; if it isn't hot enough, the crust won't crisp and the loaf won't spring
Score and load into ovenOven 500°F / 260°C
- Carefully remove the hot Dutch oven from the oven (use thick oven mitts).
- Invert the banneton over the Dutch oven bottom so the dough lands seam-side down inside.
- Working quickly, use a very sharp scoring knife or lame to make a single long slash ¼ inch (6 mm) deep at a 30° angle across the top of the dough.
- The seeds will be visible at the edges; your slash can follow or cross the grain of the seeds.
- Immediately cover with the lid and place back in the oven.
+ Show details− Hide details
Ready when: Dough is scored with a clean, confident slash; loaf is seam-side down in the Dutch oven
Tip: A sharp knife and a swift, confident motion prevent the dough from tearing; cold dough scores more cleanly than room-temperature dough
Bake coveredOven 500°F / 260°C
- Bake covered (with the Dutch oven lid on) at 500°F (260°C) for 20 minutes.
- The steam trapped inside will create oven spring and set the crust.
- You should hear the dough sizzle slightly when it goes in.
+ Show details− Hide details
Ready when: Steam is visible when lid is lifted, dough has risen and the edges are set
Tip: Do not open the oven door during this stage; you'll lose steam and the crust won't develop properly
Bake uncovered and brownOven 450°F / 230°C
- Carefully remove the lid (careful of steam).
- Reduce oven temperature to 450°F (232°C) and bake uncovered for 12–15 minutes, until the crust is deep golden brown (not pale or blonde).
- Rotate the Dutch oven once halfway through if your oven has hot spots.
- The loaf should sound hollow when tapped on the bottom (you can use an oven-safe thermometer to check: the internal temperature should reach 205–210°F / 96–99°C).
+ Show details− Hide details
Ready when: Crust is deep golden brown, loaf sounds hollow when tapped, seeds on surface are toasted, internal temp is 205–210°F (96–99°C)
Tip: If the crust is browning too quickly, tent loosely with aluminum foil; if it's pale, bake a few more minutes
Cool completely
- Remove the loaf from the Dutch oven and transfer it to a wire rack.
- Cool at room temperature for at least 1–2 hours before slicing.
- The interior will continue to set during this time.
- If you slice too early, the crumb will be gummy and fall apart.
+ Show details− Hide details
Ready when: Loaf is cool to the touch, crust is firm and sounds crisp when tapped
Tip: Resist the temptation to slice warm bread; the steam escaping will make the crumb dry out faster than if you wait
Good to know
Tips
- If your starter is very young or weak, feed it an extra time 12 hours before mixing to ensure it's at peak activity. A weak starter will add length to fermentation.
- The total time listed (18.9 hours) assumes fermentation at 68–72°F (20–22°C). If your kitchen is warmer, reduce bulk fermentation time or move to the fridge earlier. If cooler, extend fermentation.
- Toast the sesame seeds lightly but don't burn them; they'll continue to toast in the oven and can easily become bitter if overdone beforehand.
- For a more open crumb, increase hydration by 2–3% (about 15 ml more water), but only if your starter and technique are already confident.
Make ahead
Prepare the dough through step 4 (shape), then refrigerate overnight or up to 48 hours before baking. Cold fermentation actually improves flavor and makes the loaf easier to handle. You can also bake the loaf fully, cool it, wrap it, and freeze for up to 2 weeks; refresh by warming in a 350°F (175°C) oven for 10 minutes.
Storage & reheating
Room temperature (wrapped loosely in a clean kitchen towel or paper bag): 3–4 days. The crust will soften over time; to re-crisp, place the loaf uncovered in a 375°F (190°C) oven for 5–8 minutes. Refrigerator (in an airtight container or well-wrapped): up to 5 days. Freezer (whole loaf, well wrapped in plastic wrap and foil, or sliced and in a freezer bag): up to 8 weeks. Thaw at room temperature for 2–3 hours or refresh from frozen in a 350°F (175°C) oven for 15–20 minutes.
Substitutions
- sesame seeds (white or mixed), toasted → sunflower seeds or pumpkin seeds, toasted. Use the same amount. Both add a similar nuttiness and texture; toast them for 2–3 minutes in a dry skillet before adding to the dough.
- poppy seeds → nigella seeds or additional flax seeds. Nigella (black onion seeds) add an earthy note; flax will make the loaf denser but more seeds-forward. Use 2–3 tablespoons of either.
- bread flour (12–13% protein) → all-purpose flour (11% protein) mixed with 2 tablespoons of vital wheat gluten. All-purpose alone will produce a less open crumb and slightly less oven spring, but is workable. Vital wheat gluten compensates for lower protein.
- active sourdough starter, at room temperature → 100% hydration liquid starter or a combination of 60 g starter + 60 ml whole milk. If you keep a thinner starter, use the liquid version. Adding whole milk makes the dough slightly more flavorful and enriches the crumb.