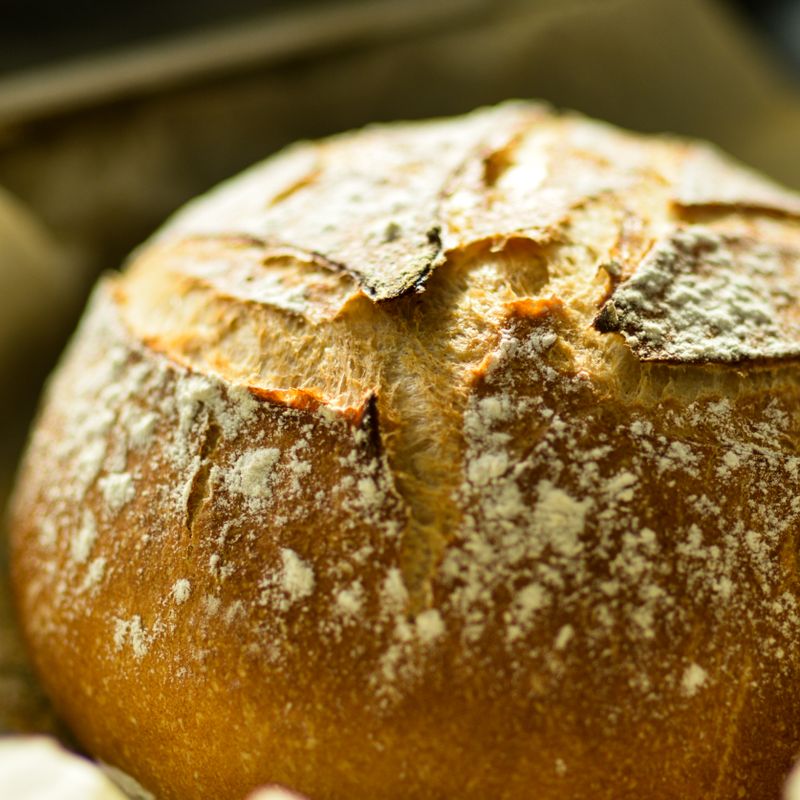
Sourdough Sprouted Buckwheat and Hemp Loaf
A hearty, rustic sourdough loaf studded with sprouted buckwheat groats and hemp seeds, blending the tanginess of sourdough with the nutty richness of whole grains and seeds. The sprouted buckwheat adds earthy depth and nutritional value, while hemp seeds contribute a subtle sesame-like flavor and omega-3 fatty acids. Perfect for slicing thick and toasting, or serving alongside soups and stews.
- Prep
- 30 min
- Cook
- 45 min
- Wait
- 8 hr
- Total
- 9 hr 15 min
- Makes
- 1 loaf (10–12 slices)
Steps
Before you start
- Ensure your sourdough starter is active and bubbly, fed 4–8 hours before use
- If sprouted buckwheat is not already on hand, plan ahead: raw buckwheat groats need 6–24 hours to sprout (see tips)
- Preheat your oven and Dutch oven 45 minutes before the final bake
- Have a kitchen scale handy for accuracy with the dough
Mix the dough
- In a large mixing bowl, combine the room-temperature water (350 ml), active sourdough starter (150 g), bread flour (400 g), and whole wheat flour (100 g).
- Stir with a bench scraper or your hand until all flour is hydrated and you have a shaggy mass with no dry flour remaining.
- Cover the bowl with a damp cloth and let rest for 30–45 minutes (this is the autolyse phase, which develops gluten naturally).
+ Show details− Hide details
Ready when: All flour is fully hydrated; dough is cohesive
Tip: This rest makes the final dough easier to work with and builds structure without mechanical mixing.
Add salt and seeds
- After the autolyse, add fine sea salt (10 g) and all of the sprouted buckwheat (100 g), hemp seeds (60 g), and flaxseed meal if using (30 g).
- Pinch and fold the dough 8–10 times using a bench scraper, rotating the bowl as you work, until all seeds and salt are distributed evenly and the dough is cohesive.
- The dough may look slightly ragged—this is normal at this stage.
+ Show details− Hide details
Ready when: Seeds are evenly distributed; dough comes together when pinched
Tip: Add salt after the autolyse phase to avoid slowing down gluten development. Handle gently to keep from deflating the dough.
Bulk fermentation (part one)
- Cover the bowl with a damp cloth and let the dough rest at room temperature (68–72°F / 20–22°C) for 2 hours.
- During the first hour, perform 3 or 4 sets of stretch-and-folds every 20 minutes: gently lift one side of the dough and fold it over itself, rotate the bowl, and repeat from each direction.
- This builds strength without aggressive kneading.
- After the stretches are done (usually by the 1.5-hour mark), let the dough rest for the remaining time.
+ Show details− Hide details
Ready when: Dough has increased in volume by about 50%, is slightly jiggly, and feels airy when gently pressed
Tip: Stretch-and-folds are crucial for building strength. Don't skip them. If your kitchen is cold, fermentation may take longer.
Pre-shape the loaf
- Turn the dough out onto a lightly floured work surface.
- Gently pre-shape it into a round by folding the edges toward the center, rotating as you go, and letting the seams create tension on the surface.
- Let this pre-shaped round rest, uncovered, for 20–25 minutes.
- This resting period, called bench rest, allows the gluten to relax slightly and makes the final shaping easier.
+ Show details− Hide details
Ready when: Dough has softened slightly and no longer springs back instantly when poked
Tip: Bench rest prevents the dough from tearing during the final shaping and helps achieve a tighter crumb.
Final shape and proof
- Flip the dough seam-side up and perform a final tight shape: fold the top third of the round toward the center, seal gently, fold the bottom up and seal, then roll it toward you to create surface tension.
- Place the shaped dough seam-side up into a floured banneton or a bowl lined with a well-floured kitchen towel.
- Cover loosely and place in the refrigerator for 8–12 hours (cold overnight fermentation).
- The cold rise develops deeper flavor and makes scoring easier.
+ Show details− Hide details
Ready when: When poked gently with a floured finger, the dough springs back slowly (not immediately, not not at all)
Tip: Cold fermentation enhances sour flavor and makes handling the wet, seed-studded dough much easier. Plan for overnight or an 8-hour minimum rest.
Preheat oven and Dutch ovenOven 500°F / 260°C
- About 45 minutes before baking, preheat your oven to 500°F (260°C).
- Place your Dutch oven (lid on) inside the oven so it heats thoroughly.
- This preheating is essential for creating steam and a crispy crust.
+ Show details− Hide details
Ready when: Oven thermometer confirms 500°F; Dutch oven is very hot
Tip: A hot Dutch oven is key to a great oven spring (rise) and crust. Don't skip the preheating.
Score and load
- Remove the dough from the refrigerator.
- If it feels stiff, let it sit at room temperature for 10–15 minutes.
- Turn it seam-side down onto a piece of parchment paper.
- Using a lame or sharp knife held at a 30-degree angle, score the top with a single bold slash, about ¼-inch (6 mm) deep, or an X-pattern of two slashes.
- The score guides expansion.
+ Show details− Hide details
Ready when: Score is clean and at least ¼-inch deep
Tip: A sharp blade and confident, quick movements prevent the dough from dragging or tearing unevenly. Score just before loading into the oven.
Bake coveredOven 500°F / 260°C
- Carefully remove the hot Dutch oven from the oven.
- Slide the parchment and dough into the Dutch oven.
- Cover with the lid and return to the 500°F (260°C) oven.
- Bake covered for 20 minutes.
- The lid traps steam, which creates a chewy crust and strong oven spring.
+ Show details− Hide details
Ready when: Dough has risen significantly; steam is visible when lid is cracked
Tip: Don't peek too much; each time you open the lid, you lose precious steam. The loaf should grow noticeably.
Bake uncoveredOven 450°F / 230°C
- Remove the Dutch oven lid and reduce the oven temperature to 450°F (232°C).
- Continue baking for another 20–25 minutes, until the loaf is deep golden brown.
- The crust should be firm and make a hollow sound when tapped on the bottom.
- The internal temperature should reach 205–210°F (96–99°C) when a thermometer is inserted into the thickest part.
+ Show details− Hide details
Ready when: Crust is deep golden brown; bottom sounds hollow when tapped; internal temperature is 205–210°F
Tip: If the crust is browning too fast, tent the loaf loosely with foil for the last 5 minutes. A hollow tap and the right internal temperature confirm doneness.
Cool completely
- Transfer the loaf to a wire rack and let it cool completely, at least 1 hour, before slicing.
- As it cools, the crumb continues to set and the crust will crisp up.
- Slice with a serrated bread knife using a gentle sawing motion.
+ Show details− Hide details
Ready when: Loaf is cool to the touch; crust is crispy and doesn't give when pressed
Tip: Resist the urge to slice while warm—the interior is still setting and will be gummy. Cooling completes the baking process.
Good to know
Tips
- To sprout buckwheat: rinse raw buckwheat groats and soak in cool water for 30 minutes, then drain. Rinse 2–3 times daily for 2–3 days in a fine-mesh strainer or sprouting jar until small white tails appear (about 1⁄8 inch). Dry thoroughly on a towel before adding to the dough to avoid excess moisture.
- Sourdough's flavor deepens with a cold ferment, but if you're short on time, you can do a 4–6 hour room-temperature final proof instead. Adjust for your kitchen temperature and watch for the poke test (slow spring-back) rather than relying on time alone.
- The seed-studded, whole-grain dough is wetter than standard white sourdough. If it feels too sticky during shaping, flour your hands and work surface generously, but avoid adding flour to the dough itself, which toughens the crumb.
- A Dutch oven is essential for trapping steam and creating a rustic, crackling crust. If you don't have one, you can use a covered baking stone or cloche, or place a shallow pan of boiling water on the oven floor to generate steam.
Make ahead
"Prepare sprouted buckwheat up to 2 days in advance and store in an airtight container in the refrigerator. The shaped dough can cold-ferment in the refrigerator for up to 16 hours; longer times may over-ferment. You can also freeze the shaped dough (in the banneton, wrapped well) for up to 1 week; bake directly from frozen, adding 5–10 minutes to the covered baking time."
Storage & reheating
"Room temperature: Store in a paper bag or on a cutting board, loosely covered, for up to 3 days; the crust will soften over time. Refrigerator: Wrap in an airtight container or bag for up to 5 days; reheat wrapped in foil at 325°F (163°C) for 10–15 minutes to refresh. Freezer: Slice the loaf, wrap slices individually in plastic wrap, and place in a freezer bag for up to 2 months; toast directly from frozen or thaw at room temperature."
Substitutions
- sprouted buckwheat groats → Raw buckwheat groats (not sprouted) or millet. Raw buckwheat will have a less mellow, slightly more astringent flavor and denser crumb. Use the same weight. If sprouting isn't an option, raw buckwheat is a solid alternative.
- raw hemp seeds (hulled) → Sunflower seeds, pumpkin seeds, or a mix of both. These will add a more robust, toasted nutty flavor and slightly different mouthfeel. Use the same weight (60 g).
- whole wheat flour → Spelt flour or rye flour. Spelt adds a sweet, slightly earthy note; rye creates a denser, more flavorful crumb. Start with 80 g rye (it absorbs more water) and adjust hydration if needed.
- ground flaxseed meal → Omit entirely, or replace with chia seeds. Flax is optional. Chia seeds will add a subtle gelatinous quality; use the same weight (30 g).
More sourdough
See all →



Find more like this
- Meal
- Snack
- Method
- Oven
- Quick & Easy
- Make Ahead