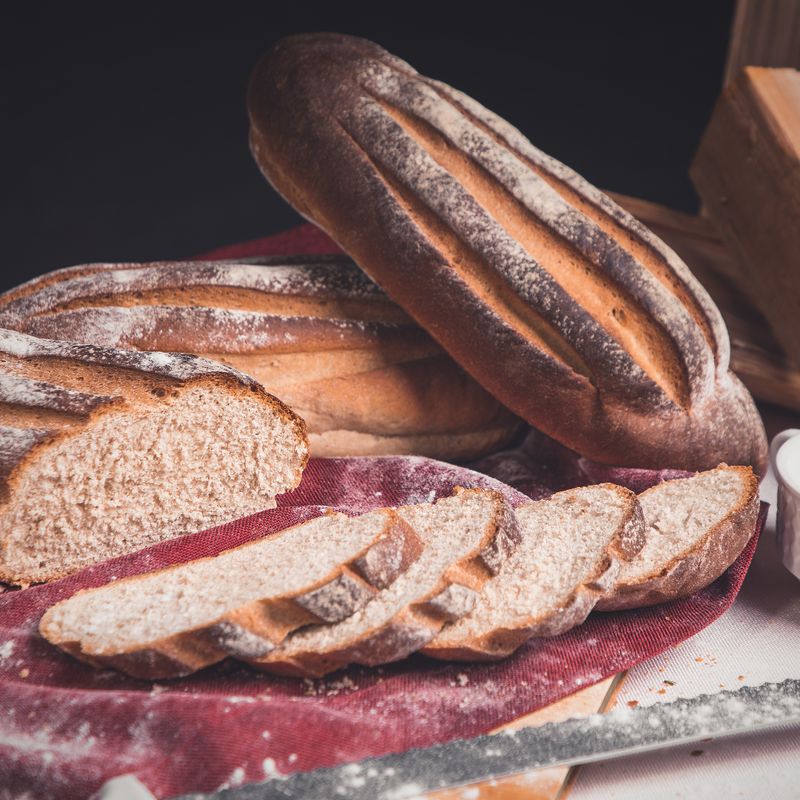
Sourdough Crusty Boule
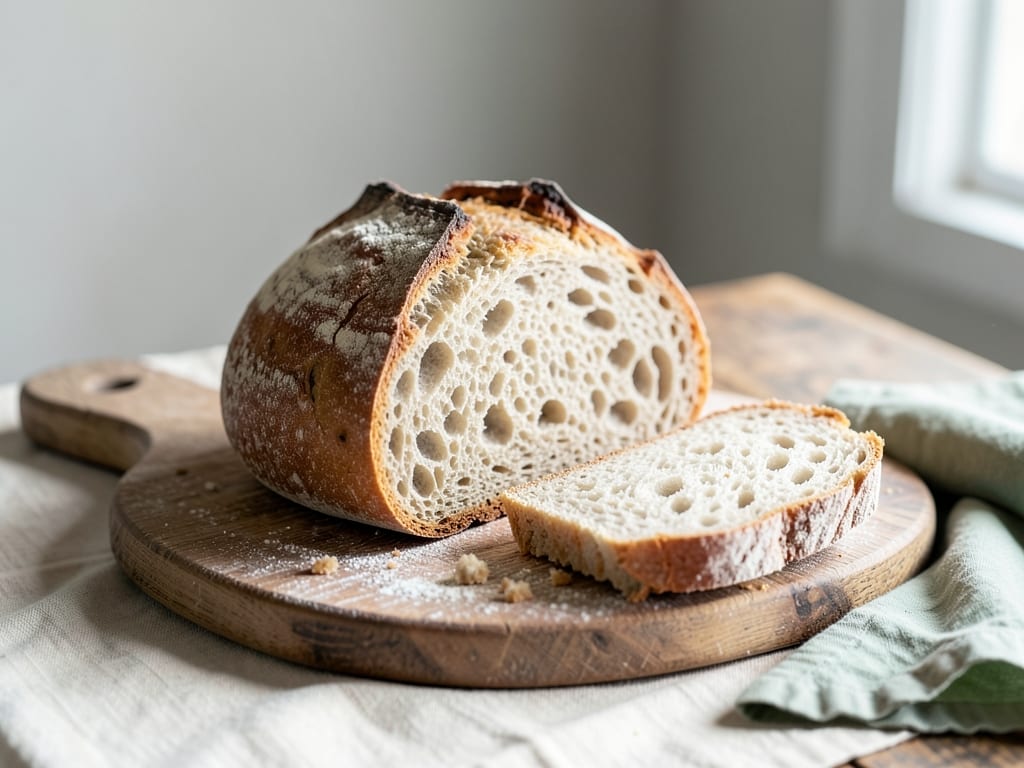
A classic French sourdough boule with a crackling crust and open, airy crumb, made using long cold fermentation for complex flavor development. This recipe uses a two-stage fermentation: bulk fermentation at room temperature followed by an overnight cold proof in the refrigerator, giving you flexibility to bake on your schedule.
- Prep
- 30 min
- Cook
- 45 min
- Wait
- 9 hr
- Total
- 10 hr 15 min
- Makes
- 1 boule (about 1.5 lbs / 680 g; 8–12 slices)
Steps
Before you start
- Ensure your sourdough starter is active and bubbly (fed 4–8 hours prior)
- Use bread flour for higher gluten development and chewier crumb
- Have a Dutch oven or covered baking vessel ready
- Read through the entire recipe; cold fermentation can happen overnight or up to 48 hours
Mix dough and autolyse
- In a large 3-quart bowl, combine 500 g bread flour, 350 ml room-temperature water, and 100 g active sourdough starter.
- Using a damp hand or wooden spoon, stir until shaggy dough forms and all flour is hydrated (no dry flour remains).
- Cover with a damp cloth or lid and let rest at room temperature (68–72°F / 20–22°C) for 30 minutes.
- This autolyse rests the gluten before you add salt.
+ Show details− Hide details
Ready when: Dough is fully hydrated and slightly cohesive
Tip: Use a kitchen scale for accuracy; by weight is much more reliable than by volume for sourdough.
Incorporate salt and develop gluten
- Add 10 g fine sea salt to the dough.
- Wet your hand and pinch and fold the dough onto itself 30–40 times over the course of 5 minutes, working from the sides to the center, rotating the bowl as you go.
- The dough will transform from shaggy to smooth and elastic.
- Stop when the dough feels supple and gently springs back when poked.
- This is the stretch-and-fold method, replacing traditional kneading.
+ Show details− Hide details
Ready when: Dough is smooth, cohesive, and springs back gently when poked
Tip: Wet hands prevent sticking; work calmly and methodically rather than aggressively.
First bulk fermentation (4–5 hours)
- Cover the bowl and let the dough ferment at room temperature (68–72°F / 20–22°C) for 4 to 5 hours.
- Perform one round of stretch-and-folds after 30 minutes of fermentation, then again at 1 hour and 1.5 hours total elapsed time (three total sets of folds).
- After the final fold at 1.5 hours, let the dough rest undisturbed for the remaining 2.5–3.5 hours.
- By the end, the dough should have increased in volume by 50–75%, feel airy, and show some bubbles at the surface and sides.
+ Show details− Hide details
Ready when: Dough has increased 50–75% in volume, feels airy, and shows visible bubbles
Tip: Room temperature matters: if your kitchen is cool (below 65°F / 18°C), fermentation will take longer; warmer, and it may be faster. Adjust timing accordingly.
Shape the boule
- Turn the dough out onto a lightly floured work surface.
- Using a bench scraper, gently degas the dough by folding it in thirds (like an envelope), then flip it seam-side down.
- Using gentle tension, pull the dough toward you 4–5 times, then rotate the bowl 90° and repeat until you've created surface tension on all sides and the dough forms a tight, round ball.
- The seam should be on the underside.
- If using a banneton, place the boule seam-side up in the floured basket; otherwise, place it seam-side up on a small bowl lined with a floured kitchen towel.
+ Show details− Hide details
Ready when: Dough is a tight, round ball with seam on the underside
Tip: Don't overwork; handle gently to preserve the gas bubbles you've developed. Light surface tension is key for oven spring.
Cold proof overnight (8–48 hours)
- Cover the shaped boule (still in banneton or towel-lined bowl) with a plastic bag or cover, then place in the refrigerator at 38–40°F (3–4°C) for at least 8 hours, or up to 48 hours.
- Longer cold fermentation (24–48 hours) develops deeper flavor and improves dough extensibility; 8–12 hours gives a fresher, milder taste.
- The cold slows yeast activity while flavor compounds accumulate.
+ Show details− Hide details
Ready when: Dough is cold and firms up; probing with a finger leaves a slow-bouncing dent
Tip: You can bake after 8 hours or freeze at this point for later (up to 3 weeks); frozen dough goes straight into the oven—no thawing needed.
Preheat Dutch oven and ovenOven 500°F / 260°C
- About 1 hour before baking, place a 5-quart Dutch oven (with lid) in a cold oven, then preheat to 500°F (260°C).
- The Dutch oven traps steam, which gives you a crispy crust.
- After 45–60 minutes, the Dutch oven will be very hot.
+ Show details− Hide details
Ready when: Dutch oven is hot and oven temperature reaches 500°F (260°C) on thermometer
Tip: A properly preheated Dutch oven is non-negotiable; it's what creates the dramatic oven spring and shatter crust.
Score and load into Dutch ovenOven 500°F / 260°C
- Remove the cold dough from the fridge.
- If using a banneton, carefully turn it out onto a piece of parchment paper.
- Using a sharp bread lame or serrated knife, score the top with a single decisive slash about ¼ inch (6 mm) deep at a 30° angle, or make an X or leaf pattern if preferred.
- Carefully transfer the dough on parchment into the preheated Dutch oven (it will be very hot; use oven mitts and move decisively).
- Cover with the Dutch oven lid.
+ Show details− Hide details
Ready when: Dough is scored and loaded; lid is in place
Tip: Score with confidence and speed; hesitation can deflate the dough. A sharp blade is essential to avoid dragging.
Bake covered (20 minutes)Oven 500°F / 260°C
- Bake the covered boule at 500°F (260°C) for 20 minutes.
- The lid traps steam around the dough, allowing it to rise and develop a tender crust before the exterior dries.
- You won't see much color yet—the dough will spring dramatically and may look pale.
+ Show details− Hide details
Ready when: Dough has risen significantly; sides are just beginning to show pale golden color
Tip: Resist the urge to peek; opening the lid releases precious steam and halts oven spring.
Bake uncovered (20–25 minutes)Oven 450°F / 230°C
- Remove the Dutch oven lid and reduce oven temperature to 450°F (232°C).
- Continue baking for 20 to 25 minutes, until the crust is deep mahogany brown and sounds hollow when tapped on the bottom.
- The internal temperature should reach 205–210°F (96–99°C).
- If the crust is still blonde after 20 minutes, bake a few minutes longer.
+ Show details− Hide details
Ready when: Crust is deep mahogany brown; loaf sounds hollow when tapped on the bottom; internal temperature is 205–210°F (96–99°C)
Tip: If your boule is browning very quickly, tent loosely with foil for the last 5 minutes, but aim for maximum color—that's where flavor is.
Cool on a wire rack
- Carefully remove the boule from the Dutch oven and place it on a wire rack.
- Let it cool at room temperature for at least 1 hour (preferably 2 hours) before slicing.
- As it cools, the crumb sets and the crust continues to crisp.
- Cutting too early results in a gummy interior.
+ Show details− Hide details
Ready when: Loaf is cool to the touch; no steam rises when you tap it
Tip: Patience at this stage is crucial; the loaf is still actively cooking as it cools. Rush, and you'll have dense, gummy bread.
Good to know
Tips
- Use a digital kitchen scale for all ingredients; sourdough is precise and weight is far more reliable than volume. A 5-gram difference in salt or starter can noticeably affect fermentation timing and flavor.
- Room temperature (68–72°F / 20–22°C) is ideal; colder kitchens (below 65°F / 18°C) will extend fermentation times by 1–2 hours. Warmer kitchens (above 75°F / 24°C) will speed it up. Adjust your stretch-and-fold schedule and bulk fermentation time accordingly.
- If your dough is over-fermented (doubling in less than 3 hours), reduce starter to 80 g next time or ferment in a cooler location. If it barely rises in 5 hours, increase starter to 120 g or use warmer water.
- Cold fermentation is your secret weapon: 24–48 hours in the fridge produces noticeably better flavor and more extensible dough, even with a young or weaker starter. It's also more forgiving—you can bake on your schedule.
Make ahead
You can cold-ferment the shaped dough for up to 48 hours in the refrigerator, or freeze it after shaping for up to 3 weeks. To bake frozen dough, score it while still frozen and bake directly in the preheated Dutch oven; add 5–10 minutes to the covered baking time. You can also refresh a day-old boule by placing it cut-side down in a 375°F (190°C) oven for 10–15 minutes.
Storage & reheating
Room temperature: Keep the cooled, whole loaf unwrapped on a cutting board or bread box for up to 4 days; it will firm slightly and the crust may soften over time. For longer storage, wrap tightly in plastic wrap after cooling, or slice and freeze individual slices in a freezer bag (up to 3 weeks). To revive, wrap the whole loaf in foil and warm at 350°F (175°C) for 15–20 minutes, or toast individual slices.
Substitutions
- bread flour → all-purpose flour (12% protein minimum). Bread flour has higher gluten content (14–16%) and is preferred, but all-purpose flour works if you accept a slightly less open crumb and may need to reduce hydration slightly (340 ml water instead of 350).
- sourdough starter, active and bubbly → 100 g active liquid sourdough starter (unfed, peak activity). If your starter is stiff or very thick, thin it with a small amount of water beforehand so it fully incorporates into the dough.
- water, filtered or tap → filtered water for best results, or chlorine-free tap water. Chlorine can inhibit fermentation; if using heavily chlorinated tap water, let it sit overnight in an open container first, or use filtered.
- fine sea salt → kosher salt (use 12 g by weight to match fine sea salt's salinity) or Himalayan pink salt. Avoid iodized salt, which can impart off-flavors. Kosher salt is coarser and takes slightly longer to dissolve; increase weight accordingly.
More sourdough
See all →


Find more like this
- Meal
- Breakfast
- Cuisine
- French
- Method
- Oven
- Quick & Easy
- 5 Ingredients or LessMake Ahead