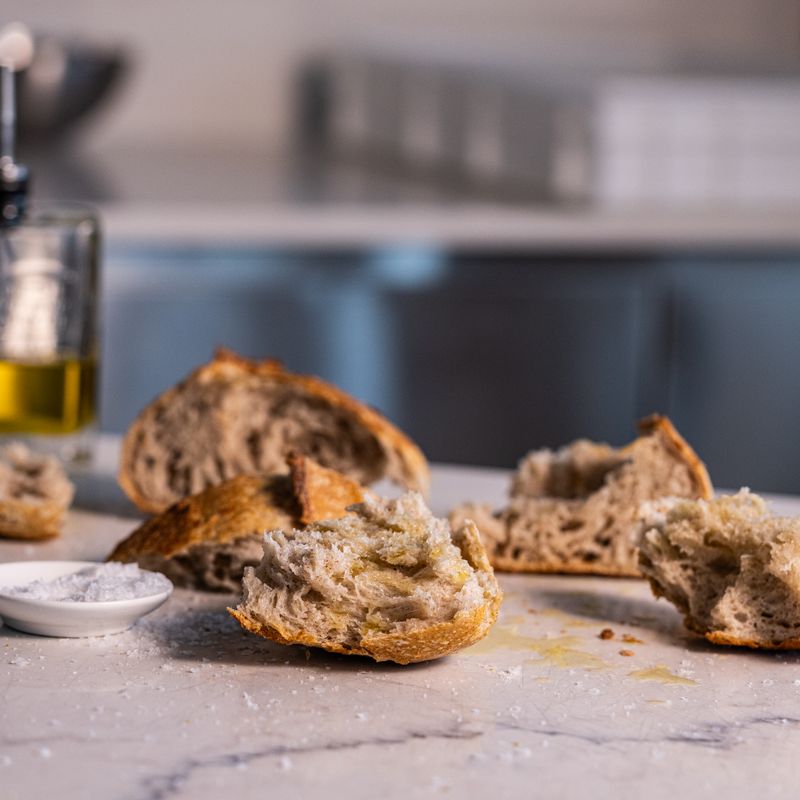
Sourdough Greek Olive Oil and Thyme Rustic Slipper Loaf
A long-fermented sourdough loaf infused with fruity extra virgin olive oil, herbaceous dried thyme, and sea salt, inspired by Mediterranean bread traditions. The 24-hour fermentation develops deep flavor while the high-hydration dough creates an open, airy crumb with a crispy, caramelized crust. The rustic slipper (ciabatta-style) shape showcases the bread's irregular, artisanal character.
- Prep
- 20 min
- Cook
- 45 min
- Wait
- 1 days
- Total
- 1 days
- Makes
- 2 loaves (about 14–16 slices total)
Steps
Before you start
- Remove sourdough starter from the fridge 12 hours before mixing and feed it (equal parts starter, flour, and water) so it is bubbly and at peak activity at mixing time
- Have a Dutch oven or covered baking vessel ready for steaming
- Clear space in your fridge for bulk fermentation and final proofing
- Line a baker's banneton or small bowl with a well-floured kitchen towel to catch the shaped dough for final proof
Mix the dough
- In a large bowl, combine the active sourdough starter (150 g), flour (500 g), and room-temperature water (350 ml).
- Using your hands or a bench scraper, stir vigorously until all flour is hydrated and no dry streaks remain.
- The dough will be shaggy and sticky.
- This is normal.
- Cover the bowl with a damp towel and let rest for 30 minutes at room temperature.
+ Show details− Hide details
Ready when: All flour is wetted; dough is cohesive but very sticky
Tip: Do not skip autolyse—it improves extensibility and flavor development.
Add salt, olive oil, and thyme
- After the 30-minute rest, sprinkle the sea salt (10 g) and crushed dried thyme (3 g) over the dough.
- Drizzle the extra virgin olive oil (60 ml) on top.
- Using wet fingers or a bench scraper, fold and knead the dough in the bowl for 3–4 minutes, working the salt and oil evenly into the dough.
- The dough will become slightly smoother and slicker from the oil.
- Cover and rest for 10 minutes.
+ Show details− Hide details
Ready when: Salt and thyme are evenly distributed; dough is smooth but still sticky
Tip: Add salt and oil after autolyse so they don't interfere with gluten development. Work gently to avoid overworking at this stage.
Perform bulk fermentation (first stretch-and-fold cycle)
- With wet hands, perform a stretch-and-fold: grasp one side of the dough, stretch it up, and fold it over itself toward the center.
- Rotate the bowl 90° and repeat three more times (four folds total).
- This takes about 1 minute.
- Cover and let rest for 30 minutes.
+ Show details− Hide details
Ready when: Dough feels slightly tighter and holds its shape better
Tip: Wet your hands so the dough doesn't stick; avoid tearing it. Four gentle folds are more effective than aggressive kneading.
Complete bulk fermentation with additional folds
- Repeat the stretch-and-fold cycle two more times at 30-minute intervals (for three folds total across 1.5 hours).
- After the final fold, cover the bowl and let it bulk ferment at cool room temperature (68–70°F / 20–21°C) for 12–16 hours.
- The dough should increase in volume by 50–75%, feel airy and jiggly when you gently shake the bowl, and show small bubbles on the surface and sides.
+ Show details− Hide details
Ready when: Dough is noticeably puffy, smells tangy and complex, and passes the poke test (a poke slowly rebounds halfway)
Tip: Cooler fermentation (below 72°F) favors flavor over speed. If your kitchen is warm, use the fridge and extend the time to 18–24 hours instead.
Pre-shape and cold rest
- Turn the dough onto a lightly floured work surface.
- Gently pre-shape it into a loose round by folding the edges toward the center, being careful not to deflate it too much.
- Transfer the pre-shaped dough to a well-floured banneton or small bowl lined with a floured kitchen towel, seam side up.
- Cover loosely with plastic wrap or a plastic bag and refrigerate for at least 4 hours (or up to 16 hours).
- The cold stops fermentation and firms the dough for scoring and shaping.
+ Show details− Hide details
Ready when: Dough is cold (35–40°F / 2–4°C) and holds its shape firmly; surface looks slightly dry
Tip: A long, cold proof improves crust color and oven spring. You can skip this and bake after 2 hours at room temperature, but flavor will be lighter.
Shape into rustic slipper loaves
- Remove the dough from the fridge.
- Gently turn it out onto a lightly floured surface.
- Using a bench scraper or dough knife, divide the dough in half to make two loaves.
- Shape each half into an oblong "slipper" or "ciabatta" shape by gently stretching and patting it into a flat, irregular rectangle about 8 inches long and 4 inches wide.
- Avoid over-handling; the dough should stay somewhat loose and rustic.
- Place each shaped loaf seam-side down on a piece of parchment paper.
- Cover loosely and let proof at room temperature for 2–3 hours until puffy and jiggly (or proof in the fridge overnight and bake cold, which gives even better oven spring).
+ Show details− Hide details
Ready when: Dough is puffy and jiggly; a gentle poke springs back very slowly or leaves a shallow indent
Tip: Slipper loaves should be oblong and somewhat irregular. Avoid shaping them too tight or too symmetrical—rustic is the goal. If you over-proof, the dough will be dense and under-risen in the oven.
Preheat oven and Dutch ovenOven 475°F / 245°C
- Place a Dutch oven (5–6 quart capacity) in your oven and preheat to 475°F (245°C) for at least 45 minutes.
- The vessel and the oven must be very hot to create steam and achieve a crispy, caramelized crust.
- If using a covered baking stone or another steaming method, preheat similarly.
+ Show details− Hide details
Ready when: Oven and Dutch oven are at temperature; any water droplets on the interior will immediately sizzle and evaporate
Tip: Do not skip preheating. A cold Dutch oven will not trap steam and you will get a pale crust instead of a dark, crispy one.
Score and load dough into Dutch ovenOven 475°F / 245°C
- Carefully remove the hot Dutch oven from the oven and place it on a heat-safe surface.
- Invert one proofed loaf (on parchment) onto a lame or very sharp knife and score the top with a diagonal slash about ¼ inch deep, or make two parallel scores.
- If using flax or sesame seeds, brush the top of the loaf lightly with water and sprinkle 1 tablespoon (10 g) of seeds evenly over the surface before baking.
- Using oven mitts and working quickly, carefully slide the parchment and loaf into the preheated Dutch oven.
- Cover with the lid and return to the oven.
- Bake the first loaf at 475°F (245°C) for 22–25 minutes covered, then remove the lid and bake for 15–18 minutes until the crust is deep golden-brown.
- While the first loaf bakes, let the second loaf continue to proof.
+ Show details− Hide details
Ready when: Crust is deep golden-brown, not pale or light; the loaf sounds hollow when tapped on the bottom
Tip: Use parchment paper to avoid direct contact with the hot Dutch oven. If the crust is not dark enough by 40 minutes total, extend the uncovered time by 3–5 minutes. Seeds should be sprinkled immediately before baking so they adhere to the damp dough.
Cool first loaf and bake secondOven 475°F / 245°C
- Remove the first loaf from the oven and turn it out onto a wire cooling rack.
- Let it cool for at least 20 minutes before slicing (residual heat continues to set the crumb structure).
- While it cools, reheat the Dutch oven at 475°F (245°C) for 10 minutes.
- Score and bake the second loaf using the same method, adding flax or sesame seeds if desired: 22–25 minutes covered, then 15–18 minutes uncovered.
+ Show details− Hide details
Ready when: Second loaf is deep golden-brown; both loaves are fully cooled and ready to slice
Tip: Do not slice into warm bread—the crumb is still setting and will be gummy. Wait at least 20 minutes after baking.
Cool and serve
- Once both loaves have cooled completely (at least 20 minutes), slice and serve.
- The rustic slipper loaves should have an open, irregular crumb with visible air pockets, a crispy exterior crust, and a subtle thyme and olive oil flavor throughout.
+ Show details− Hide details
Ready when: Loaves are cool to the touch; crumb is set and slices cleanly
Tip: Brush the warm crust with a little more extra virgin olive oil immediately after baking for extra shine and flavor.
Good to know
Tips
- Feed your sourdough starter at least 12 hours before mixing if it has been in the fridge. Peak activity is essential—your starter should be bubbly, doubled in size, and smell tangy and slightly sweet.
- Temperature control is key to sourdough success. Cooler fermentation (68–70°F / 20–21°C) creates better flavor and a more extensible dough than warm fermentation (75°F / 24°C+). If your kitchen is warm, use your fridge to slow fermentation.
- Do not skip the poke test on both bulk and final proof. Gently poke the dough with a floured finger—it should spring back slowly and leave a shallow indent. Under-proofed dough springs back quickly; over-proofed dough springs back slowly or not at all and will collapse in the oven.
- Bake on parchment paper inside a Dutch oven or preheated covered baker's vessel. The steam created by the sealed environment allows the crust to expand and caramelize before setting, giving you that shiny, crispy, thick crust that defines great artisan bread.
Make ahead
The dough can be shaped, covered, and refrigerated for up to 16 hours before final proof. You can also proof the shaped dough overnight in the fridge and bake it straight from cold the next morning for even better oven spring and crust color. The bulk fermentation can also be extended up to 24 hours if your kitchen is cool.
Storage & reheating
Room temperature: Store in a paper bag or linen bread bag for 2–3 days; keep cut-side down on a cutting board after slicing. Refrigerator: Wrap tightly in plastic and refrigerate for up to 5 days; refresh by misting lightly with water and warming in a 350°F (175°C) oven for 5–8 minutes. Freezer: Wrap tightly in plastic wrap and foil; freeze for up to 3 months. Thaw at room temperature for 2–3 hours or toast from frozen.
Substitutions
- dried thyme → 1½ tsp dried oregano or 1 tsp dried rosemary. Dried oregano gives a more peppery, Mediterranean flavor; dried rosemary is more piney and intense. Use a little less rosemary as it is stronger.
- extra virgin olive oil → Light or mild olive oil, or a high-quality walnut oil. Light olive oil will give less fruity flavor but the same richness; walnut oil adds a subtle nuttiness instead of fruitiness. Either works well.
- bread flour or all-purpose flour → All-purpose flour or a blend of all-purpose and whole wheat (up to 20% whole wheat). Bread flour has more protein and creates a stronger gluten network, but all-purpose works fine. Whole wheat adds nutty flavor and a denser crumb.
- active sourdough starter, fed and at peak → Active dry yeast or instant yeast (5–6 g total) mixed with a pinch of salt. If you don't have active sourdough starter, you can use commercial yeast, but you will lose the complex tang and depth that sourdough fermentation provides. Increase the bulk fermentation to only 4–6 hours, and skip the long cold rest if using yeast.
More sourdough
See all →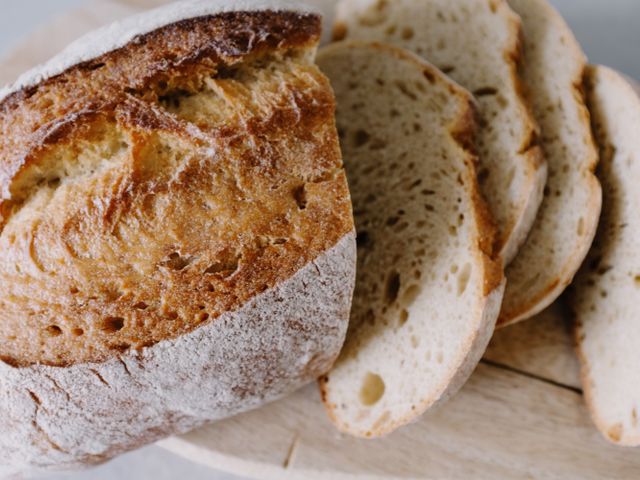



Find more like this
- Meal
- Breakfast
- Cuisine
- Mediterranean
- Method
- Oven