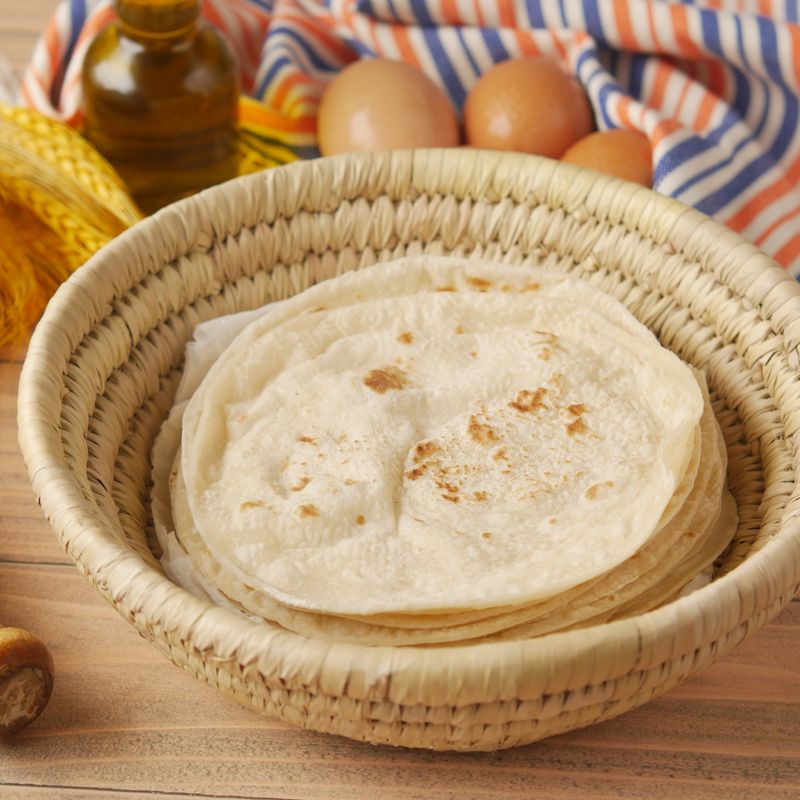
Sourdough Discard Trinidad Sada Roti Flatbread
A Caribbean-inspired flatbread that transforms sourdough discard into tender, buttery layers. Sada roti is a simple, unleavened Trinidad staple traditionally made with flour, salt, and butter. This version incorporates active sourdough discard for subtle tang and improved texture, creating a flatbread that's flaky on the outside, soft within, and perfect for breakfast, lunch, or as an accompaniment to curries and stews.
- Prep
- 30 min
- Cook
- 16 min
- Wait
- 20 min
- Total
- 1 hr 6 min
- Makes
- 8 rotis (8-inch flatbreads)
Steps
Before you start
- Use sourdough discard that is at peak activity (bubbly and doubled) for the best rise and flavor
- Bring butter and discard to room temperature before starting
- Have all ingredients measured and ready—the dough comes together quickly
- Heat your cast-iron skillet or griddle over medium heat for 5 minutes before cooking
Mix dry ingredients
- In a large mixing bowl, whisk together the whole wheat flour (210 g), all-purpose flour (90 g), and salt (4 g).
- Create a well in the center and pour in the room-temperature sourdough discard (240 ml) and lukewarm water (60 ml).
+ Show details− Hide details
Tip: Whisking the flours and salt first prevents clumping when the wet discard is added.
Bring dough together
- Using a wooden spoon or your hands, mix until a shaggy dough forms.
- The dough will be slightly sticky.
- Knead in the bowl for 2–3 minutes until the mixture is evenly combined and no dry flour pockets remain.
- The dough should hold together but stick slightly to your fingers.
+ Show details− Hide details
Ready when: Dough is evenly mixed with no dry flour visible and holds together when pinched
Tip: Do not overwork—sada roti dough should be tender, not tough. Mix just enough to combine.
Incorporate butter into dough
- Add the softened butter (113 g) to the dough in two additions, kneading gently after each addition until fully incorporated.
- The dough will be soft and slightly oily.
- Knead for 2 minutes total after all butter is added.
- Shape the dough into a ball.
+ Show details− Hide details
Ready when: Butter is evenly distributed throughout; dough is soft and no longer streaky
Tip: Adding butter in two additions ensures even distribution. If the dough feels warm, let it rest for 5 minutes before proceeding.
Rest dough
- Cover the dough ball with plastic wrap or parchment paper and let it rest at room temperature for 20 minutes.
- This rest develops the dough's structure and makes it easier to roll.
+ Show details− Hide details
Ready when: Dough is visibly relaxed and slightly larger
Tip: Do not skip this rest—it prevents the dough from shrinking back when you roll it.
Divide into portions
- Turn the dough out onto a lightly floured work surface.
- Using a bench scraper or knife, divide it into 8 equal pieces (about 80–90 g each).
- Roll each piece into a ball.
- Cover loosely with parchment or plastic wrap to prevent drying.
+ Show details− Hide details
Ready when: 8 evenly sized balls, smooth on top
Tip: Use a scale if possible to ensure portions are even so they cook at the same rate.
Roll out first roti
- Take one dough ball and flatten it slightly with your palm.
- On a lightly floured work surface, use a rolling pin to roll it into a thin 8-inch (20 cm) round, about ⅛-inch (3 mm) thick.
- The dough should be even and thin but not see-through.
- If it springs back, let it rest for 1 minute and continue rolling.
+ Show details− Hide details
Ready when: Dough is an even 8-inch round, thin and pliable without tears
Tip: Roll gently from the center outward. If the dough tears, pinch it closed—small tears will seal when cooked.
Cook first batch
- Heat a 10-inch cast-iron skillet or griddle over medium heat.
- Once hot (a drop of water should sizzle gently), add 1 teaspoon (5 g) of butter.
- Slide the rolled roti into the skillet and cook for 2 minutes on the first side.
- The bottom should develop light golden-brown spots.
- Flip and cook the second side for 1.5–2 minutes until golden and cooked through.
- You should see occasional bubbles puffing on the surface.
+ Show details− Hide details
Ready when: Light golden-brown spots on both sides, roti puffs slightly and is no longer translucent
Tip: Do not crowd the skillet. Cook one roti at a time. If the heat is too high, the outside burns before the inside cooks; too low and it becomes dense.
Finish and stack
- Transfer the cooked roti to a plate.
- While still warm, brush the top lightly with softened butter (if desired).
- Stack rotis on top of each other, wrapped loosely in a clean kitchen towel to keep them warm and soft.
- Keep the remaining dough balls covered while you cook the next batch.
+ Show details− Hide details
Ready when: Roti is warm and buttered; stack is wrapped to retain steam
Tip: Stacking the warm rotis in a towel creates steam that keeps them tender and pliable.
Cook remaining rotis
- Repeat steps 6 and 7 with the remaining 7 dough balls, rolling and cooking one at a time.
- Use 1 teaspoon (5 g) butter for each roti.
- The skillet should maintain medium heat throughout; adjust if necessary.
+ Show details− Hide details
Ready when: All 8 rotis are cooked, stacked, and warm
Tip: While one roti cooks, roll the next one so there is no waiting between batches.
Good to know
Tips
- Sourdough discard must be bubbly and active (peak fermentation) for the best rise and subtle sour flavor. If your discard smells like yeast and is visibly bubbled, it is ready.
- The dough may seem sticky and unusual compared to bread dough—this is correct. The high butter content and sourdough contribute to a soft, tender crumb. Avoid adding extra flour, which will toughen the roti.
- For even browning and cooking, ensure your skillet is truly at medium heat before adding each roti. Test the temperature with a drop of water—it should sizzle gently, not violently.
- If rotis feel tough or dense after cooking, the heat was likely too low. Increase to medium-high slightly for the next batch. Conversely, if the outside is dark brown but the inside is not cooked through, lower the heat.
Make ahead
Dough can be made 1–2 hours ahead and kept covered at room temperature. Shape portions and refrigerate covered for up to 8 hours (bring to room temperature before rolling). Cooked rotis can be cooled, wrapped in plastic wrap, and refrigerated for 3 days or frozen for up to 1 month.
Storage & reheating
Room temperature (wrapped in a clean towel): 4–6 hours. Refrigerator (sealed in an airtight container): 3 days. Freezer (wrapped individually in plastic wrap, then in a freezer bag): up to 1 month. Reheat on a skillet or griddle over medium heat for 1–2 minutes per side until warm and soft. Alternatively, wrap in a damp paper towel and microwave for 15–20 seconds.
Substitutions
- whole wheat flour → Use all all-purpose flour (265 g total). Rotis will be lighter and slightly less nutty, with a more delicate texture. Reduce cooking time by 10–15 seconds on each side.
- active sourdough starter discard, at room temperature → Use 240 ml (1 cup) of regular milk or water and add 1 teaspoon (5 g) instant yeast mixed with the flour. You will lose the sourdough tang. The yeast will make the dough rise slightly during rest, producing a slightly fluffier roti.
- unsalted butter, at room temperature → Use ghee or coconut oil in equal amounts. Ghee adds a nutty flavor authentic to Indian rotis; coconut oil creates a more Caribbean-aligned flavor. Both will produce slightly different browning.
- fine sea salt → Use 1 teaspoon of kosher salt. Kosher salt has a larger grain, so use slightly more to achieve the same saltiness. Adjust to taste.
More flatbread doughs
See all →


Find more like this
- Meal
- Breakfast
- Cuisine
- Caribbean
- Method
- Stovetop
- Quick & Easy
- 5 Ingredients or Less