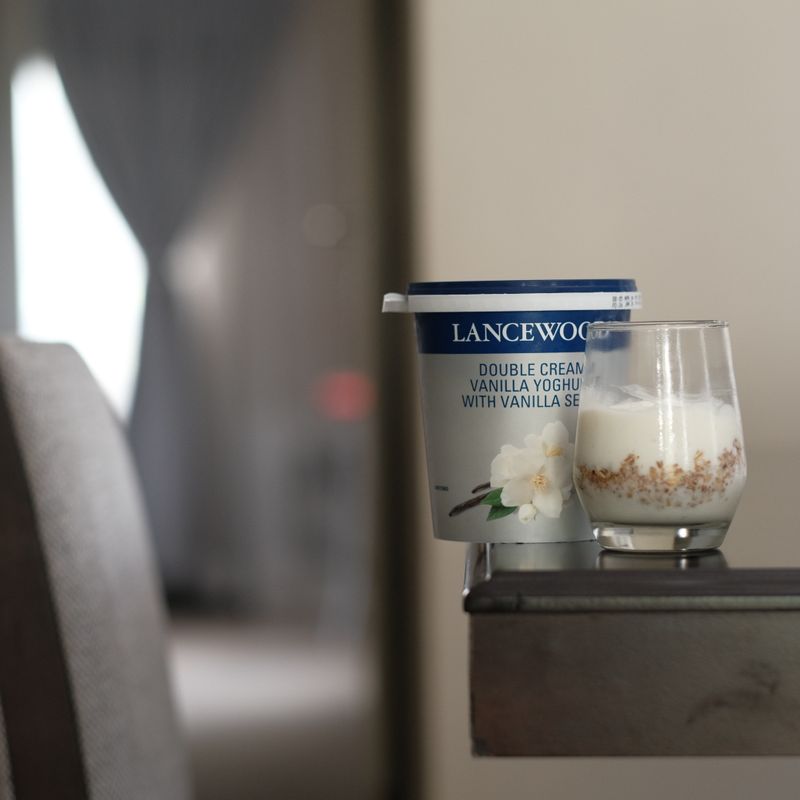
Instant Pot Homemade Yogurt with Vanilla
Make silky, tangy yogurt at home with an Instant Pot using whole milk, a live-culture yogurt starter, and real vanilla bean for natural flavor. No commercial additives—just pure, creamy yogurt ready to eat plain or topped with granola and honey. The incubation process is hands-off, making this an easy weeknight project that yields about 7 cups of yogurt from a single batch.
- Prep
- 15 min
- Cook
- 5 min
- Wait
- 8 hr 10 min
- Total
- 8 hr 30 min
- Makes
- 7 cups (about 56 oz) of yogurt
Steps
Before you start
- Remove yogurt starter from the refrigerator 30 minutes before starting so it reaches room temperature (crucial for live cultures).
- Have a clean Instant Pot and glass jars or containers ready.
- Read through the full method so you understand the cooling and incubation timing.
- Use a yogurt starter with active live cultures (like plain Greek yogurt, Straus Family Creamery, or a dedicated yogurt culture).
Heat milk in Instant PotOven 185°F / 85°C
- Pour the 56 fl oz (1650 ml) whole milk into the Instant Pot inner pot (no need to use the rack at this stage).
- Press the Sauté button and set it to the highest heat setting.
- Heat the milk, stirring occasionally with a wooden spoon, until it reaches 185°F (85°C) on an instant-read thermometer—this will take about 5–8 minutes.
- You'll see small wisps of steam rising but don't let it boil.
- This step kills any unwanted bacteria and helps create a thicker, creamier yogurt.
+ Show details− Hide details
Ready when: Milk reaches 185°F (85°C) with small steam wisps; do not boil
Tip: Ultra-pasteurized milk may not set as well; use standard pasteurized milk if possible. Stir frequently to avoid scorching the bottom.
Cool milk to 110°FOven 185°F / 85°C
- Once the milk reaches 185°F (85°C), press Cancel to turn off the Instant Pot.
- Place the inner pot on a heat-safe surface or trivet.
- Insert the stainless steel rack into the Instant Pot base, then carefully place the inner pot back on the rack (this creates an air gap for even cooling).
- Let the milk cool to 110°F (43°C), stirring gently every few minutes.
- This takes approximately 20–25 minutes.
- Use your instant-read thermometer to monitor the temperature.
- When it reaches 110°F (43°C), the milk should be warm to the touch but not hot—this is the ideal temperature for the cultures to activate.
+ Show details− Hide details
Ready when: Milk is at exactly 110°F (43°C), warm but not hot to touch
Tip: Do not skip the cooling step or inoculate at a higher temperature—the live cultures will die. Check temperature at least three times during cooling.
Prepare vanilla mixture
- While the milk cools, scrape the seeds from the split vanilla bean and place them in a small bowl.
- Add 3 tablespoons (45 ml) of the cooling milk from the Instant Pot to the vanilla seeds and stir to disperse them evenly (this prevents clumping).
- If you prefer to avoid visible vanilla flecks, strain the seeds through a fine-mesh sieve into another bowl, but most people enjoy the authentic specks.
- Set the vanilla mixture aside at room temperature.
+ Show details− Hide details
Ready when: Vanilla seeds are well dispersed in the milk; no clumps visible
Tip: Use fresh vanilla beans (not extract) for the most flavorful result. If using vanilla extract, skip this step and add 2 teaspoons to the yogurt starter mixture in the next step.
Inoculate milk with starter culture
- Once the milk is at 110°F (43°C), pour the room-temperature yogurt starter (0.5 cup / 120 ml) into a separate bowl.
- Add about 1/4 cup (60 ml) of the warm milk to the starter and whisk gently for 30 seconds until smooth and fully combined.
- Then slowly pour the starter mixture back into the pot, stirring the milk gently but thoroughly in slow, sweeping motions for about 1 minute.
- This even distribution of cultures throughout the milk is critical for uniform yogurt.
- Add the vanilla seed mixture and stir gently for another 30 seconds to combine.
+ Show details− Hide details
Ready when: Starter is fully incorporated and vanilla is evenly distributed; no streaks of starter visible
Tip: Vigorous stirring or shaking can break down the milk proteins. Stir slowly and gently. Never let the temperature drop below 100°F (37°C) before incubating.
Incubate yogurt in Instant Pot
- Press the Yogurt button on your Instant Pot (if your model has one).
- The display will show '8:00,' meaning 8 hours of incubation time.
- Do not adjust the timer.
- Some Instant Pot models allow you to adjust this; if so, keep it at 8–10 hours.
- The Instant Pot will maintain a gentle, consistent heat around 110°F (43°C), which is perfect for the cultures to thrive and set the yogurt.
- Cover the pot with the glass lid (not the pressure-cooking lid) or a kitchen towel.
- Leave the pot undisturbed on the counter.
- During this time, the milk will slowly thicken into yogurt.
+ Show details− Hide details
Ready when: Display counts down from 8:00 to 0:00; cultures have incubated for 8 hours
Tip: Do not move, shake, or open the Instant Pot during incubation. Even small vibrations can prevent the yogurt from setting properly. Keep the pot away from drafts and vibrations (such as washing machines or loud appliances).
Check yogurt for thickness
- When the Instant Pot timer reaches 0:00 and beeps, wait 5 minutes, then press Cancel and turn off the heat.
- Using a clean spoon, gently tilt and peek at the yogurt inside the pot.
- It should jiggle slightly when you move the pot—like soft custard or thick pudding.
- If it looks too liquid or watery, return the cover and let it incubate for another 30–60 minutes at room temperature by covering with a kitchen towel and leaving it in the turned-off Instant Pot.
- If it looks perfectly set (creamy, with just a slight jiggle), it's ready.
+ Show details− Hide details
Ready when: Yogurt jiggles gently like soft custard; no liquid whey pools on top (or very little)
Tip: Longer incubation (10–12 hours) makes tangier yogurt; shorter (6–7 hours) is milder. Trust your eyes and the jiggle test—don't rely solely on time.
Cool and transfer to containers
- Once the yogurt is set, carefully transfer it to clean glass jars or containers.
- You can either pour it gently (it will be loose at first) or scoop it with a spoon if it's very thick.
- If there's a thin layer of liquid whey on top, you can pour it off for a thicker yogurt, or stir it in for a creamier texture.
- Cover the jars with lids and place them in the refrigerator.
- The yogurt will continue to set and firm up as it chills, reaching full thickness in 2–3 hours but is perfectly edible immediately.
- Discard the vanilla bean pod if it fell into the yogurt during incubation.
+ Show details− Hide details
Ready when: Yogurt is transferred to containers and lids are secured
Tip: Do not shake or stir the yogurt during transfer—rough handling can break down the delicate curds. Pour or scoop slowly and gently.
Chill and enjoy
- Refrigerate the yogurt for at least 3 hours (or overnight) before serving.
- The yogurt will firm up significantly during chilling and develop its full flavor.
- Serve plain, or top each portion with 1/2 teaspoon (2.5 ml) of raw honey, fresh berries, granola, or a drizzle of the reserved vanilla bean pod (which can be rinsed, dried, and reused in other recipes).
- The yogurt will keep refrigerated for up to 10 days.
+ Show details− Hide details
Ready when: Yogurt is thick, creamy, and fully set after 3+ hours of chilling
Tip: Save 1/2 cup (120 ml) of your finished yogurt as a starter for your next batch—it will stay active in the fridge for up to 5 batches.
Good to know
Tips
- Do not use ultra-pasteurized milk—the high heat breaks down milk proteins and prevents proper yogurt setting. Standard pasteurized whole milk is ideal.
- Keep all equipment (spoon, jars, thermometer) clean but not necessarily sterilized. The live cultures are hardy and will thrive in normal kitchen-clean conditions.
- Save your last 1/2 cup of finished yogurt as a 'mother culture' for your next batch. You can repeat batches 4–5 times before the culture weakens and you'll need a fresh starter.
- For tangier yogurt, incubate for 10–12 hours; for milder, creamier yogurt, incubate for 6–7 hours. The longer the incubation, the more lactose is consumed by the cultures, making it easier to digest.
Make ahead
Yogurt can be made 1–2 days ahead and refrigerated. The finished yogurt can also be strained through cheesecloth for 4–8 hours to create Greek-style yogurt with a thicker, creamier texture and tangy flavor.
Storage & reheating
Refrigerate in airtight glass containers for up to 10 days. Do not freeze (frozen yogurt separates when thawed). For Greek yogurt, strain finished yogurt through cheesecloth in the refrigerator for 4–8 hours to remove whey, then store the thickened yogurt for up to 2 weeks.
Substitutions
- vanilla bean (Madagascar or Tahitian) → 2 teaspoons (10 ml) pure vanilla extract. Add to the yogurt starter mixture in Step 4 instead of fresh vanilla bean. Flavor will be slightly sharper but convenient.
- plain live-culture yogurt or powdered yogurt starter → 2–3 tablespoons (30–45 ml) of store-bought plain yogurt with live active cultures. Use a fresh yogurt to ensure active cultures. Avoid yogurt older than 2 weeks, as culture viability decreases.
- whole milk (not ultra-pasteurized preferred, but standard pasteurized works) → 2% low-fat milk or a blend of 80% whole milk and 20% heavy cream. 2% milk will yield a slightly thinner yogurt; adding cream makes it richer and creamier.
- raw honey or clover honey → maple syrup, agave nectar, or pure cane sugar (1.5 teaspoons / 7.5 ml per serving). These provide sweetness without raw honey's crystalline texture. Stir in before serving.
More yogurt & granola
See all →


Find more like this
- Meal
- Breakfast
- Method
- Instant Pot
- Quick & Easy
- 5 Ingredients or LessEasyMeal PrepMake Ahead