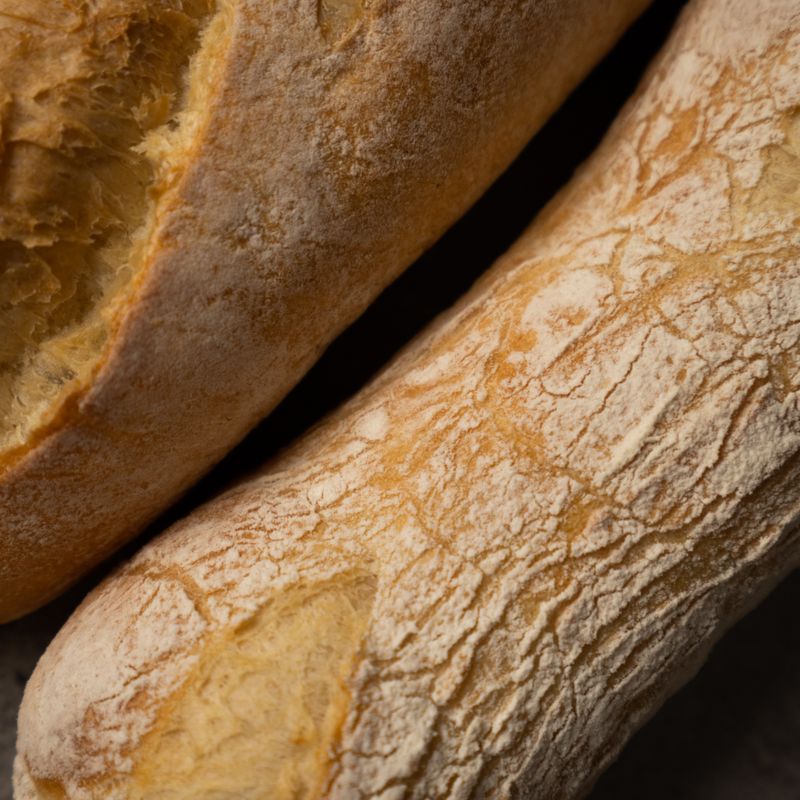
Sourdough Spanish Barra with Crispy Crust and Open Crumb
A traditional Spanish barra made with sourdough starter, this rustic loaf features a deeply caramelized, crackling crust and an open, irregular crumb structure. The long fermentation develops complex flavor and a delicate texture that's perfect for slicing, toasting, or tearing apart. Steam-baking creates the signature crispy exterior while keeping the interior moist and chewy.
- Prep
- 20 min
- Cook
- 25 min
- Wait
- 8 hr
- Total
- 8 hr 45 min
- Makes
- 1 loaf (12–14 slices)
Steps
Before you start
- Ensure your sourdough starter is active and bubbly (fed 4–8 hours before mixing)
- Have a dutch oven or covered baking vessel ready
- Preheat your oven with the dutch oven inside to 500°F (260°C) for at least 45 minutes
- Use bread flour for strength and extensibility
- Read through the full timeline—this dough benefits from a long, cool fermentation
Mix the dough
- In a large mixing bowl, combine 100 g active sourdough starter, 325 ml room-temperature water, and 500 g bread flour.
- Stir with your hand or a wooden spoon until all flour is moistened and no dry streaks remain.
- The dough will be shaggy and loose.
- Cover with a damp towel and let rest for 30 minutes at room temperature.
- This autolyse allows the flour to fully hydrate.
+ Show details− Hide details
Ready when: All flour is moistened and no dry bits remain
Tip: Skip the autolyse if you prefer to add salt immediately, though resting strengthens the dough.
Add salt and incorporate
- After the 30-minute rest, sprinkle 10 g sea salt over the dough.
- Wet your hand and fold the dough over itself 6–8 times in the bowl, incorporating the salt gradually.
- The dough will become smoother and more cohesive.
- Once the salt is fully worked in, cover and let rest for 10 minutes.
+ Show details− Hide details
Ready when: Salt is evenly distributed and dough feels unified
Tip: Wet your hand before folding to prevent sticking and avoid developing lumpy pockets of undissolved salt.
First set of coil folds
- Wet your hand and perform coil folds: grab the side of the dough closest to you and fold it toward the center, rotate the bowl 90°, and repeat.
- Do 4–5 coil folds, covering the bowl between rotations.
- This builds strength and develops gluten without aggressive kneading.
- The dough will feel tighter and more elastic.
- Cover and rest for 30 minutes at room temperature.
+ Show details− Hide details
Ready when: Dough is noticeably smoother and springs back slowly when poked
Tip: Coil folds are gentler than stretch-and-fold and help develop open crumb without degassing the dough.
Second set of coil folds
- Repeat the coil folding routine: 4–5 folds, rotating the bowl 90° between each fold, then cover and rest for 30 minutes.
+ Show details− Hide details
Ready when: Dough is cohesive and springs back when poked with a finger
Tip: The dough is getting stronger; don't overwork it now, as it will degas and become dense.
Bulk fermentation at cool temperature
- After the second set of folds, cover the bowl and transfer it to the coolest place in your kitchen—ideally 65–70°F (18–21°C).
- This could be an unheated room, a cool corner, or the refrigerator (though not fully cold yet).
- Let the dough bulk ferment for 8–12 hours or overnight, until it increases in volume by 30–50% and jiggles slightly when the bowl is gently moved.
- The dough should feel airy and full of gas, but not overly puffy.
+ Show details− Hide details
Ready when: Dough has risen 30–50%, feels full of bubbles, and jiggles gently in the bowl
Tip: A long, cool fermentation is key to Spanish barra character: it develops sour flavor and creates the open, irregular crumb. Avoid warm fermentation, which makes dense bread.
Pre-shape the batta
- Turn the dough out onto a lightly floured work surface.
- Without degassing it too much, gently pre-shape it into a loose batard (oval) by folding the top third down, then the bottom third up, and rolling it toward you to create tension on the surface.
- This pre-shape should be roughly 10 inches (25 cm) long and 3 inches (7–8 cm) wide.
- Place it seam-side down on the work surface and let rest for 20 minutes, uncovered or lightly covered, while you prepare your banneton.
+ Show details− Hide details
Ready when: Dough is relaxed but holds a slight oval shape; it dimples when poked lightly
Tip: Gentle handling at this stage preserves the bubbles you've developed. Don't pound or over-fold the dough.
Final shaping
- Dust your banneton (or a bowl lined with a floured kitchen towel) generously with flour.
- Flip the pre-shaped dough seam-side up.
- Fold the top edge down to the center, sealing gently with your fingertips, then fold the bottom edge up and seal.
- Roll the dough toward you, creating a tight, taut oval with tapered ends.
- Place it seam-side up in the banneton, dust lightly with flour, and cover loosely with plastic or a plastic bag.
+ Show details− Hide details
Ready when: Dough is taut, oval, with defined tapered ends and a sealed seam
Tip: A tight final shape creates surface tension, which gives you a crispy exterior and helps the loaf spring in the oven.
Cold proof overnight
- Cover the banneton with plastic and place it in the refrigerator at 38–40°F (3–4°C) for 8–16 hours, or until the dough is fully proofed.
- To test for doneness, gently poke the dough with a floured finger—it should bounce back slowly and leave a small dimple.
- If it springs back quickly, it needs more time; if it doesn't bounce back at all, it may be overproofed.
+ Show details− Hide details
Ready when: Dough springs back slowly and holds a small dimple after the poke test
Tip: Cold proofing is optional but highly recommended for a crisp crust and tangy flavor. You can also proof at room temperature for 2–4 hours instead, if needed.
Preheat oven and prepare for bakingOven 500°F / 260°C
- About 1 hour before baking, preheat your oven to 500°F (260°C) with a dutch oven or covered baking vessel inside.
- The vessel should be large enough to fit the batard comfortably (at least 5 quart capacity).
- Allow the dutch oven to heat for at least 45 minutes so it reaches full temperature and the bottom is very hot.
+ Show details− Hide details
Ready when: Dutch oven is very hot and smoke may faintly rise from the lid
Tip: A properly preheated dutch oven is essential for crispy crust and oven spring. Do not skip this step.
Score and transfer to ovenOven 500°F / 260°C
- Remove the dutch oven from the oven (carefully—it is very hot).
- Line the bottom with a square of parchment paper for easy handling.
- Turn the proofed batard out of the banneton onto a cutting board, seam-side down.
- Using a bread lame or very sharp serrated knife held at a 30° angle, score a single long slash down the center of the loaf, about ¼ inch (6 mm) deep and 8–10 inches (20–25 cm) long.
- Immediately but carefully transfer the batard to the hot dutch oven (with parchment), seam-side down.
- Cover with the lid.
+ Show details− Hide details
Ready when: Batard is scored cleanly and sits in the hot dutch oven, lid in place
Tip: A cold dough scores cleanly because the surface is firm. The single slash along the length encourages the characteristic ear (flap) on the barra. Work quickly so the dutch oven doesn't cool.
Bake covered with steamOven 500°F / 260°C
- Bake covered at 500°F (260°C) for 20 minutes.
- The trapped steam will puff the dough and set the crust.
- You should hear a faint crackling sound as the crust forms.
+ Show details− Hide details
Ready when: Loaf has risen and the interior of the dutch oven is filled with steam; slight crackle audible
Tip: Do not open the oven or lift the lid during this phase—you will release steam and deflate the loaf.
Finish baking uncoveredOven 500°F / 260°C
- Carefully remove the lid and continue baking at 500°F (260°C) for 22–28 minutes, until the crust is deeply golden-brown with darker brown streaks and edges, and the loaf sounds hollow when tapped on the bottom.
- The internal temperature should reach 205–210°F (96–99°C).
+ Show details− Hide details
Ready when: Crust is deeply caramelized and crackling; bottom sounds hollow when tapped; internal temperature is 205–210°F (96–99°C)
Tip: If the crust is browning too fast, reduce the oven temperature to 475°F (245°C) for the final phase. The high heat is important for that crispy exterior, but every oven varies.
Cool completely
- Remove the batard from the dutch oven and place it on a wire rack or clean kitchen towel.
- Allow it to cool completely at room temperature for at least 1 hour (ideally 2 hours) before slicing.
- The crumb continues to set and firm up as it cools, and premature slicing will result in a gummy texture.
+ Show details− Hide details
Ready when: Loaf is at room temperature and bottom is cool to the touch
Tip: Resist the urge to slice while warm—the interior will be soft and the slice will collapse. A fully cooled loaf slices cleanly.
Good to know
Tips
- Spanish barra are built on a long, cool fermentation: the 8–12 hour bulk and 8–16 hour cold proof are not optional. This develops the complex sour flavor, creates an open crumb with irregular hole structure, and makes the dough easier to score.
- Coil folds (instead of aggressive stretch-and-fold) gently build gluten without degassing the dough. This preserves the large bubbles created by long fermentation.
- Steam is essential for a crispy, crackling crust. Do not skip preheating the dutch oven, and do not open the oven during the first 20 minutes of baking.
- The single long slash down the center encourages the characteristic 'ear' (scored flap) that defines Spanish barra. Hold the lame at a 30° angle for a clean cut.
- Always cool completely before slicing. Warm bread has a soft, gummy crumb that compresses under the knife and falls apart. One to two hours at room temperature is ideal.
Storage & reheating
Room temperature (2–3 days): Place the cooled loaf in a cloth bread bag or wrap it loosely in a linen towel to allow air circulation and keep the crust crisp. Once cut, store it cut-side down on a cutting board or wrapped lightly in plastic. Refrigerator (up to 5 days): Wrap tightly in plastic or in a bread bag and refrigerate to slow mold growth. To revive a stale crust, wrap the whole loaf in foil and warm in a 325°F (163°C) oven for 10 minutes. Freezer (up to 2 months): Wrap the cooled loaf tightly in plastic wrap and then foil, or place in a freezer bag. Thaw at room temperature for 4–6 hours, then warm in a 325°F (163°C) oven for 10 minutes if you want a crisp crust.
Substitutions
- bread flour → All-purpose flour (11–12% protein) or a blend of 80% all-purpose and 20% whole wheat flour. All-purpose flour will give a slightly softer crumb and less extensibility; add 5–10 ml more water if you use 100% all-purpose. Whole wheat flour adds nuttiness and slightly darkens the crust but may reduce open crumb.
- active sourdough starter → Ripe liquid (100% hydration) sourdough starter at 110–120 g, or 75 g thick (50% hydration) starter. Adjust total dough hydration by reducing water slightly if using a very thick starter. A liquid starter makes slight weight adjustments but keeps fermentation timing roughly the same.
- fine sea salt → Kosher salt (Diamond Crystal) at 12 g, or sea salt flakes at 9 g. Kosher salt is less dense; adjust up slightly. Fine sea salt is standard for this recipe.
- filtered or tap water → Use dechlorinated or well water if available for a cleaner flavor. Tap water works fine; chlorine can inhibit wild fermentation slightly but won't significantly impact this dough.
More yeast breads
See all →


Find more like this
- Meal
- Breakfast
- Cuisine
- Spanish
- Method
- Oven
- Quick & Easy
- 5 Ingredients or Less