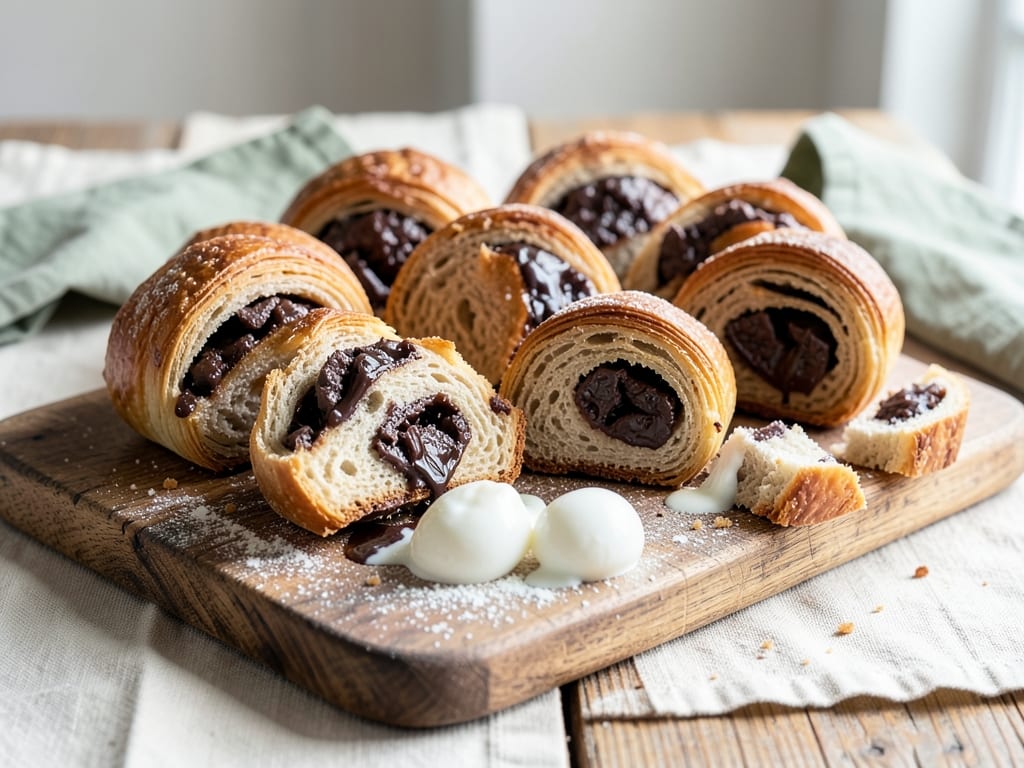
Sourdough Pain au Chocolat
French laminated pastries made with tangy sourdough starter and cold butter lamination, yielding ten chocolate-filled, flaky pastries with dark golden exteriors and melted chocolate centers. This sophisticated three-day recipe combines long sourdough fermentation with precise butter-folding technique, resulting in delicate, tender layers and complex tangy flavor. Requires patience, temperature control, and attention to the lamination process.
- Prep
- 1 hr 45 min
- Cook
- 25 min
- Wait
- 20 hr 10 min
- Total
- 22 hr 20 min
- Makes
- 10 pain au chocolat
Steps
Before you start
- Your sourdough starter must be active and fed 4-8 hours prior, showing good rise with a bubbly, pleasant aroma.
- Plan for a three-day schedule: Day 1 (mixing and bulk fermentation in late afternoon/evening), Day 2 (lamination and overnight rest), Day 3 (shaping, proofing, and baking).
- Clear refrigerator space for multiple chilling periods; have lamination butter (400g) cold but flexible (50-65°F / 10-18°C) when you need it.
- Read through the lamination steps (Steps 4-6) and understand the rolling, folding, and turning technique before beginning.
- Keep your work surface clear and have extra flour ready; lamination requires a stable, cool workspace.
Mix dough and autolyse
- In a large mixing bowl, combine 500g bread flour, 200g active sourdough starter (fed within the past 4-8 hours), and 280ml water.
- Stir with a wet hand until all flour is incorporated and the mixture is a shaggy, rough dough with no dry flour patches.
- The texture should look lumpy and underdeveloped.
- Cover the bowl with plastic wrap and let rest at room temperature (68-72°F / 20-22°C) for 30 minutes.
- This autolyse period allows the flour to fully hydrate and begins gluten development naturally.
+ Show details− Hide details
Ready when: Dough is shaggy and lumpy, all flour is fully wet
Tip: Make sure your sourdough starter is active and bubbly before mixing; a sluggish or recently refrigerated starter will result in slow fermentation.
Add salt and build gluten with stretch-and-fold
- Sprinkle 10g salt and 50g cold cubed butter over the dough.
- Wet your hand with cool water, grab one side of the dough, stretch it up and fold it over the center.
- Rotate the bowl 90° and repeat 3 more times in the same direction (this completes one round of stretch-and-fold).
- Cover and rest for 30 minutes.
- Repeat this entire stretch-and-fold sequence 3 more times, with 30-minute rests between each round.
- By the final round, the dough should feel noticeably smoother and more cohesive, with slight elasticity and visible bubbles on the surface.
- You're building gluten structure while gradually incorporating the butter.
+ Show details− Hide details
Ready when: Dough is smooth and elastic, holds together when lifted, visible bubbles present
Tip: Keep your hands wet during S&F to prevent sticking; don't overstretch or the dough will tear. If the dough feels particularly tight, let it rest an extra 10 minutes before the next round.
First bulk fermentation
- Cover the bowl with plastic wrap and let the dough ferment at room temperature (68-72°F / 20-22°C).
- The dough is ready when it has increased in volume by 50-75% and feels airy and alive.
- It should show visible bubbles when you gently press the side, and have a pleasant, tangy aroma.
- This typically takes 5-6 hours, but may take longer in a cool kitchen (aim for 6-7 hours at 65°F / 18°C) or shorter in a warm one (as little as 4 hours at 75°F / 24°C).
- Don't let it rise more than 75% or the gluten will weaken and fermentation will collapse.
+ Show details− Hide details
Ready when: Dough has increased 50-75%, feels pillowy with visible bubbles, has pleasant aroma
Tip: Use a kitchen thermometer to monitor dough temperature, aiming for 75-78°F / 24-26°C during bulk fermentation. A cooler kitchen (65°F / 18°C) slows fermentation and deepens flavor development. Mark the initial height on the bowl with a piece of tape or a food marker.
Enclose lamination butter (pre-laminate)
- Lightly flour your work surface.
- Turn the dough out onto the counter and gently pat and stretch it into a rough 12x8 inch (30x20 cm) rectangle, being careful not to deflate it completely.
- Place your 400g block of cold butter on one half of the dough, leaving a 1-inch (2.5 cm) border on all sides.
- Fold the other half of the dough over the butter, then press and pinch all the edges together firmly to seal so the butter is completely enclosed and won't leak out.
- If the dough feels warm or sticky at this point, cover with plastic wrap and chill for 15 minutes before proceeding to the first turn.
+ Show details− Hide details
Ready when: Butter is fully enclosed within the dough with sealed edges all around
Tip: The butter block must be cold (50-65°F / 10-18°C) but flexible, not rock-hard or warm. If it's too soft, it will break through the dough; if too hard, it will crack. If your kitchen is warm, work quickly and chill between folds.
First and second lamination turns
- Lightly flour your work surface and place the butter-enclosed dough in front of you.
- Using a rolling pin, gently roll out the dough lengthwise (away from you) to a 20x6 inch (50x15 cm) rectangle, maintaining even thickness.
- The goal is to stretch the dough without breaking through the butter layers; you should see faint striations or stripes.
- Brush off excess flour with a pastry brush or dry bench scraper.
- Fold the rectangle into thirds like a letter: fold the bottom third up toward the center, then fold the top third down over it.
- Rotate the dough 90° clockwise so the open edges now face you (this helps you track which turn you're on).
- Wrap the dough in plastic wrap and refrigerate for 20-30 minutes until the butter feels firm again.
- Remove from the fridge and repeat the rolling, folding, and rotating process exactly as described.
- Wrap and chill again for 20-30 minutes.
- You've now completed two turns.
+ Show details− Hide details
Ready when: Each turn produces visible striations or layers when you look at the dough's edge; thickness is even
Tip: If dough becomes too warm and the butter starts breaking through, chill immediately for 15 minutes. If it becomes hard and cracks when rolling, let it rest at room temperature for 5 minutes to soften slightly. Watch for visible butter pockets appearing; if you see them, chill right away.
Third and fourth turns, then overnight rest
- Remove the dough from the fridge and repeat the rolling, folding, rotating, and chilling process two more times for the 3rd and 4th turns (20-30 min chills between each).
- After the 4th fold and rotation, wrap the laminated dough tightly in plastic wrap and refrigerate overnight, or for at least 8 hours (12 hours is ideal).
- This extended rest is crucial: it allows the butter and dough to fully relax and equilibrate, making the dough much easier to shape tomorrow and significantly reducing the risk of butter breaking through the dough during baking.
- The dough will keep refrigerated for up to 3 days if needed.
+ Show details− Hide details
Ready when: Dough is cold and firm; you can tear a small corner and see clear laminated layers
Tip: Overnight rest is strongly recommended; it prevents the dough from being overly elastic and resistant to shaping, and dramatically reduces the risk of butter breaking through during baking. If your schedule requires, the dough can rest in the fridge for up to 3 days (wrap it well to prevent drying).
Shape into pain au chocolat
- Remove the laminated dough from the refrigerator and let it sit at room temperature for 5-10 minutes to warm slightly (it should still be cold and firm but workable).
- Lightly flour your work surface and roll out the laminated dough to an 18x10 inch (45x25 cm) rectangle, about 1/4 inch (6 mm) thick.
- Trim the edges neatly with a sharp knife if needed to create a clean rectangle.
- Using a sharp knife or pastry wheel, cut the rectangle into 10 equal pieces, each approximately 4.5x3.5 inches (11x9 cm).
- For each piece: place 5-6g of dark chocolate batons (2-3 batons, depending on size) in a line along one long edge, about 1/2 inch (1.25 cm) from the edge.
- Roll the rectangle tightly away from you, pressing gently to seal the seam.
- Place seam-side down on a parchment-lined baking sheet, spacing them about 2 inches (5 cm) apart to allow room for puffing.
+ Show details− Hide details
Ready when: All 10 pastries are shaped, seam sealed, and evenly spaced on the baking sheet
Tip: If the dough warms up and becomes sticky during shaping (taking more than 10-15 minutes total), cover shaped pastries with plastic wrap and chill for 10-15 minutes. Keep unused dough covered so it doesn't dry out. Don't worry if a little chocolate peeks out; it will caramelize during baking.
Final proof (at room temperature or cold)
- Cover the shaped pastries loosely with plastic wrap (or place in a large, loose plastic bag).
- Let them proof at room temperature (68-72°F / 20-22°C) for 2-3 hours until they are visibly puffy and airy.
- They should look noticeably risen, and a gentle poke with your finger should feel pillowy; the dough should spring back slowly rather than immediately or not at all.
- Alternatively, for a cold overnight proof (which often yields better, more even texture): cover and refrigerate overnight (8-12 hours), then remove from the fridge 30-45 minutes before baking to let them come to room temperature.
- The cold-proof method is often preferred because it's less temperamental and gives superior results.
+ Show details− Hide details
Ready when: Pastries are visibly puffed and airy; gentle poke springs back slowly
Tip: Don't let them overproof; if they become very puffy and collapse when you touch them, they're overproofed and will spread during baking. Room-temperature proof takes about 2-3 hours, but watch for the visual cues, not the time. Cold-proof overnight is more forgiving.
Preheat oven and apply egg washOven 400°F / 205°C
- While the pastries are in their final 15-20 minutes of proofing, preheat your oven to 400°F (200°C).
- In a small bowl, beat 1 large egg yolk with 15ml (1 tbsp) water until smooth and uniform.
- Once the pastries are fully proofed, brush each one evenly with the egg wash using a pastry brush, covering the tops and sides generously.
- Avoid pooling egg wash in the gaps between pastries, as this can prevent the sides from rising properly during baking.
- If egg wash drips or pools, gently dab it away with a dry brush.
+ Show details− Hide details
Ready when: All pastries evenly egg-washed; oven has reached 400°F (200°C)
Tip: Use an egg yolk for a richer, glossier finish. If you don't have just a yolk, use one whole beaten egg. The egg wash gives pain au chocolat their characteristic deep golden-brown, glossy appearance.
Bake until goldenOven 400°F / 205°C
- Place the baking sheet on the middle rack of the preheated oven (400°F / 200°C).
- Bake for 22-28 minutes, until the pastries are a deep, rich golden brown on top and the sides are also evenly browned.
- The chocolate inside should be melted and soft, but ideally not leaking out dramatically.
- If you're concerned about doneness or chocolate leakage, you can carefully insert a thin knife or paring knife between the laminated layers of one pastry to peek; the chocolate should look dark and glossy.
- Remove from the oven and let the pastries cool on the baking sheet for 5 minutes (they continue to firm up slightly during this rest), then transfer to a wire cooling rack.
- They are best enjoyed within a few hours of baking, while still warm or at room temperature.
+ Show details− Hide details
Ready when: Deep golden-brown exterior; chocolate is melted but not leaking excessively
Tip: Oven temperatures vary; watch for deep golden brown rather than relying solely on the time. If the tops brown too quickly, you can tent with aluminum foil for the last 5 minutes. Don't overbake or the pastries will be dry and the chocolate may separate from the dough.
Good to know
Tips
- Temperature control is critical to success: Lamination butter should be cold (50-65°F / 10-18°C), and dough should stay cool throughout (aim for 68-72°F / 20-22°C during development). Use a kitchen thermometer if precision matters. Cold butter won't break through; warm butter will.
- Lamination requires patience and a light touch: Each turn must be executed carefully to avoid tearing the dough and mixing butter into it. If the dough resists rolling, let it rest for 5 minutes; if the butter starts peeking through, chill immediately for 15 minutes.
- Overnight rests dramatically improve results: The extended cold rest between lamination (Step 6) and shaping, and optionally between shaping and baking, makes the dough much easier to handle and yields more even, lighter pastries with less risk of butter breaking through.
- Sourdough flavor develops during bulk fermentation: A cooler kitchen (65°F / 18°C) and longer bulk fermentation (6-8 hours) will yield more pronounced sourdough tang. A warmer kitchen speeds fermentation and produces a milder flavor. Adjust timing to your kitchen temperature.
Make ahead
The laminated dough can be prepared up to 3 days ahead and stored in the refrigerator, wrapped tightly in plastic wrap. Shape and proof directly from the cold dough. Fully baked pain au chocolat can be frozen for up to 1 month; wrap individually in plastic wrap, then place in a freezer-safe container. Reheat from frozen in a 300°F (150°C) oven for 15-20 minutes, or thaw overnight and reheat for 8-10 minutes.
Storage & reheating
Room temperature: Store in an airtight container for up to 2 days; they gradually lose crispness over time. Refrigerator: Store in an airtight container for up to 4 days; reheat in a 300°F (150°C) oven for 8-10 minutes until the interior warms through. Freezer: Wrap individual pastries in plastic wrap, then place in a freezer-safe container; freeze for up to 1 month. Reheat from frozen in a 300°F (150°C) oven for 15-20 minutes, or thaw overnight in the refrigerator and reheat for 8-10 minutes until warm.
Substitutions
- dark chocolate batons → Finely chopped dark chocolate (70% cacao) or dark chocolate chips. If batons are unavailable, use about 5-6g (1-2 tsp) of chopped chocolate per pastry. The chocolate may be slightly more scattered inside, but the flavor is the same.
- sourdough starter → 200ml whole milk mixed with 1g instant yeast (about 1/4 tsp). This creates a yeast-leavened version without the complex sourdough flavor. The fermentation will be faster (bulk ferment may be 3-4 hours instead of 5-6). The final pastry will be less tangy and more neutral in flavor.
- large egg → 1 tbsp whole milk or heavy cream mixed with 1 tsp water, or 1 tbsp water mixed with 1/2 tsp sugar. These alternatives provide some shine but won't give quite as glossy or deep brown a finish. The pastry will still taste excellent.
- unsalted butter → European-style butter (85% fat) for a richer result, or all-butter laminating margarine if vegan/dairy-free is needed. European butter will yield richer, more tender layers. Laminating margarine works but produces a less rich flavor and may not caramelize as beautifully.
More pastries
See all →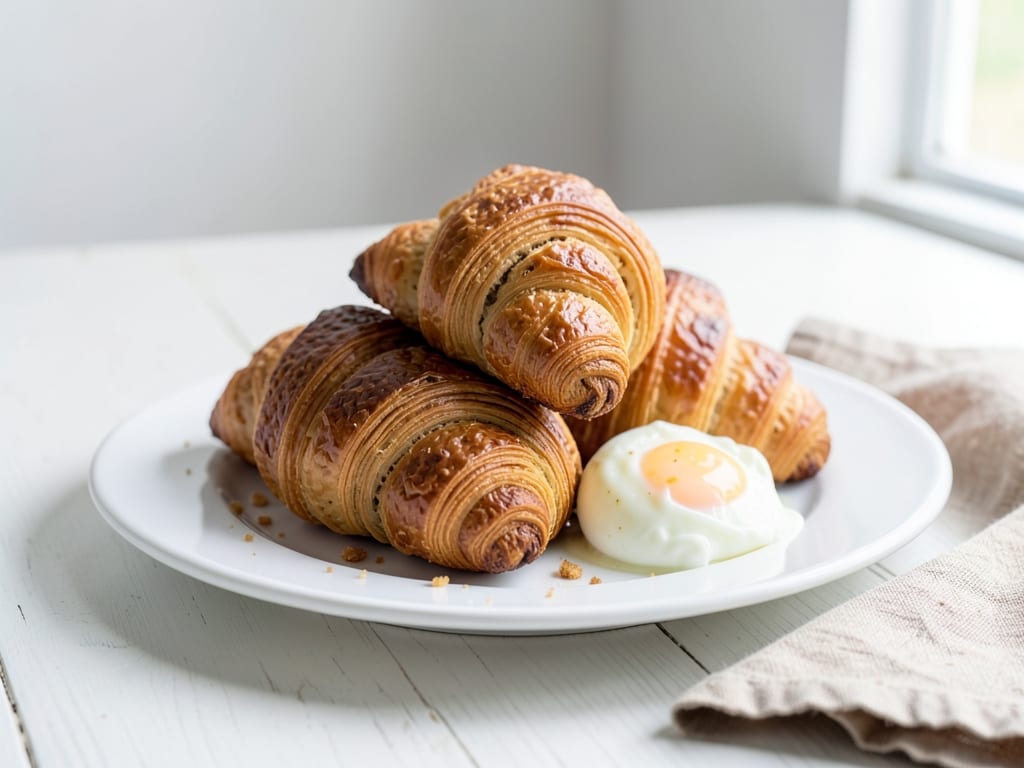


Find more like this
- Meal
- Breakfast
- Cuisine
- French
- Method
- Oven
- Quick & Easy
- Make Ahead