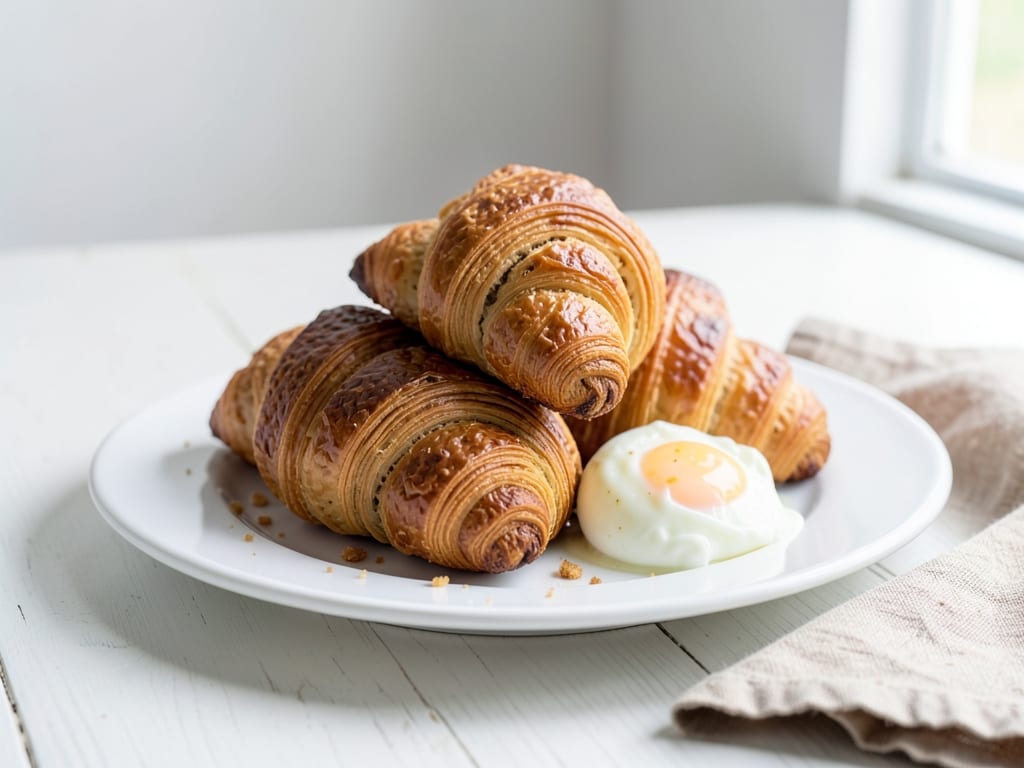
Sourdough Croissants
Sourdough croissants take classic French laminated pastry in a new direction by using active sourdough starter instead of commercial yeast. The extended fermentation and slow cold rise develop incredible depth of flavor—notes of nuts, caramel, and subtle tang—while the traditional lamination technique creates dozens of thin, crispy butter layers. These are genuine croissants, not quick bread. Plan for a project that unfolds over two days, with most of the time being hands-off fermentation and proofing. The result: buttery, flaky, tender pastries with complex flavor that no one-day croissant can match.
- Prep
- 1 hr 25 min
- Cook
- 20 min
- Wait
- 1.2 days
- Total
- 1.3 days
- Makes
- 12 croissants
Steps
Before you start
- Feed your sourdough starter 4–8 hours ahead of mixing; use when it's bubbly and at peak
- Have all ingredients at cool room temperature (68–70°F / 20–21°C) for easiest mixing and lamination
- Chill your work surface and rolling pin before starting
- Plan for a two-day project: day 1 involves mixing and one rest; day 2 involves lamination, shaping, final proof, and baking (or spread across three days for less rushing)
Combine and mix dough
- Add bread flour, milk, water (60 ml / ¼ cup portion), sourdough starter, sugar, and salt to a stand mixer bowl.
- Using the dough hook on low speed, mix for 5 minutes until ingredients come together into a shaggy mass (or stir by hand with a wooden spoon).
- Increase to medium speed and mix another 5 minutes until the dough is smooth and slightly sticky, holding together as one mass.
- Gently press in the softened butter until fully incorporated, about 2 minutes more.
- The dough should feel soft, slightly tacky, and cohesive.
- It is not fully kneaded—lamination will develop the gluten structure.
+ Show details− Hide details
Ready when: Soft, slightly tacky dough that holds together as one mass
Bulk fermentation
- Transfer the dough to a lightly oiled container (about 3–4 qt / 3–4L).
- Cover with plastic wrap or a damp cloth.
- Refrigerate for 12–16 hours at 38–40°F (3–4°C).
- The dough should increase in volume by about 30–40%, develop visible bubbles, and smell distinctly sour and complex.
- This cool fermentation makes the dough easier to laminate and develops rich flavor.
+ Show details− Hide details
Ready when: Dough increased 30–40% in volume and smells sour and complex
Shape dough and prepare butter
- Remove dough from fridge and let it rest on the counter for 15 minutes to warm slightly (still cool to the touch).
- While dough rests, fold the cold butter between two sheets of parchment paper and gently flatten it with a rolling pin to an even ½-inch (1.25 cm) thickness, roughly 6×8 inches (15×20 cm).
- The butter should be cold but slightly pliable—if it cracks when you try to fold the parchment, let it sit 5–10 minutes at room temperature.
- Dust the work surface very lightly with flour and gently shape the dough into a rough rectangle (about 10×8 inches / 25×20 cm).
- Using a bench scraper, remove excess flour from the surface.
+ Show details− Hide details
Ready when: Butter pliable but still cold, dough slightly softened
Lock in the butter
- Place the dough rectangle on clean parchment, positioned lengthwise in front of you.
- Remove the folded butter from its parchment and place it on the left two-thirds of the dough.
- Fold the right third of the dough over the butter, then fold the left third over both layers, creating an envelope with butter sealed inside.
- Rotate the dough 90° clockwise so the seam faces left.
- Gently even out the rectangle with light rolling if needed, but do not press hard—just level it to about ¾ inch (2 cm) thick.
- Wrap in plastic and chill 30 minutes.
+ Show details− Hide details
Ready when: Dough cold to touch, edges feel firm
First letter fold
- Remove dough from fridge and let it sit 5 minutes at room temperature.
- Place dough on parchment with a short side facing you.
- Roll gently with a rolling pin to a rectangle about 16×9 inches (40×23 cm), working from center outward and keeping edges even.
- Fold the right third of the rectangle over the middle, then fold the left third over the right, like folding a letter.
- Rotate the dough 90° so a short side faces you again.
- Wrap in plastic and chill 30 minutes.
+ Show details− Hide details
Ready when: Dough is cold, firm edges, no tears
Tip: Light rolling pressure—you are not developing gluten, just shaping
Second letter fold
- Remove from fridge, let sit 5 minutes.
- Repeat the previous step exactly: roll to 16×9 inches, fold in thirds, rotate.
- Wrap and chill 30 minutes.
+ Show details− Hide details
Ready when: Dough is cold and firm
Third letter fold
- Remove from fridge, let sit 5 minutes.
- Repeat the folding step: roll to 16×9 inches, fold in thirds, rotate.
- Wrap and chill 1 hour (or up to 2 hours for maximum rest and flake development).
+ Show details− Hide details
Ready when: Dough is cold and firm
Fourth and final fold
- Remove from fridge, let sit 5 minutes.
- Repeat folding one last time: roll to 16×9 inches, fold in thirds, rotate.
- Wrap in plastic and chill for at least 1 hour, or until ready to shape (can chill up to 8 hours).
+ Show details− Hide details
Ready when: Dough is cold, firm, and even in texture
Tip: Chilling overnight actually improves flavor and workability
Cut and shape croissants
- Remove chilled dough from fridge; let it sit 5 minutes on the counter to warm very slightly (still cold to the touch).
- Place on parchment and roll gently with a rolling pin to a rectangle approximately 14×10 inches (35×25 cm).
- Using a bench scraper or sharp knife, trim the long sides to straighten edges.
- Cut the rectangle in half lengthwise, creating two 14×5 inch (35×12.5 cm) strips.
- Cut each strip into right-pointing triangles: using a ruler and knife, cut diagonal lines from top to bottom at 3–4 inch (7.5–10 cm) intervals, creating triangles with a ~3 inch base and 5 inch height.
- You will get 12 roughly equal triangles.
- Roll each triangle: starting at the wide base, roll tightly toward the point.
- The dough should form a tight cylinder, then curve naturally into a crescent as you roll, with the point slightly tucked underneath.
- Place each croissant point-side down on parchment-lined baking sheets, spacing them about 2 inches (5 cm) apart (about 6 per sheet for two sheets).
+ Show details− Hide details
Ready when: 12 evenly shaped croissant crescents
Tip: Keep dough cold while shaping; if it gets too warm and soft, chill again for 10 minutes
Second rise (final proof)
- Cover each baking sheet loosely with plastic wrap or a damp cloth.
- Let croissants proof at room temperature (68–72°F / 20–22°C) for 12–14 hours, or until they are puffy and nearly doubled in height.
- For faster proofing, use a 75°F (24°C) proofing box for 6–8 hours instead.
- Properly proofed croissants should feel light and airy when gently pressed; a very light fingerprint should slowly spring back about halfway.
+ Show details− Hide details
Ready when: Croissants nearly doubled, light and airy when pressed
Tip: Underproofing results in dense croissants; overproofing causes them to collapse in the oven
Apply egg wash and bakeOven 400°F / 205°C
- About 30 minutes before baking, preheat your oven to 400°F (200°C).
- In a small bowl, whisk together 1 large egg and 1 tablespoon (15 ml) water until smooth.
- Just before baking, gently brush the egg wash onto each croissant, avoiding getting it between the layers (which can seal them and prevent puffing).
- Use a light, soft pastry brush and apply a thin, even coat.
- Place baking sheets in the preheated 400°F oven.
- Bake for 18–22 minutes, until the croissants are a deep golden brown.
- The internal temperature at the center should reach 205–210°F (96–99°C).
- Croissants should sound hollow and crispy when tapped on the bottom.
+ Show details− Hide details
Ready when: Deep golden brown exterior, crispy when tapped, internal temperature 205–210°F (96–99°C)
Cool and serve
- Remove baking sheets from the oven and transfer croissants to a wire cooling rack.
- Let them cool for at least 10–15 minutes before serving—they continue to set and crisp as they cool.
- Eat them fresh while still slightly warm, or store according to guidelines below.
- Croissants taste best eaten within a few hours of baking.
+ Show details− Hide details
Ready when: Cooled and firm, ready to eat
Good to know
Tips
- Keep everything cool: this recipe depends on cold dough and cold butter. If your kitchen is warm, chill your work surface, baking sheets, and even your rolling pin in the freezer for 15 minutes before starting. Warm dough is nearly impossible to laminate cleanly
- Butter temperature is critical: it should be around 65°F (18°C)—cold but flexible enough to spread without cracking. If it is too hard and cracks, let it sit out for 5–10 minutes; if too soft and greasy, return it to the fridge for 10 minutes
- Do not skip the bulk ferment: the 12–16 hour cold fermentation develops flavor and makes lamination easier by tightening the gluten structure. This cannot be rushed or shortened without losing the sourdough character
- Trust the poof test for final proof: properly proofed croissants should feel light and airy when gently pressed, with a very light fingerprint slowly springing back about halfway. Underproofed croissants are dense; overproofed ones collapse in the oven and spread flat
Make ahead
You can shape the croissants up to 12 hours ahead, cover, and refrigerate them. Proof from cold for 8–12 hours (they will proof more slowly in the fridge, which is actually beneficial for flavor), then bring to room temperature for 1–2 hours and egg wash before baking. Alternatively, bake first, cool, then wrap and refrigerate or freeze.
Storage & reheating
Croissants are best eaten the day of baking. Room temperature: keep in an airtight container for up to 2 days; reheat at 350°F (175°C) for 5 minutes to restore crispiness. Refrigerator: up to 4 days in an airtight container; reheat at 350°F for 8 minutes. Freezer: baked croissants keep up to 3 months wrapped well; unbaked shaped croissants keep 2–3 months. Reheat from frozen at 350°F for 10–15 minutes until heated through and crispy.
Substitutions
- active sourdough starter → 7g (2¼ tsp) instant yeast or active dry yeast. Active, bubbly starter produces better flavor and texture than commercial yeast, but yeast works fine. Reduce bulk fermentation to 4–6 hours and final proof to 4–6 hours (will not develop the same depth of flavor)
- whole milk (or 2% milk) → 240 ml (1 cup) water. Dough will be less rich but still work well; croissants will be slightly less tender and less golden
- bread flour → all-purpose flour. Protein content is slightly lower; add 1–2 tablespoons more flour if dough feels too sticky. Lamination may be slightly less pronounced
- unsalted butter, cold → duck fat or lard (250 g cold). Creates a different, more savory flavor profile (especially duck fat) and slightly flakier texture, but less structured lamination since these fats do not have butter's water content
More pastries
See all →


Find more like this
- Meal
- Breakfast
- Cuisine
- French
- Main ingredient
- Eggs
- Diet
- VegetarianHalal
- Method
- Oven
- Quick & Easy
- Make Ahead