Roasted Garlic and Herb Broth
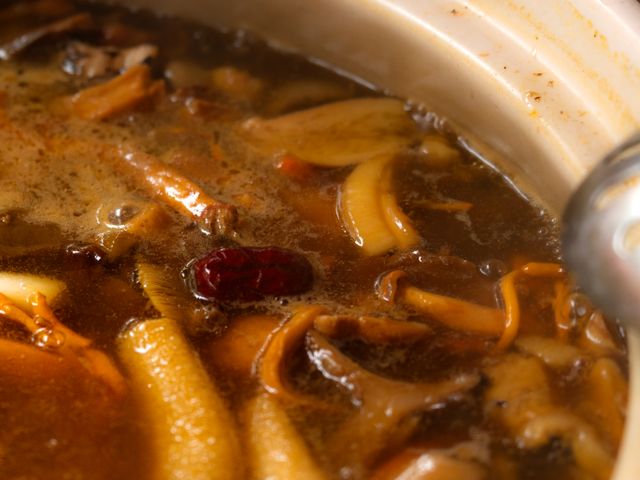
A French-inspired vegetable broth enriched with the deep, sweet flavor of roasted garlic and fresh herbs. This broth starts by caramelizing whole garlic heads and aromatics in the oven, then simmering them with vegetable scraps and fresh thyme and parsley for a golden, aromatic base perfect for soups, grains, and braises. The roasting step mellows the garlic's sharpness into creamy sweetness.
- Prep
- 15 min
- Cook
- 1 hr 15 min
- Wait
- 10 min
- Total
- 1 hr 40 min
- Makes
- About 6 cups (1.4 L)
Steps
Before you start
- Gather vegetable scraps ahead of time (carrot peels and trimmings, onion skins, celery ends, leek greens)
- Rinse the vegetable scraps gently to remove excess soil
- Preheat the oven to 425°F (220°C)
Roast the garlic and onionsOven 425°F / 220°C
- Toss the whole garlic heads and onion halves with the olive oil, sea salt, and black pepper in a small roasting pan.
- Spread them cut-side down (for the onions) and nestled together.
- Roast at 425°F (220°C) for 35–40 minutes, until the garlic is deeply golden and soft when pierced with a knife, and the onions are caramelized at the edges.
- The kitchen should smell sweet and mellow.
+ Show details− Hide details
Ready when: Garlic cloves yield easily to a knife; onion edges are charred
Tip: Don't skip the roasting—it converts the garlic's sharp sulfur compounds into sweet, caramelized notes that define the broth's flavor.
Combine ingredients in stockpot
- Transfer the roasted garlic heads and onions to a large stockpot or Dutch oven (6- to 8-quart).
- Add the rinsed vegetable scraps, cold water, fresh thyme sprigs, parsley, and bay leaf if using.
- Stir gently to combine.
+ Show details− Hide details
Ready when: All ingredients submerged in water
Bring to a boil
- Set the pot over high heat and bring to a rolling boil, uncovered, about 8–10 minutes.
- Skim away any gray or brown foam that rises to the surface using a fine-mesh skimmer or slotted spoon.
- Skimming removes impurities that would cloud the broth.
+ Show details− Hide details
Ready when: Broth reaches a rolling boil; foam stops forming after 2–3 minutes of skimming
Tip: Skim early and often in the first few minutes; this is the best window to catch impurities and create a clear, golden broth.
Reduce heat and simmer
- Once skimmed, reduce the heat to low (aim for a gentle simmer where small bubbles occasionally break the surface, not a rolling boil).
- Simmer uncovered for 35–40 minutes.
- The broth should smell fragrant and look slightly deeper in color than water.
+ Show details− Hide details
Ready when: Broth is fragrant, warm throughout, and golden in color
Tip: Keep the heat low and steady—a vigorous boil will make the broth cloudy and overly concentrated.
Strain the broth
- Set a fine-mesh strainer over a large bowl.
- Carefully pour the broth through the strainer in batches, pressing gently on the solids with the back of a spoon to extract all the liquid.
- Discard the solids.
- The broth should be clear and golden with a rich aroma.
+ Show details− Hide details
Ready when: All liquid has passed through the strainer; solids are fully expressed
Tip: Don't rush or squeeze aggressively—gentle pressing gives the clearest broth. If you prefer extra-clear broth, pour it through cheesecloth placed over the strainer.
Cool and skim fat (optional)
- Let the broth cool to room temperature, about 10 minutes.
- If you prefer a lighter broth, refrigerate until fat solidifies on the surface (about 4 hours or overnight), then lift off and discard.
- Otherwise, use the broth as is—the fat carries flavor.
+ Show details− Hide details
Ready when: Broth is warm but no longer steaming
Tip: Leaving the fat in enriches the broth's mouthfeel and adds luxurious flavor—perfect for soups and braises.
Good to know
Tips
- Collect vegetable scraps in the freezer for 1–2 weeks to have enough on hand. Avoid brassicas (cabbage, broccoli, Brussels sprouts) and starchy scraps, which can make broth taste dull or sulfurous.
- For deeper color and more umami, add a 2-inch piece of kombu (dried kelp) or a handful of mushroom stems during the simmer. Remove before straining.
- This broth is the French mother—the base for consommés, bisques, and potages. Use it wherever a vegetable stock would go, especially in creamy soups and grain pilafs.
- Taste the broth before using. If it's too subtle, simmer it down by 20–30% to concentrate flavors, or add a pinch more salt.
Make ahead
Broth can be made up to 2 days ahead. Strain, cool completely, then refrigerate or freeze. Making it ahead allows the flavors to deepen and makes it easy to remove surface fat.
Storage & reheating
Refrigerate in an airtight container for up to 5 days. Freeze in ice cube trays for up to 3 months (pop out and store in freezer bags). Reheat gently on the stovetop over medium heat—do not boil, as extended heat can diminish delicate herb notes.
Substitutions
- fresh thyme sprigs → 1 teaspoon dried thyme (added with the water). Dried thyme is more concentrated; use half the fresh amount. Add it early so it fully hydrates.
- fresh flat-leaf parsley, loosely packed → 2 sprigs fresh tarragon or chervil, or 0.5 teaspoon dried. Tarragon and chervil bring different but complementary herbaceous notes; use sparingly as they're more assertive than parsley.
- vegetable scraps (carrot, celery, leek, parsnip trimmings and peels) → 2 cups chopped fresh vegetables (carrot, celery, onion, leek). If you don't have scraps, roughly chop fresh vegetables instead. The result will be slightly clearer but equally flavorful.
- extra virgin olive oil → butter (1.5 tablespoons / 21 g) or vegetable oil. Butter adds richness; vegetable oil is neutral. Either works for roasting, though butter will brown slightly.