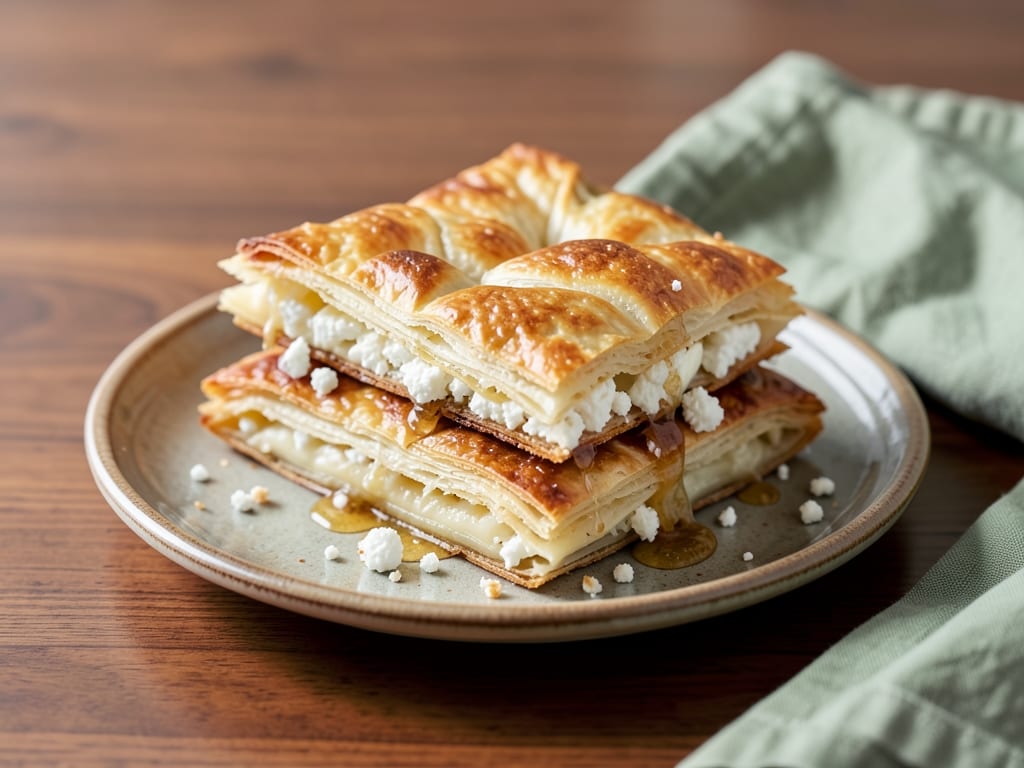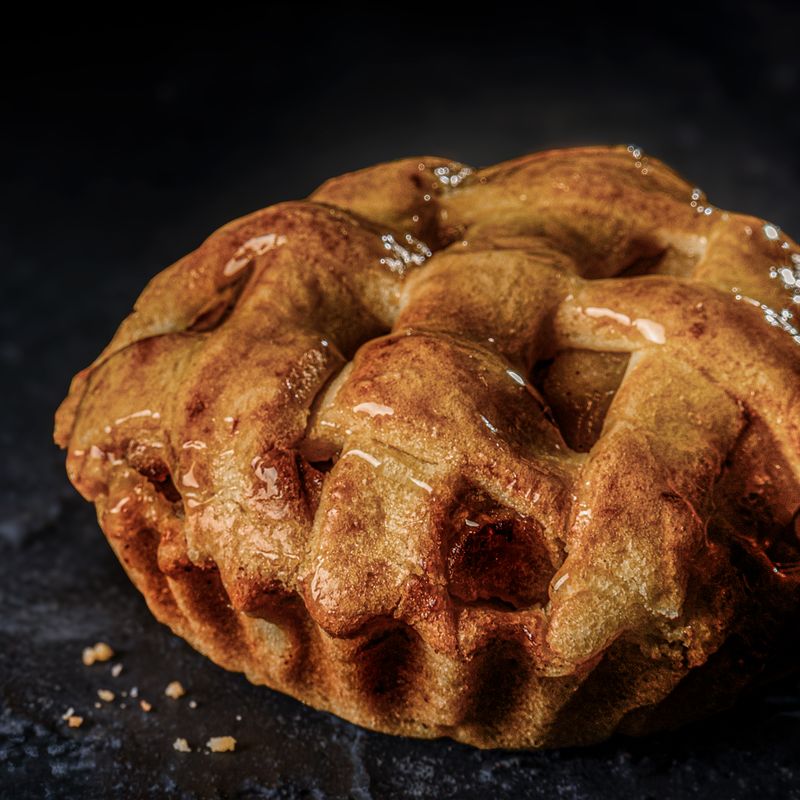
Queso de Bola Hand Pie with Hazelnut Glaze
Golden, flaky hand pies filled with creamy Edam cheese, smooth hazelnut paste, and warm cinnamon spice. These Latin American-inspired pastries have a crispy exterior and a rich, slightly sweet interior—finished with a silky hazelnut glaze and a sprinkle of sea salt. Perfect for breakfast, brunch, or as an elegant sweet-savory snack.
Steps
Before you start
- Preheat your oven to 400°F (200°C) and line two large baking sheets with parchment paper
- Thaw frozen puff pastry at room temperature for 15–20 minutes until pliable but still cool
- Have all filling ingredients measured and at room temperature before assembling
Mix the filling
- In a medium bowl, combine the grated Edam cheese, 3 tablespoons hazelnut paste, cinnamon, and brown sugar.
- Stir until evenly mixed.
- The mixture should be slightly chunky from the cheese and have a warm spice aroma.
- Set aside.
+ Show details− Hide details
Ready when: Ingredients are evenly combined with no streaks of color
Tip: Don't overmix—the cheese should remain in distinct pieces, not become a paste.
Prepare the pastry sheets
- Unfold the thawed puff pastry onto a lightly floured work surface.
- Using a pastry wheel or knife, cut the two pastry sheets into eight equal rectangles (about 4×3 inches / 10×8 cm each).
- Arrange four rectangles on each lined baking sheet, leaving 2 inches between them.
- Keep a damp towel nearby to cover unused pastry so it doesn't dry out.
+ Show details− Hide details
Ready when: All pastry rectangles are evenly sized and spaced on baking sheets
Tip: Keep puff pastry cold during cutting—warm pastry tears. If it becomes too warm, chill it for 5 minutes before continuing.
Fill the pies
- Spoon about 1 tablespoon of filling slightly off-center toward one long edge of each pastry rectangle.
- Leave a ½-inch border on all sides.
- Distribute filling evenly among all eight pies.
- Do not overfill, or the pastry will leak during baking.
+ Show details− Hide details
Ready when: Each pie has 1 tablespoon filling with visible clear border around edges
Tip: If using a piping bag, fill slightly faster and more evenly; spoon works well for home cooks and gives nice rustic shape.
Fold and seal the pies
- Fold each pastry rectangle in half lengthwise over the filling, creating a long rectangle.
- Press the edges firmly together with the tines of a fork to seal, creating a decorative crimped edge.
- Ensure all edges are sealed so filling doesn't escape during baking.
+ Show details− Hide details
Ready when: All edges are firmly pressed and sealed with no gaps or openings
Tip: Press down firmly—weak seals will pop open in the oven and leak cheese. You should hear the pastry crackle slightly as you press.
Apply the egg wash
- In a small bowl, whisk together the beaten egg and 1 tablespoon water until well combined.
- Using a baking brush, lightly brush the top and sides of each pie with the egg wash.
- This creates a shiny, golden-brown crust.
- Sprinkle a light pinch of fine sea salt on each pie.
+ Show details− Hide details
Ready when: All pies have an even light coating of egg wash and a few salt crystals visible
Tip: Don't use too much egg wash or the pastry will become heavy and won't puff as dramatically.
Bake the piesOven 400°F / 205°C
- Place both baking sheets in the preheated 400°F (200°C) oven.
- Bake for 18–20 minutes, until the pastry is deep golden brown and puffed, and you can see the cheese filling starting to ooze slightly at the sealed edges.
- Rotate the pans halfway through baking (around the 10-minute mark) so they brown evenly.
+ Show details− Hide details
Ready when: Pastry is deep golden brown, visibly puffed, and cheese is just starting to seep at the edges
Tip: If your oven has hot spots, rotate the pans at the 10-minute mark. The pies should smell rich and nutty when done.
Cool briefly
- Remove the baking sheets from the oven and transfer the pies to a cooling rack.
- Let them rest for 5 minutes—they will be very hot and the filling will still be setting.
- This brief rest makes them easier to handle and prevents the filling from running when you add the glaze.
+ Show details− Hide details
Ready when: Pies are still warm to the touch but no longer steaming
Tip: Don't skip this step—a full glaze on a too-hot pie will slide right off or melt unevenly.
Make the hazelnut glaze
- In a small bowl, whisk together 3 tablespoons hazelnut paste, 2 tablespoons softened butter, 1 tablespoon honey, ¼ teaspoon cinnamon, ¼ teaspoon vanilla extract, and a pinch of salt until smooth and creamy.
- If the mixture is too thick to drizzle, add warm water 1 teaspoon at a time until you reach a pourable but still thick consistency, like heavy cream.
+ Show details− Hide details
Ready when: Glaze is smooth, creamy, and pourable but not runny
Tip: Add water slowly; too much makes the glaze thin and watery. The glaze should slowly stream off a spoon.
Glaze the pies
- Drizzle the hazelnut glaze generously over the tops of the cooled pies using a spoon or small whisk.
- Let the glaze pool slightly but not run down the sides.
- Sprinkle a few more grains of fine sea salt over the glaze while still wet.
- Serve warm or at room temperature.
+ Show details− Hide details
Ready when: All pies are drizzled with glaze and salt is visible
Tip: If the glaze has cooled and stiffened, gently warm it over low heat or whisk in a few more drops of warm water to loosen it again.
Good to know
Tips
- Edam cheese becomes creamy and slightly nutty when baked, which is why it's ideal for hand pies. If your Edam is very cold, grate it first, then let it sit at room temperature for 10 minutes before mixing with hazelnut paste.
- The salt crust on top is intentional—the savory-salty contrast with the sweet hazelnut glaze and creamy cheese filling is the signature of these pies. Don't skip it.
- For a more rustic appearance, use a fluted pastry wheel to cut and seal the edges instead of a fork. This creates a prettier crimped edge.
- If you don't have hazelnut paste, you can make a quick version by blending ½ cup roasted hazelnuts with 1 tablespoon neutral oil and a pinch of salt in a food processor until smooth (about 2 minutes). Sift out any skins if desired.
Make ahead
Pies can be assembled up to 4 hours ahead, covered with plastic wrap, and refrigerated before baking. Bake straight from the fridge, adding 2–3 minutes to the baking time. The glaze is best made just before serving but can be made up to 1 hour ahead and gently rewarmed.
Storage & reheating
Store cooled pies in an airtight container at room temperature for up to 2 days, or in the refrigerator for up to 4 days. Reheat gently in a 300°F (150°C) oven for 8–10 minutes until warm. Freeze unbaked assembled pies for up to 3 months; bake from frozen, adding 4–5 minutes to the baking time. Do not freeze after baking and glazing, as the texture will suffer.
Substitutions
- Edam cheese, rind removed → Gruyère or Emmental cheese. Both are semi-hard cheeses with a slightly nuttier flavor that pairs beautifully with hazelnuts. Grate finely as you would the Edam.
- smooth hazelnut paste or hazelnut butter → almond butter or peanut butter. Almond butter will be slightly more refined; peanut butter will be richer and earthier. Use the same amount by weight.
- frozen puff pastry, thawed → homemade rough puff pastry or all-butter croissant dough. Both will give a slightly flakier, more labor-intensive result. Roll to the same thickness as store-bought puff pastry.
- honey → maple syrup or agave nectar. Either will add a subtle depth of flavor. Use 1 tablespoon (15 ml) maple syrup or agave for the same consistency.