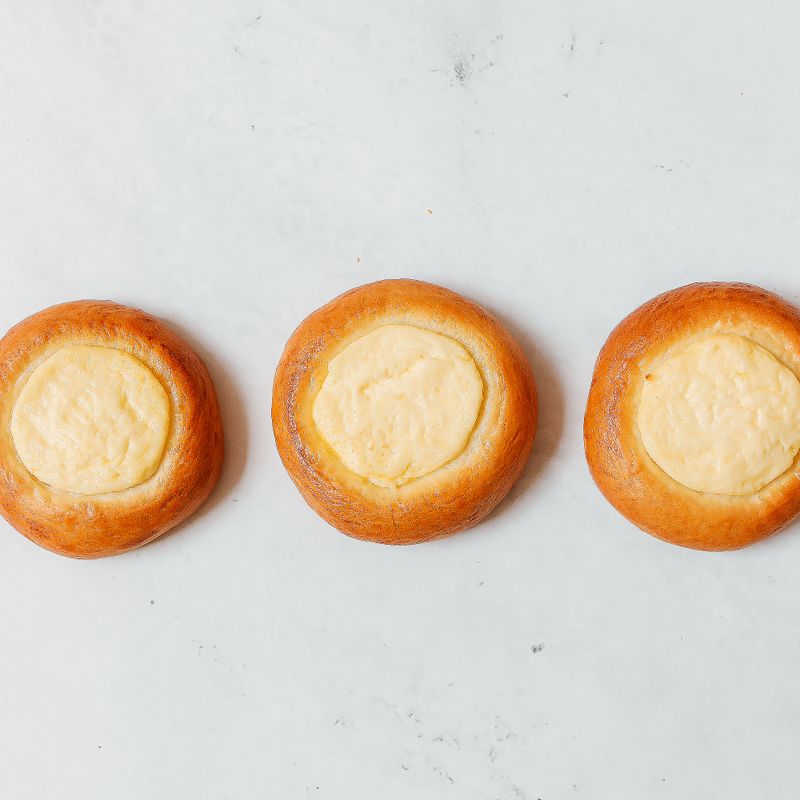
Cheese Danish with Cream Cheese Filling
Flaky, golden puff pastry squares folded around a smooth, lightly sweet vanilla cream cheese filling and finished with a simple vanilla glaze. A bakery-style breakfast made with store-bought puff pastry in under an hour of effort.
- Prep
- 25 min
- Cook
- 22 min
- Wait
- 50 min
- Total
- 1 hr 37 min
- Makes
- 9 danishes
Steps
Before you start
- Thaw the puff pastry in the refrigerator overnight, or for 30 minutes at room temperature until pliable but still cold.
- Set the cream cheese out 45 minutes ahead so it is soft and blends without lumps.
- Line two large baking sheets with parchment paper.
- Keep the pastry cold while you work. If it turns soft or sticky, slide it onto a tray and chill for 10 minutes.
Heat oven, line pansOven 400°F / 205°C
- Position oven racks in the upper and lower thirds and heat the oven to 400°F (200°C).
- Line two large baking sheets with parchment paper.
+ Show details− Hide details
Ready when: Oven reaches 400°F (200°C).
Make cream cheese filling
- In a medium bowl, stir the softened cream cheese with a spatula or whisk until completely smooth.
- Add the granulated sugar, egg yolk, 1 teaspoon vanilla, lemon juice and a small pinch of salt.
- Stir just until silky and no streaks remain.
- Do not whip in air, which makes the filling puff and then collapse.
+ Show details− Hide details
Ready when: Filling is smooth, thick and spreadable with no lumps.
Tip: If the cream cheese is lumpy, microwave it for 10 seconds before mixing.
Make egg wash
- In a small bowl, beat the whole egg with 1 tablespoon water until fully combined and no clear strands of white remain.
+ Show details− Hide details
Ready when: Mixture is uniformly pale yellow.
Roll and cut pastry
- Lightly dust a clean counter with the flour.
- Unfold one pastry sheet and roll it gently to a 10-inch (25 cm) square, rolling in one direction only to protect the layers.
- Cut it into 3 rows by 3 rows to make 9 squares of about 3.3 inches (8.5 cm).
- Repeat with the second sheet, but cut it in the same way and use 9 squares in total, setting the extra squares aside to bake as a baker's snack with a spoon of filling or discard.
- Chill the remaining pastry while you work.
+ Show details− Hide details
Ready when: Squares have clean, sharp edges and feel cold and firm.
Tip: Press the knife straight down rather than dragging it. Dragging seals the edges and stops them from puffing.
Fill and fold squares
- Place 9 squares on the lined pans, 2 inches (5 cm) apart.
- Spoon about 1 heaping tablespoon (20 g) of filling in the center of each.
- Brush the 4 corners lightly with egg wash, then fold two opposite corners to the center, overlapping them slightly over the filling, and press down firmly to seal.
- Brush the tops and edges of each pastry with egg wash.
+ Show details− Hide details
Ready when: Corners are pressed together and filling is visible at the sides.
Tip: Keep egg wash off the cut sides. It glues the layers together and stops the rise.
Chill before baking
- Refrigerate the filled pans for 20 minutes so the butter in the pastry firms up.
- This helps the layers puff instead of the butter melting out.
+ Show details− Hide details
Ready when: Pastry feels cold and firm to the touch.
Bake the danishesOven 400°F / 205°C
- Bake at 400°F (200°C) for 20 to 24 minutes, swapping and rotating the pans halfway through.
- The danishes are done when they are deep golden brown, puffed, and the underside of a pastry is browned and crisp.
- The filling should be set and just slightly jiggly in the center.
+ Show details− Hide details
Ready when: Deep golden brown tops and browned bottoms; filling set at the edges.
Tip: Pale pastry is underbaked and will taste doughy. Add 2 more minutes if in doubt.
Cool on racks
- Slide the parchment with the danishes onto wire racks and cool for 20 minutes.
- The filling will firm up as it cools.
+ Show details− Hide details
Ready when: Danishes are warm, not hot, and the filling is set.
Glaze and serve
- Whisk the powdered sugar, 2 teaspoons milk and the 1/4 teaspoon vanilla in a small bowl until smooth.
- If it is too thick to drizzle, add milk 1/2 teaspoon at a time.
- Drizzle over the warm danishes with a spoon or fork and let set for 5 minutes before serving.
+ Show details− Hide details
Ready when: Glaze falls from the spoon in a thick ribbon that holds for a few seconds.
Tip: Glaze on hot pastry melts and runs off, so wait until warm.
Good to know
Tips
- Roll the pastry in one direction only and cut with a sharp blade so the layers can rise.
- Chilling the assembled pastries before baking is the key to tall, flaky layers.
- Add a teaspoon of jam or fresh berries on top of the filling for a fruit version.
- Use block cream cheese, not the spreadable tub kind, which is too loose and can leak while baking.
Make ahead
"Assemble the unbaked danishes up to 12 hours ahead, cover loosely and refrigerate on the lined pans, then brush with egg wash just before baking and add 1 to 2 minutes to the bake time. The filling can be made up to 2 days ahead and kept covered in the fridge."
Storage & reheating
"Room temperature: up to 8 hours, loosely covered. Refrigerator: up to 3 days in an airtight container because of the cream cheese filling. Freezer: freeze unglazed baked danishes for up to 1 month. Reheat from the fridge or freezer on a baking sheet at 325°F (160°C) for 8 to 12 minutes until warm and crisp, then glaze."
Substitutions
- full-fat cream cheese (block style) → mascarpone or whole-milk ricotta, well drained. Mascarpone gives a softer, richer filling. Ricotta is lighter and a little grainy.
- fresh lemon juice → orange juice or 1/2 teaspoon finely grated lemon zest. Adds the same tang to balance the sweetness.
- whole milk → heavy cream or lemon juice. Cream gives a richer glaze, and lemon juice makes it tangy.
- frozen puff pastry sheets (all-butter if possible) → homemade rough puff pastry. Use about 490 g and keep it cold as with store-bought.
More pastries
See all →


Find more like this
- Meal
- Breakfast
- Cuisine
- American
- Main ingredient
- Cream Cheese
- Diet
- VegetarianHalal
- Method
- Oven
- Quick & Easy
- Easy