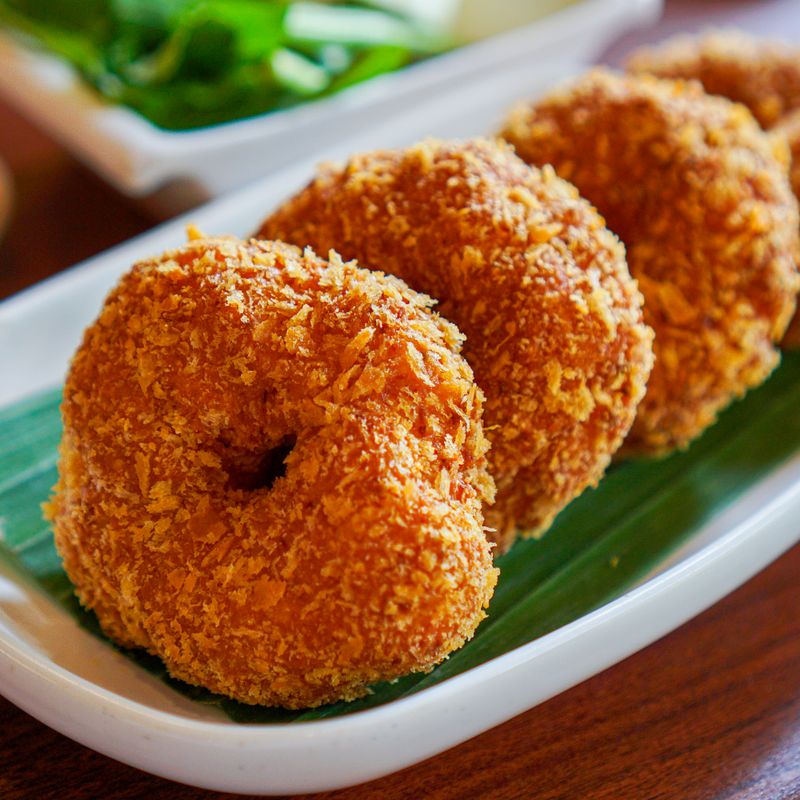
Perilla Leaf Sesame Fried Rice Cakes
Crispy pan-fried rice cakes studded with fragrant perilla leaves and toasted sesame seeds, bound with a savory soy-based mixture. These golden cakes have a crunchy exterior and tender interior, offering the distinctive licorice-like flavor of Korean perilla (kkaennip). Serve warm as a banchan (side dish) or light vegetarian main with soup.
- Prep
- 15 min
- Cook
- 12 min
- Wait
- 5 min
- Total
- 32 min
- Makes
- 8 cakes (2 per serving)
Steps
Before you start
- Use day-old or cooled cooked rice (day-old works best and prevents mushiness)
- Have all ingredients prepped and ready before you start frying
- Use fresh perilla leaves if available; they should be dry and at room temperature
Toast sesame seeds
- Heat a dry skillet over medium heat.
- Add sesame seeds and toast for 2–3 minutes, stirring frequently, until fragrant and light golden.
- Transfer to a small bowl and set aside.
+ Show details− Hide details
Ready when: Seeds are fragrant and light golden
Tip: Don't walk away; sesame seeds burn quickly. Lower heat if they toast too fast.
Make binding mixture
- In a medium bowl, whisk together soy sauce (2 tablespoons), toasted sesame oil (1 tablespoon), minced garlic (2 cloves), and rice vinegar (1 teaspoon).
- Set aside.
Combine rice and seasonings
- Add the cooked rice (3 cups) to the bowl with the binding mixture.
- Gently fold until evenly coated.
- Stir in the torn perilla leaves (12 leaves) and toasted sesame seeds (3 tablespoons).
- Season to taste with salt and white pepper.
- The mixture should be moist but not wet; the rice grains should hold together when squeezed.
+ Show details− Hide details
Ready when: Rice is evenly coated and holds together when squeezed
Tip: Don't overmix; you want visible perilla pieces and sesame flecks throughout.
Shape rice cakes
- Divide the seasoned rice into 8 equal portions (about 1/4 cup each).
- Using your hands or a measuring cup, gently form each portion into a round, flat cake about 3 inches (7.5 cm) wide and 1/2 inch (1.3 cm) thick.
- Place on a clean work surface.
+ Show details− Hide details
Ready when: Cakes are evenly shaped and compact
Tip: Wet your hands lightly to prevent sticking. Don't compress too hard or they'll be dense.
Rest cakes
- Let the formed cakes sit at room temperature for 5 minutes to help them hold their shape while frying.
Heat skillet and oil
- Heat a 9-inch nonstick or cast iron skillet over medium-high heat.
- Add vegetable oil (2 tablespoons) and swirl to coat evenly.
- When the oil shimmers and just begins to smoke lightly, the pan is ready.
+ Show details− Hide details
Ready when: Oil shimmers and just begins to smoke
Tip: Use medium-high, not high, to avoid burning the exterior before the interior heats through.
Fry first batch
- Gently place 4 rice cakes into the hot oil, leaving space between them.
- Fry undisturbed for 3–4 minutes, until the bottom is golden brown and crispy.
- Carefully flip each cake using a spatula and fry the second side for 2–3 minutes until golden and crispy.
- Transfer to a plate lined with paper towels.
+ Show details− Hide details
Ready when: Both sides are golden brown and crispy
Tip: Don't move the cakes once they hit the oil or they won't develop a crust. Use a thin spatula so you don't break them.
Fry second batch
- Repeat with the remaining 4 rice cakes, adding a touch more oil to the pan if needed.
- Fry for 3–4 minutes on the first side and 2–3 minutes on the second side until golden and crispy.
+ Show details− Hide details
Ready when: Both sides are golden brown and crispy
Tip: The second batch may cook slightly faster because the pan is thoroughly heated.
Serve warm
- Arrange the fried rice cakes on a serving plate while warm.
- The exterior should be crispy and golden, while the interior remains tender.
- Serve immediately as a side dish or light main course.
+ Show details− Hide details
Tip: These are best eaten within minutes of frying while the exterior is still crispy.
Good to know
Tips
- For extra crispy cakes, pat the rice mixture dry with paper towels before shaping to remove excess moisture.
- If your rice cakes fall apart while frying, the mixture may be too wet. Try chilling the mixture for 15 minutes before shaping to help it hold together better.
- Perilla leaves can be hard to find outside Asian markets; check the refrigerated or frozen section of well-stocked stores, or substitute as noted.
- These cakes pair beautifully with a simple dipping sauce of equal parts soy sauce and rice vinegar, plus a touch of sesame oil and a pinch of gochugaru (Korean red chili flakes) for heat.
Storage & reheating
Store cooled rice cakes in an airtight container in the refrigerator for up to 3 days. Reheat in a 375°F (190°C) oven for 8–10 minutes until warmed through and the exterior crisps up again. Do not microwave, as it will make them soggy. Not recommended for freezing as the texture deteriorates.
Substitutions
- fresh perilla leaves (kkaennip) → shiso leaves (if available) or fresh mint mixed with a small amount of chopped fresh cilantro. Perilla has a distinctive earthy, licorice-like flavor; shiso is the closest botanical relative. Mint and cilantro approximate the aromatic quality but won't be identical.
- white sesame seeds → black sesame seeds for a more dramatic appearance and slightly nuttier flavor. White and black sesame work equally well; use black for visual contrast.
- cooked short-grain rice (such as sushi or arborio, cooled) → sushi rice or jasmine rice, cooled. Avoid long-grain rice, which won't hold together well. Short-grain varieties are essential.
- toasted sesame oil → 2 teaspoons extra garlic infused oil plus 1/2 teaspoon regular sesame oil. Pure sesame oil is key to the flavor profile; if substituting, use minimally to avoid overpowering the perilla.
More rice bowls
See all →


Find more like this
- Meal
- Lunch
- Cuisine
- Korean
- Main ingredient
- Brown Rice
- Method
- Stovetop
- Quick & Easy
- Easy