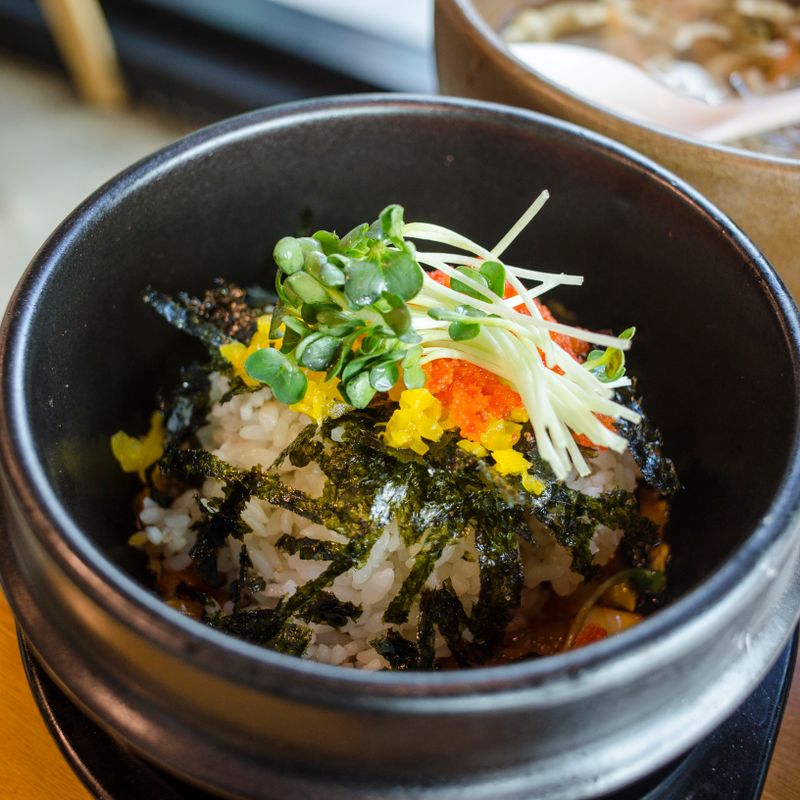
Japanese Hijiki Seaweed and Sesame Rice
A wholesome Japanese side dish combining tender short-grain rice with rehydrated hijiki seaweed, sesame seeds, and a touch of soy sauce. The hijiki softens in the steaming process and melds with the rice, while toasted sesame adds nutty depth and texture. Perfect alongside grilled fish, miso soup, or any Japanese meal.
- Prep
- 10 min
- Cook
- 25 min
- Wait
- 15 min
- Total
- 50 min
- Makes
- About 3 cups cooked rice
Steps
Before you start
- Measure your rice and water with the same cup to ensure proper ratio (1 rice : 1.1 water for short-grain)
- Soak the dried hijiki seaweed in warm water for 5 minutes before using
- Have sesame seeds toasted and ready (you can toast them while the rice cooks)
Soak hijiki seaweed
- Place the dried hijiki in a small bowl and pour 0.75 cup (180 ml) of warm water over it.
- Let it soak for 5 minutes until it's soft and has expanded to about 3–4 times its original volume.
- The hijiki should be tender but still slightly al dente.
- Drain in a fine-mesh strainer, discarding the soaking liquid, and set aside.
+ Show details− Hide details
Ready when: Hijiki has tripled in size and is tender when bitten
Tip: Don't over-soak hijiki or it becomes mushy. Exactly 5 minutes is ideal.
Rinse rice
- Place the short-grain rice in a fine-mesh strainer and rinse under cool running water, stirring gently with your fingers, until the water runs mostly clear (3–4 passes).
- This removes excess starch and helps the rice grains stay separate.
- Drain well and transfer to a medium saucepan.
+ Show details− Hide details
Ready when: Water runs nearly clear after rinsing
Tip: Rinsing is essential for clean-tasting rice; don't skip it.
Combine rice with water and hijiki
- Pour 1.65 cups (390 ml) of water into the saucepan with the drained rice.
- Add the soaked hijiki, 1.5 tablespoons (22 ml) of soy sauce, and the mirin if using.
- Stir once to combine all ingredients evenly.
- Do not add salt yet.
+ Show details− Hide details
Ready when: Ingredients are evenly distributed and the liquid looks homogeneous
Tip: The soy sauce adds sufficient saltiness; additional salt is only for final adjustment.
Toast sesame seeds
- While the rice cooks, heat a small dry skillet over medium heat.
- Add the sesame seeds and stir constantly for 2–3 minutes until fragrant and lightly golden.
- Watch carefully as they burn easily.
- Transfer to a small plate and set aside.
+ Show details− Hide details
Ready when: Sesame seeds are light golden and smell toasty and nutty
Tip: Don't leave the pan unattended; sesame seeds go from perfect to burnt in seconds.
Bring rice to boil
- Place the saucepan over medium-high heat and bring the rice mixture to a boil, uncovered.
- You'll see steam rising and hear gentle bubbling.
- This should take about 3–4 minutes.
- Stir once more to prevent sticking.
+ Show details− Hide details
Ready when: Liquid boils vigorously and steam rises from the pan
Tip: Keep the lid off during this step to allow steam to escape.
Steam rice covered
- Once boiling, reduce the heat to low, immediately place a tight-fitting lid on the saucepan, and let the rice steam undisturbed for 18–20 minutes.
- The rice and hijiki will absorb all the liquid and become tender.
- Do not lift the lid during cooking or you'll release steam and the rice won't cook evenly.
+ Show details− Hide details
Ready when: No liquid bubbles around the edges, the saucepan is silent, and steam no longer escapes from under the lid
Tip: Resist peeking! Opening the lid will release steam and make the rice mushy or unevenly cooked.
Rest and fluff rice
- Remove the saucepan from heat and let it stand, still covered, for 10 minutes.
- This allows any remaining moisture to distribute evenly.
- Then remove the lid and fluff the rice gently with a fork, breaking up any clumps.
- The grains should be tender, separate, and the hijiki should be interspersed throughout.
+ Show details− Hide details
Ready when: Grains are tender and separate when fluffed; hijiki is soft and well distributed
Tip: The resting period is crucial—it ensures the rice doesn't dry out and the texture is perfect.
Finish and serve
- Transfer the rice to a serving bowl.
- Taste and adjust seasoning with a pinch of salt if needed (the soy sauce is fairly salty, so taste first).
- Sprinkle the toasted sesame seeds generously over the top and gently fold in about half of them to distribute the nutty flavor throughout.
- Serve warm as a side dish alongside grilled fish, miso soup, or roasted vegetables.
+ Show details− Hide details
Ready when: Sesame seeds are folded through the rice and some remain on top for visual appeal
Tip: Fold in only half the sesame seeds so you keep some on top for color and texture contrast.
Good to know
Tips
- Hijiki expands significantly when soaked, so 0.5 cup dried will yield about 1.5 cups cooked. Don't use more than 0.5 cup or the rice will taste too strongly of seaweed.
- For a deeper sesame flavor, use half white and half black sesame seeds, or even try toasted black sesame seed oil (a few drops stirred into the rice at the end).
- If you can't find mirin, a tiny pinch of sugar balances the umami, but it's optional—the soy sauce alone makes this dish delicious.
- This rice pairs beautifully with grilled mackerel or salmon, miso soup, and pickled vegetables, making it a complete Japanese-style side meal.
Make ahead
You can prepare the hijiki seaweed up to 1 day ahead and store it drained in an airtight container in the refrigerator. Toast the sesame seeds up to 3 days ahead and store in an airtight container at room temperature. Cook the rice fresh on the day you plan to serve it for best flavor and texture.
Storage & reheating
Store leftover hijiki sesame rice in an airtight container in the refrigerator for up to 3 days. To reheat, place in a small saucepan with 2–3 tablespoons of water, cover, and warm over low heat for 3–5 minutes, stirring gently, until heated through. Alternatively, microwave in a covered bowl for 1–2 minutes, stirring halfway through. The rice can be frozen in a freezer-safe container for up to 2 months; thaw overnight in the refrigerator and reheat as above.
Substitutions
- dried hijiki seaweed → wakame seaweed or arame seaweed. Use the same amount. Wakame is milder and arame is slightly more delicate; both soak and cook in about 5 minutes.
- white sesame seeds → black sesame seeds or a mix of white and black. Black sesame seeds look striking and have a slightly earthier flavor. Toast the same way and use the same amount.
- mirin (sweet rice wine) → 1 teaspoon (5 ml) of sugar or honey. Adds sweetness to balance the umami, though the result will be slightly less refined. Add with the soy sauce.
- short-grain white rice (or sushi rice) → Japanese sushi rice or calrose rice. Both have similar starch content and texture. Avoid long-grain varieties as they'll yield a different, less creamy result.