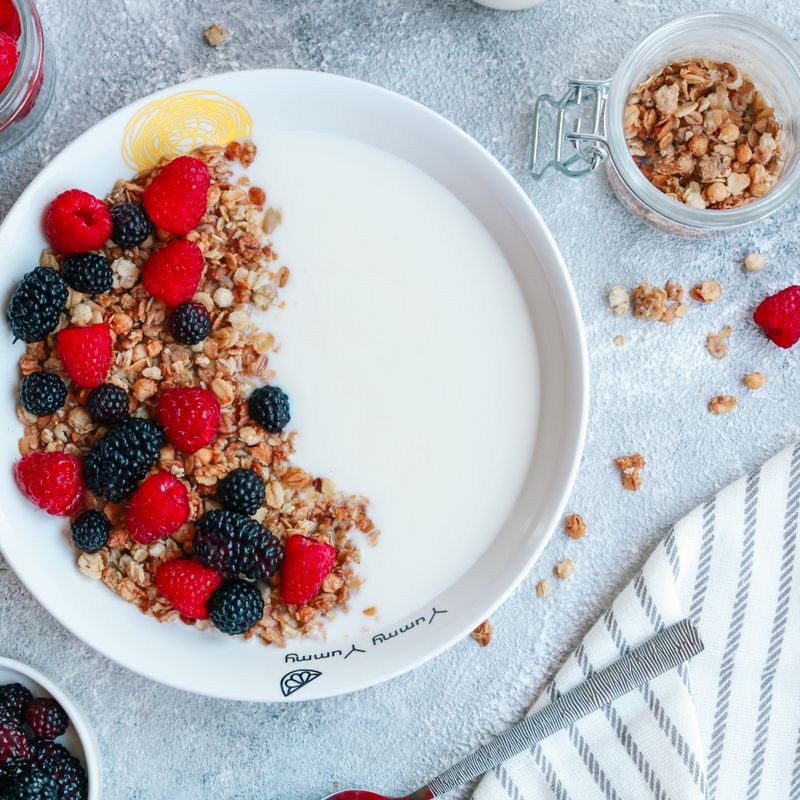
Instant Pot Yogurt Cheesecake with Granola Crust
A tangy, creamy cheesecake made in the Instant Pot with a Greek yogurt base for brightness, topped with a buttery granola crust that's baked separately for crunch. This moist, tender cake is lighter than traditional cheesecake, with bright lemon notes and the satisfying contrast of crunchy granola. Perfect for a sophisticated dessert that feels impressive but comes together easily.
- Prep
- 20 min
- Cook
- 35 min
- Wait
- 2 hr 15 min
- Total
- 3 hr 10 min
- Makes
- One 7-inch (18 cm) cheesecake (8 slices)
Steps
Before you start
- Preheat oven to 375°F (190°C) for the granola crust
- Have cream cheese and Greek yogurt at room temperature (leave out 30 minutes)
- Prepare a 7-inch (18 cm) springform pan by lining the bottom with parchment paper and wrapping the outside with aluminum foil up to the rim
- Have the Instant Pot trivet and a 1-cup (240 ml) water or broth ready for the cooking liquid
Toast granola crust mixtureOven 375°F / 190°C
- Combine oats, chopped almonds, melted butter, salt, and vanilla extract in a medium bowl and stir until evenly coated.
- Spread on a small baking sheet and bake at 375°F (190°C) for 8–10 minutes, stirring halfway through, until golden and fragrant.
- Remove and let cool for 2 minutes, then crumble with your hands to break up any large clumps.
- Stir in honey until the mixture is moist but still crumbly.
- Set aside to cool completely (about 5 minutes).
+ Show details− Hide details
Ready when: Granola is golden, fragrant, and crumbly after toasting and mixing with honey
Tip: Toast the granola separately from the crust to add crunch—pressing it into a crust would make it dense and chewy.
Prepare pan and water bath setup
- Line the bottom of a 7-inch (18 cm) springform pan with parchment paper.
- Wrap the outside of the pan snugly with aluminum foil, covering the bottom and sides up to the rim to prevent water from seeping in.
- Pour 1 cup (240 ml) water into the Instant Pot, insert the trivet, and set aside.
- You will not start the Instant Pot yet.
+ Show details− Hide details
Ready when: Pan is securely wrapped and water bath is ready
Tip: Foil must seal the pan completely so steam doesn't seep into the cheesecake during cooking, which can cause cracking.
Beat cream cheese and sugar
- In a large bowl, use an electric mixer on medium speed to beat the softened cream cheese and sugar together for 2–3 minutes until light, fluffy, and pale.
- Scrape down the bowl halfway through.
- The mixture should look airy and slightly increased in volume.
+ Show details− Hide details
Ready when: Cream cheese mixture is light, fluffy, and pale
Tip: Don't skip the beating step—aeration is crucial for a smooth, crack-free cheesecake. Overmixing once eggs are added can cause excess air pockets.
Fold in yogurt and lemon
- Add the Greek yogurt to the cream cheese mixture and fold gently with a spatula until mostly combined.
- Add the lemon zest and 3 tablespoons (45 ml) of the lemon juice.
- Fold until just combined—do not overmix, as you want to minimize air incorporation.
+ Show details− Hide details
Ready when: Yogurt and lemon are evenly distributed with no visible streaks
Tip: Folding gently instead of mixing keeps the batter light and reduces the risk of cracks during cooking.
Combine cornstarch and vanilla
- In a small bowl, whisk together the cornstarch and vanilla extract until smooth.
- Add this mixture to the yogurt–cream cheese batter and fold gently until fully incorporated.
+ Show details− Hide details
Ready when: Cornstarch and vanilla are evenly distributed
Tip: Mixing cornstarch into a small amount of vanilla first prevents lumps and ensures even distribution in the batter.
Add eggs carefully
- Add the three room-temperature eggs to the batter one at a time, folding gently after each addition until just incorporated.
- Do not beat or overmix once eggs are added, as this will create too many air bubbles.
+ Show details− Hide details
Ready when: Each egg is fully incorporated before the next is added; no streaks of egg white remain
Tip: Room-temperature eggs blend in more smoothly and create a more cohesive batter than cold eggs, which reduces cracks.
Press crust and fill pan
- Press the cooled granola mixture gently and evenly into the bottom of the foil-wrapped springform pan, creating a thin, even layer.
- Pour the cheesecake batter over the granola crust and smooth the top with a spatula.
+ Show details− Hide details
Ready when: Crust is evenly pressed and batter is smooth on top
Tip: A thin, even crust won't overcook or become soggy; make it about ¼ inch (6 mm) thick.
Pressure cook the cheesecake
- Lower the filled springform pan onto the trivet in the Instant Pot using the handles or by creating a foil sling.
- Cover the Instant Pot with the lid, ensuring the vent is set to sealing.
- Set to high pressure for 25 minutes using manual or pressure cook mode.
- The Instant Pot will take 3–5 minutes to reach pressure before the 25-minute countdown begins.
+ Show details− Hide details
Ready when: High-pressure cook is complete; the display shows 0:00
Tip: A foil sling (fold a long piece of foil in thirds lengthwise) makes lowering and removing the pan safer and easier.
Cool in pot with natural release
- Allow the pressure to release naturally for 10 minutes.
- After 10 minutes, carefully release any remaining steam by moving the vent to venting position.
- Open the lid slowly, tilting it away from you.
- The cheesecake surface should jiggle slightly in the center when gently shaken—this is normal and correct.
+ Show details− Hide details
Ready when: Pressure has released; the center still jiggles slightly
Tip: Never use quick-release on cheesecake—sudden pressure loss causes the cake to crack. Natural release is essential.
Cool in Instant Pot
- Leave the cheesecake in the closed Instant Pot (with the lid off) for 15 minutes to cool gently.
- The residual heat will help set the cake further.
+ Show details− Hide details
Ready when: Cheesecake is warm but not hot; surface is set
Tip: This intermediate cooling step is crucial—it prevents the sudden contraction that causes cracks when moving the cake to the fridge.
Transfer and refrigerate
- Using a foil sling, carefully lift the springform pan out of the Instant Pot and place it on a wire rack or kitchen counter.
- Let the cheesecake cool to room temperature (about 30 minutes), then remove the foil wrapper.
- Refrigerate the cheesecake, still in the springform pan, for at least 4 hours or overnight until completely chilled and set.
+ Show details− Hide details
Ready when: Cheesecake is completely chilled and no longer jiggles when gently shaken
Tip: Do not skip the room-temperature cooling step—a sudden move to the fridge can shock the cheesecake and cause cracks.
Remove from pan and serve
- Run a thin, sharp knife or offset spatula around the inside edge of the springform pan to loosen the cheesecake.
- Release the springform lock and carefully lift away the sides.
- If desired, slide a thin spatula under the parchment to separate the cheesecake from the pan bottom, or serve directly on the parchment.
- Slice with a hot, wet knife (wipe between slices) for clean cuts.
- Serve chilled.
+ Show details− Hide details
Ready when: Cheesecake is fully released from pan and sliced cleanly
Tip: A hot, wet knife cuts through cheesecake cleanly without dragging or crumbling. Dip the knife in hot water and wipe with a clean towel between each slice.
Good to know
Tips
- The key to a crack-free Instant Pot cheesecake is never using quick-release—always allow at least 10 minutes of natural pressure release. Cracks form from sudden temperature changes that cause the cake to shrink too fast.
- Room-temperature ingredients (especially eggs, cream cheese, and yogurt) blend smoothly and create a cohesive, lump-free batter. Cold ingredients don't incorporate as evenly, which can lead to dense patches and cracks.
- The slight jiggle in the center when the cheesecake comes out of the Instant Pot is correct—it continues to set as it cools. Overbaking results in a dry, rubbery cake, so trust the timing.
- If you don't have fresh lemons, use bottled lemon juice for the liquid, but zest from a fresh lemon gives much brighter, more aromatic flavor. Bottled zest is less fragrant and can taste stale.
Make ahead
Bake the cheesecake up to 2 days ahead. Cool completely, cover with plastic wrap, and refrigerate until ready to serve. The granola crust can be made 3 days in advance and stored in an airtight container at room temperature.
Storage & reheating
Store the whole cheesecake (in the springform pan, covered with plastic wrap) in the refrigerator for up to 4 days. For longer storage, wrap the entire cake in plastic wrap and then foil, and freeze for up to 1 month. Thaw overnight in the refrigerator before serving. Do not freeze individual slices, as the texture becomes grainy. Serve chilled straight from the refrigerator.
Substitutions
- raw almonds, roughly chopped → raw walnuts, roughly chopped, or pecans. Use the same weight. Walnuts will give a slightly earthier, richer flavor; pecans add sweetness.
- plain Greek yogurt (0% or 2% fat) → sour cream (use slightly less, about ¾ cup or 170 g). Sour cream will make the cheesecake tangier and slightly denser. Reduce amount slightly to avoid excess moisture.
- fresh lemon → finely grated zest from 1 large fresh lime, or 1 teaspoon dried lemon zest. Lime creates a bright, tropical flavor. Dried zest is more concentrated, so use less.
- raw or clover honey → maple syrup or agave nectar. Use the same weight. Maple will add depth; agave will keep the flavor more neutral.
More puddings & custards
See all →




Find more like this
- Meal
- Dessert
- Main ingredient
- Eggs
- Method
- Instant Pot
- Quick & Easy
- Make Ahead