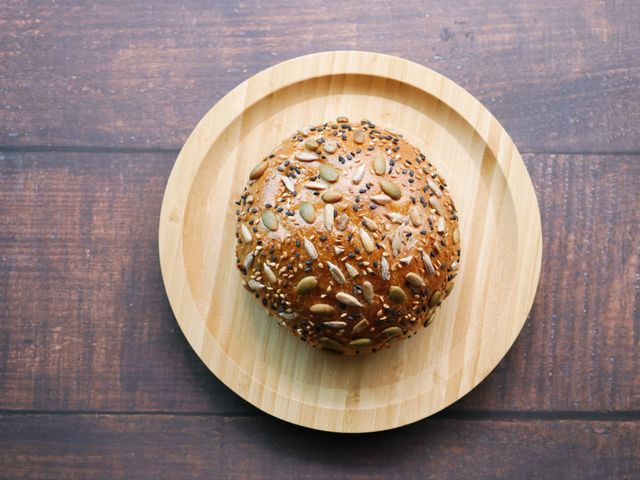
Greek Paxinoús Buns
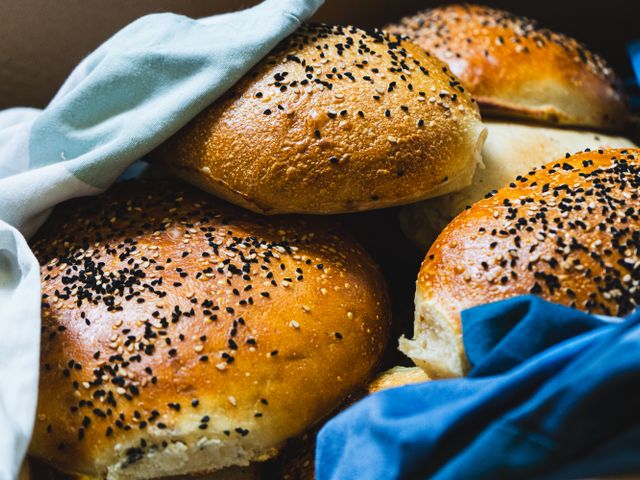
Paxinoús are rustic Greek whole wheat buns with a nutty flavor and tender crumb, topped with a generous blanket of sesame seeds. Traditional throughout Greece, these rolls are perfect for breakfast, lunch, or serving alongside mezze. The dough is enriched with olive oil and uses a mix of whole wheat and all-purpose flour for a hearty yet approachable texture. A simple overnight cold fermentation develops deep flavor and makes these buns even more distinctive.
- Prep
- 20 min
- Cook
- 22 min
- Wait
- 9 hr
- Total
- 9 hr 42 min
- Makes
- 12 buns (about 2 oz / 55 g each)
Steps
Before you start
- Read the full recipe—the dough rises overnight in the fridge, so plan ahead.
- Use whole wheat flour that's fresh (within 6 months of milling); older flour absorbs more water and yields a denser crumb.
- Have two baking sheets and parchment paper ready.
- Measure flour by spooning into a cup and leveling, or weigh for accuracy.
Mix dough
- In a large mixing bowl, combine 1.5 cups (195 g) whole wheat flour, 1.5 cups (195 g) all-purpose flour, and 0.5 teaspoon (3 g) instant yeast.
- Add 1 cup (240 ml) lukewarm water and 2 tablespoons (30 ml) olive oil.
- Stir with a wooden spoon or dough whisk until a shaggy dough forms; all dry flour should be incorporated.
- The dough will be soft and slightly sticky—this is correct.
- Cover the bowl loosely with plastic wrap.
+ Show details− Hide details
Ready when: all flour moistened, rough dough ball formed
Tip: Don't overwork the dough at this stage. The slow overnight fermentation will develop gluten structure, so you don't need to knead vigorously now.
Autolyse and first rise
- Let the dough rest at room temperature (68–72°F / 20–22°C) for 30 minutes.
- This gives the flours time to fully hydrate.
- After 30 minutes, sprinkle 1.5 teaspoons (9 g) kosher salt over the dough and gently fold it in using a bench scraper or the heel of your hand, folding the edges toward the center until the salt is fully incorporated, about 2 minutes.
- Cover and refrigerate overnight (or up to 16 hours).
- The dough will rise slowly and develop flavor.
+ Show details− Hide details
Ready when: dough is puffy but not doubled; it should jiggle slightly when the bowl is nudged
Tip: Cold fermentation is essential for depth of flavor in Greek buns. If you're short on time, let the dough rise at room temperature for 3–4 hours instead, but the flavor will be less complex.
Warm dough and prep to shape
- Remove the dough from the refrigerator 20 minutes before shaping.
- Set two baking sheets on the counter and line them with parchment paper.
- The dough will be cool and firm; this makes shaping much easier.
- Lightly dust your work surface with all-purpose flour.
+ Show details− Hide details
Tip: Chilled dough is less sticky and won't spread as much during shaping.
Shape buns
- Turn the dough out onto the floured work surface.
- Using a bench scraper or sharp knife, divide the dough into 12 equal pieces (each piece will weigh about 55–60 g).
- Working with one piece at a time, cup your hand over it and roll it gently toward you in circular motions, creating surface tension.
- The bun should form a smooth, taut ball.
- Place each shaped bun seam-side down on the prepared baking sheets, spacing them about 2 inches apart (they will rise and touch slightly—this is traditional).
- You should have 6 buns on each sheet.
+ Show details− Hide details
Ready when: 12 evenly sized, smooth buns arranged on sheets
Tip: If the dough is very sticky, lightly wet your hands instead of flouring them; this prevents adding too much flour, which would toughen the buns.
Second rise
- Cover the baking sheets loosely with plastic wrap or a clean kitchen towel.
- Let the buns rise at room temperature (68–72°F / 20–22°C) for 60–75 minutes.
- They should increase in size by about 50 %, puffing slightly and becoming soft to the touch, but they should not quite double.
- If your kitchen is cool, this may take up to 90 minutes.
+ Show details− Hide details
Ready when: buns are visibly fuller; when gently poked with a floured finger, the indent springs back slowly (about half-way)
Tip: Don't let them rise too long—overproofed buns will collapse in the oven and be dense. A gentle poke test is your best guide.
Preheat oven and prepare egg washOven 420°F / 215°C
- About 15 minutes before the buns finish rising, preheat your oven to 420°F (215°C).
- In a small bowl, whisk together 1 large egg and 1 tablespoon (15 ml) water until well combined.
- This egg wash will give the buns a beautiful golden sheen and help the sesame seeds adhere.
+ Show details− Hide details
Ready when: egg wash is homogeneous and glossy
Tip: Egg wash works best if it's well blended—lumpy egg won't brush on smoothly and will create uneven browning.
Apply egg wash and sesame seeds
- When the buns have finished rising, gently brush the top of each bun with the egg wash, using a pastry brush and using just enough to lightly coat (avoid letting pools of egg wash settle in crevices, as they can brown too dark).
- Immediately pour or sprinkle 0.75 cup (120 g) sesame seeds into a shallow bowl.
- Working quickly, press each egg-washed bun into the sesame seeds, coating the top generously.
- The seeds should stick in a thick, uneven layer—this is authentic.
+ Show details− Hide details
Ready when: all buns are coated with a generous, visible layer of sesame seeds
Tip: Work quickly after applying egg wash, before it dries, so the sesame seeds adhere evenly. Unhulled (raw) sesame seeds have better flavor and texture than hulled white seeds.
BakeOven 420°F / 215°C
- Place both baking sheets in the preheated 420°F (215°C) oven on the middle and lower racks.
- Bake for 20–24 minutes, rotating the sheets from top to bottom halfway through (around the 11-minute mark).
- The buns are done when the tops are deep golden brown and the sesame seeds are lightly toasted and fragrant.
- If you have an instant-read thermometer, the internal temperature at the center of a bun should register 200–205°F (93–96°C).
+ Show details− Hide details
Ready when: deep golden-brown tops, sesame seeds lightly toasted and fragrant, hollow sound when tapped on the bottom, internal temp 200–205°F (93–96°C)
Tip: If the sesame seeds are browning too fast, tent the baking sheets loosely with foil after the first 10 minutes. Rotating the pans ensures even baking in most ovens.
Cool and serve
- Remove the baking sheets from the oven.
- Let the buns cool on the sheets for 5 minutes, then transfer them to a wire rack to cool completely (about 30 minutes).
- Serve at room temperature, warm, or toasted and split for sandwiches.
+ Show details− Hide details
Ready when: buns are warm to the touch but firm enough to handle without falling apart
Tip: Buns are best eaten the same day they're baked, but they remain good the next day. Refresh them in a 300°F (150°C) oven for 5–8 minutes before serving.
Good to know
Tips
- Whole wheat flour ferments faster than all-purpose flour due to its higher bran content, which speeds enzymatic activity. If your kitchen is warm (above 75°F / 24°C), start checking the dough after 8–10 hours in the fridge to avoid overproofing.
- For a tangier, more complex flavor, extend the cold fermentation to 18–24 hours. The buns will be slightly firmer and may need 5–10 fewer minutes of second rise.
- Press the buns gently into sesame seeds rather than sprinkling seeds on top. This gives a more rustic, traditional appearance and ensures the seeds stay on through baking.
- Paxinoús are delicious on their own, but they also pair beautifully with Greek cheese (feta, kasseri), olives, cured meats, or a simple tomato and herb salad for a traditional breakfast or lunch.
Storage & reheating
Store buns in an airtight container at room temperature for up to 2 days. For longer storage, freeze in an airtight bag for up to 3 months. To reheat, wrap in foil and warm in a 300°F (150°C) oven for 8–10 minutes (from room temperature) or 15–18 minutes (from frozen). Do not microwave, as it will make them rubbery.
Substitutions
- all-purpose flour → bread flour (higher protein content). Bread flour will create a slightly chewier crumb with a bit more structure. Use the same weight but reduce water by 1–2 tablespoons, as bread flour absorbs more liquid.
- instant (bread) yeast → 0.25 teaspoon active dry yeast or 0.5 teaspoon fresh (compressed) yeast. Active dry yeast requires 10–15 more minutes of rise time per stage due to slower fermentation. Reduce fresh yeast slightly as it ferments faster.
- sesame seeds (white or mixed) → nigella seeds (black caraway) or a mix of sesame and nigella. Nigella seeds are used in some regional Greek variations and add a slightly peppery, earthy note. The flavor profile changes noticeably.
- extra-virgin olive oil → neutral oil (sunflower or vegetable oil). The buns will be slightly less flavorful and less authentically Greek, but the texture and rise will be the same.