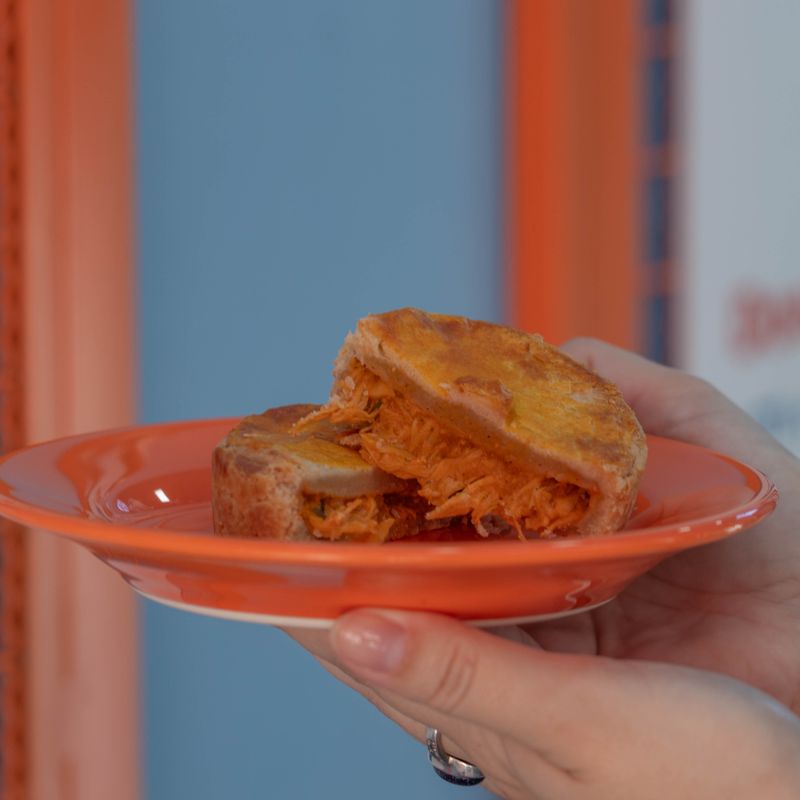
Coquito Hand Pie with Coconut and Nutmeg
Handheld Caribbean pastries filled with a sweet, spiced coconut mixture reminiscent of coquito eggnog. Flaky puff pastry encases a fragrant filling of toasted coconut, brown sugar, and warm spices including nutmeg and cinnamon. Perfect for a snack, dessert, or holiday treat.
Steps
Before you start
- Preheat oven to 400°F (200°C)
- Remove puff pastry from freezer 15 minutes before using so it's easy to cut but still cold
- Line two large baking sheets with parchment paper
Toast the coconut
- In a small saucepan over medium heat, add the shredded coconut without any fat.
- Toast for 3–4 minutes, stirring constantly, until it becomes fragrant and turns light golden.
- The coconut will release its natural oils as it toasts.
- Transfer immediately to a medium mixing bowl to stop the cooking.
+ Show details− Hide details
Ready when: Coconut is fragrant and light golden brown
Tip: Watch carefully—coconut burns quickly. Stir continuously to toast evenly.
Make the filling
- To the toasted coconut, add the butter, brown sugar, nutmeg, cinnamon, cloves, salt, and vanilla extract.
- Stir until well combined and the spices are evenly distributed.
- The mixture should look slightly moist and crumbly but hold together when pinched.
+ Show details− Hide details
Ready when: Spices are evenly distributed and butter is mixed throughout the coconut mixture
Tip: The butter will soften from the warm toasted coconut and coat the mixture, creating a richer filling.
Prepare the pastry
- Working quickly to keep the pastry cold, unfold the thawed puff pastry sheets on a lightly floured surface.
- Using a 3-inch (7.5 cm) round cutter or a small glass, cut out 12 rounds from the pastry.
- (You may get 6 rounds per sheet if using standard pastry sheets.) Arrange 6 rounds on each prepared baking sheet, spacing them about 2 inches apart.
+ Show details− Hide details
Ready when: 12 even rounds are cut and arranged on baking sheets
Tip: Chill the cut pastry rounds on the baking sheet in the refrigerator while you assemble the pies if the kitchen is warm.
Fill and seal the pies
- Place about 1 tablespoon of coconut filling in the center of each pastry round.
- Fold the pastry in half over the filling to create a half-moon shape.
- Using a fork, press down firmly along the sealed edge to crimp and seal it tight.
- The crimping helps prevent filling from leaking during baking.
+ Show details− Hide details
Ready when: All 12 pies are filled, folded, and crimped with sealed edges
Tip: Don't overfill—too much filling can cause the pastry to burst or not seal properly. Press the fork firmly into the seam.
Apply egg wash
- Beat together the egg and 1 tablespoon of water in a small bowl.
- Using a pastry brush, lightly brush the egg wash over the top of each hand pie, being careful not to let it pool on the baking sheet (it will prevent browning on the sides).
+ Show details− Hide details
Ready when: All pies are evenly coated with a thin layer of egg wash
Tip: Use a light hand with the brush—a thin coat gives the best golden color.
Add final touches (optional)
- If desired, sprinkle a tiny pinch of nutmeg on top of each pie.
- This adds visual appeal and reinforces the spice flavor.
+ Show details− Hide details
Ready when: Nutmeg is sprinkled on top of each pie
Bake until goldenOven 400°F / 205°C
- Place the baking sheets in a preheated 400°F (200°C) oven.
- Bake for 18–20 minutes, until the pastry is puffed and deep golden brown on top.
- If the edges brown too quickly, loosely tent with aluminum foil halfway through baking.
- The pies should sound crispy when tapped.
+ Show details− Hide details
Ready when: Pastry is puffed and deep golden brown; edges are crispy when tapped
Tip: Don't skip the egg wash—it's what creates that beautiful golden color and signals doneness.
Cool briefly before serving
- Remove the baking sheets from the oven and let the hand pies cool on the sheets for 5 minutes.
- They will firm up slightly, making them easier to handle.
- Serve warm or at room temperature.
+ Show details− Hide details
Ready when: Pies have cooled enough to handle without burning fingers
Tip: Pies taste best when still warm, but they're good at room temperature too.
Good to know
Tips
- For a Caribbean twist, add 1 tablespoon of rum extract to the filling for a subtle coquito eggnog flavor.
- Toast the coconut in a dry pan—it concentrates the flavor and gives the filling a deeper, more complex taste than raw coconut.
- Keep your puff pastry as cold as possible; cold pastry puffs more dramatically in the oven.
- If making these for a large party, assemble and freeze them unbaked, then pop them straight into the oven—no thawing needed.
Make ahead
Unfilled hand pies can be assembled, egg-washed, and frozen on a baking sheet for up to 2 weeks. Bake directly from frozen, adding 2–3 minutes to the baking time.
Storage & reheating
Store cooled hand pies in an airtight container at room temperature for up to 2 days, or in the refrigerator for up to 4 days. Reheat in a 350°F (175°C) oven for 5 minutes to restore crispness. Freeze unbaked pies for up to 2 weeks or baked pies for up to 1 month; thaw baked pies at room temperature before reheating.
Substitutions
- unsweetened shredded coconut → Sweetened shredded coconut. Reduce the brown sugar by 2 tablespoons (25 g) to balance sweetness.
- freshly grated nutmeg → Ground mace or a mix of nutmeg and cardamom. Mace has a slightly milder, more delicate spice note; cardamom adds complexity.
- packed light brown sugar → White sugar plus 1 tablespoon molasses. Gives a similar depth of flavor with a lighter color.
- frozen puff pastry sheets, thawed according to package directions → Homemade or quality defrosted phyllo dough (2 sheets brushed with melted butter). Phyllo will be crispier and thinner; watch baking time closely (8–10 minutes).
More pastries
See all →


Find more like this
- Meal
- Dessert
- Diet
- VegetarianHalal
- Method
- Oven
- Quick & Easy
- Make Ahead