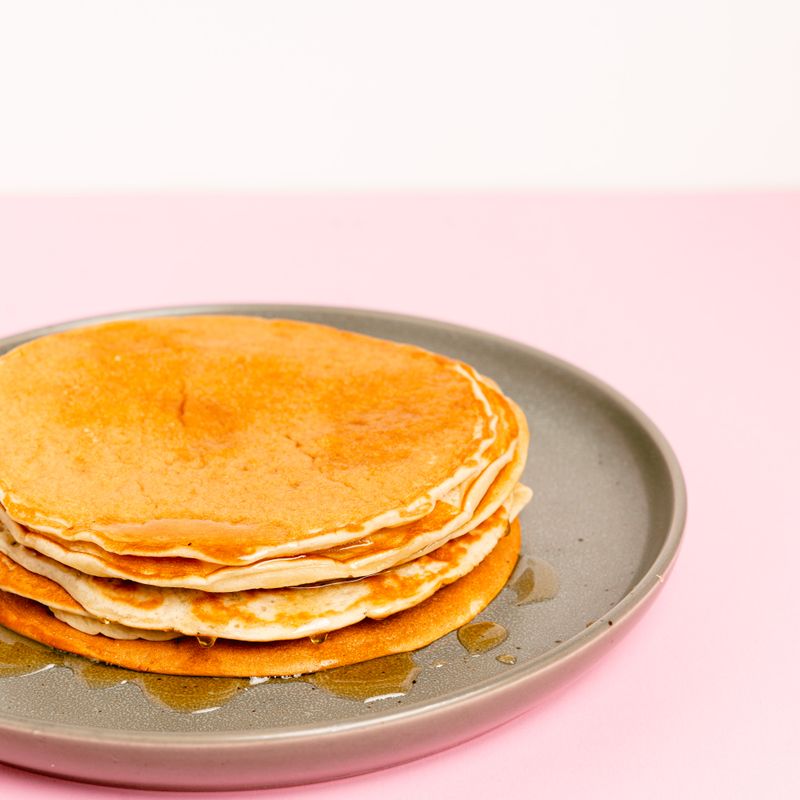
Classic Pancakes with Maple Syrup and Butter
Tall, tender, golden-edged diner-style pancakes made from pantry staples in 30 minutes. A short rest and a medium griddle give you fluffy centers, and they're served the classic way with a pat of butter and warm maple syrup.
- Prep
- 10 min
- Cook
- 15 min
- Wait
- 5 min
- Total
- 30 min
- Makes
- About 12 pancakes (4-inch/10 cm), serving 4
Steps
Before you start
- Take the egg and milk out of the fridge 15–20 minutes ahead so the melted butter doesn't clump when it hits cold liquid.
- Melt the 3 tablespoons of butter for the batter and let it cool for a few minutes so it won't scramble the egg.
- Check your baking powder is fresh (it should fizz when a pinch is stirred into hot water); old baking powder is the top cause of flat pancakes.
- Have a baking sheet with a wire rack and a thin spatula ready next to the stove.
Set up the ovenOven 200°F / 95°C
- Heat the oven to 200°F (95°C) and set a wire rack inside a rimmed baking sheet.
- This keeps finished pancakes warm and crisp-edged while you cook the remaining batches.
- Melt the batter butter if you haven't already.
+ Show details− Hide details
Ready when: Butter is fully liquid and no longer hot to the touch.
Tip: Don't go above 200°F (95°C) or the pancakes will dry out.
Whisk the dry ingredients
- In the large bowl, whisk together the flour, sugar, baking powder and salt for 20 seconds until evenly combined with no baking powder clumps.
+ Show details− Hide details
Ready when: Mixture looks uniform in color with no lumps.
Whisk the wet ingredients
- In the medium bowl or measuring cup, whisk the egg until the yolk and white are fully blended.
- Whisk in the milk and vanilla (if using).
- Slowly drizzle in the cooled melted butter while whisking.
+ Show details− Hide details
Ready when: Liquid is smooth with no visible streaks of egg or flecks of butter.
Tip: If small butter clumps form, your milk is too cold. Keep whisking and they'll smooth out.
Combine gently
- Make a well in the center of the dry ingredients and pour in the wet mixture.
- Fold with a rubber spatula for about 10–12 strokes, just until the flour disappears.
- The batter should be thick and lumpy, with a few small pea-sized lumps.
+ Show details− Hide details
Ready when: No dry flour pockets remain, and batter slowly falls from the spatula in a thick ribbon.
Tip: Overmixing develops gluten and makes tough, rubbery pancakes. Lumps are fine.
Rest and heat griddle
- Let the batter rest for 5 minutes so the flour hydrates and the baking powder starts working.
- Meanwhile, set the griddle or skillet over medium heat (about 350°F/175°C on a griddle) for 3–5 minutes.
+ Show details− Hide details
Ready when: Batter looks slightly puffed with a few bubbles. A drop of water flicked on the surface sizzles and skitters away within a second or two.
Tip: Don't stir the batter after resting; you'll deflate the bubbles.
Grease and pour
- Rub the surface lightly with the cold cooking butter so it melts into a thin, shimmering film.
- Pour ¼ cup (60 ml) batter per pancake, spacing them at least 2 inches (5 cm) apart.
- Cook 3–4 pancakes per batch, depending on your griddle size.
+ Show details− Hide details
Ready when: Batter spreads to a round about 4 inches (10 cm) wide and sizzles gently.
Tip: Use only a thin film of butter; too much makes the pancakes fry unevenly and look blotchy.
Cook the first side
- Cook for 2 to 3 minutes without moving them.
- Watch for bubbles to form across the surface and pop, leaving small holes, and for the edges to look dry and set.
+ Show details− Hide details
Ready when: Bubbles have popped and stay open, edges look matte, and the underside is golden brown when you peek with a spatula.
Tip: If the underside is dark before bubbles appear, lower the heat slightly.
Flip and finish
- Slide the spatula fully under each pancake and flip once, in one confident motion.
- Cook the second side for 1 to 2 minutes, without pressing down, until it is golden and the pancake feels springy.
+ Show details− Hide details
Ready when: Both sides are golden brown, the pancake is about ¾ inch (2 cm) thick, and the center springs back when lightly touched.
Tip: Never press the pancake with the spatula; it squeezes out the air that makes it fluffy.
Keep warm, repeatOven 200°F / 95°C
- Transfer finished pancakes to the rack in the oven in a single layer.
- Wipe the griddle with a bit more cold butter between batches, and repeat with the remaining batter, adjusting the heat as needed, for about 12 pancakes total.
+ Show details− Hide details
Ready when: Each batch is evenly golden, with an internal temperature of at least 160°F (71°C) in the center.
Tip: Stacking the pancakes on a plate traps steam and makes them soggy, so use the rack.
Warm syrup and serve
- Warm the maple syrup in a small saucepan over low heat or in the microwave for 20–30 seconds until just warm, not hot.
- Stack 3 pancakes on each of 4 plates, top each stack with a pat of softened butter, and pour the warm syrup over the top.
- Serve right away.
+ Show details− Hide details
Ready when: Syrup is warm and loose-flowing, and the butter is melting on the hot pancakes.
Tip: Don't boil the syrup; it will thicken and can crystallize.
Good to know
Tips
- Use a ¼-cup measure or ladle for evenly sized pancakes that finish cooking at the same time.
- Test with one pancake first. If it browns too fast, lower the heat; if it's pale after 3 minutes, raise it slightly. The first pancake is often your test.
- If the batter thickens as it sits, whisk in a tablespoon of milk at a time to loosen it, folding gently.
- Flip only once. Flipping multiple times causes dense, flat pancakes.
Make ahead
"Mix the dry ingredients up to 1 week ahead and store airtight. Whisk the wet ingredients and refrigerate separately overnight; combine just before cooking, since baking powder loses power once wet. Cooked pancakes can also be made ahead and reheated (see storage)."
Storage & reheating
"Room temperature: up to 2 hours (kept covered). Fridge: cool completely, then store airtight with parchment between pancakes for up to 3 days. Freezer: freeze in a single layer on a baking sheet until firm, then bag for up to 2 months. Reheat from the fridge or freezer in a toaster on a medium setting, or on a baking sheet at 350°F (175°C) for 5–8 minutes (10–12 from frozen), until hot throughout."
Substitutions
- whole milk → 1¼ cups (300 ml) buttermilk plus ½ teaspoon baking soda, with baking powder reduced to 2 teaspoons. Gives a tangier, slightly more tender pancake; the batter will be a bit thicker, so thin with 1–2 tablespoons milk if needed.
- whole milk → unsweetened soy or oat milk, same amount. Works well for dairy-free pancakes; pair with a neutral oil or dairy-free butter.
- all-purpose flour → 1 cup (125 g) all-purpose flour plus ½ cup (60 g) white whole wheat flour. Adds a nuttier flavor with a slightly denser crumb; add 1 extra tablespoon of milk.
- unsalted butter → neutral oil such as canola, 3 tablespoons (45 ml). No need to melt or cool, and the pancakes stay just as tender, though with less buttery flavor.
More pancakes & waffles
See all →




Find more like this
- Meal
- Breakfast
- Cuisine
- American
- Diet
- VegetarianHalal