
Yellow Split Peas with Turmeric and Ginger
A warming, creamy Indian dal made from yellow split peas infused with earthy turmeric, bright ginger, and aromatic cumin. Cooked in a pressure cooker for tender, silky peas in just minutes. Finished with ghee for richness and a touch of lemon for balance. Perfect alongside rice, flatbread, or as a nourishing vegetarian main course.
- Prep
- 10 min
- Cook
- 25 min
- Wait
- 5 min
- Total
- 40 min
- Makes
- About 3 cups (720 ml), 4 servings
Steps
Before you start
- Rinse the yellow split peas thoroughly under cold water until the water runs clear
- Have all spices measured and ready
- If using fresh ginger, peel it before mincing
Sauté aromatics
- If using an electric pressure cooker, select the sauté function and heat for 2 minutes.
- If using a stovetop pressure cooker, place on medium-high heat.
- Add 1.5 tablespoons of the ghee, then add the diced onion.
- Cook, stirring often, for 3–4 minutes until the onion is soft and translucent.
- Add the minced ginger and garlic, stirring constantly, and cook for another 1 minute until fragrant.
+ Show details− Hide details
Ready when: Onion is soft and translucent; ginger and garlic are fragrant
Tip: Don't let the garlic and ginger burn—keep them moving in the pan
Add spices and peas
- Add the turmeric powder, ground cumin, and optional cumin seeds, stirring for about 30 seconds until the spices become fragrant and coat the aromatics.
- Pour in the rinsed yellow split peas and stir for another 30 seconds, ensuring the peas are evenly coated with the ghee and spices.
+ Show details− Hide details
Ready when: Spices are fragrant; peas are coated with ghee and spices
Tip: Toasting the spices for a moment releases their essential oils for deeper flavor
Add water and pressure cook
- Pour in the 4.5 cups (1080 ml) of water.
- Stir to combine, scraping up any browned bits from the bottom of the pot.
- If using an electric pressure cooker, seal the lid and set to high pressure for 12 minutes.
- If using a stovetop pressure cooker, bring to a boil briefly, then seal and cook at high pressure (15 psi) for 12 minutes.
- Do not leave the cooker unattended.
+ Show details− Hide details
Ready when: Pressure cooker reaches full pressure and timer begins
Tip: Use the natural pressure in the pot to cook the peas evenly; don't skip the deglazing step
Release pressure naturally
- Once the cooking time is complete, turn off the heat (or move the stovetop cooker away from the flame).
- Allow the pressure to release naturally for 5 minutes.
- This gentle release helps the peas finish cooking and become creamy.
- After 5 minutes, carefully open the pressure valve to release any remaining steam, then remove the lid.
+ Show details− Hide details
Ready when: All steam has escaped; lid can be safely removed
Tip: Never force the lid open or quick-release the pressure—this prevents sputtering and keeps peas intact
Mash and blend (optional)
- Open the lid carefully.
- The peas should be very tender and the liquid should be mostly absorbed (there may be a small amount of liquid remaining, which is fine).
- If you prefer a creamier, more blended dal, use an immersion blender to partially blend the mixture until some peas are broken down but some texture remains.
- Alternatively, leave the peas whole for a more brothy consistency.
- Stir in the remaining 1 tablespoon of ghee.
+ Show details− Hide details
Ready when: Peas are very tender; consistency is as desired
Tip: Blending is optional—some prefer the peas whole and soupy, others like a thick, creamy dal
Season and finish
- Taste the dal and add sea salt and black pepper to taste.
- Stir in the fresh lemon juice, which will brighten the flavors and cut through the richness of the ghee.
- If the dal seems too thick, add a splash of water (up to ½ cup / 120 ml) and stir well.
- Adjust seasoning if needed.
- Sprinkle with fresh cilantro if desired, and drizzle with a bit more ghee for richness.
+ Show details− Hide details
Ready when: Seasoning is balanced; lemon juice is incorporated
Tip: Add lemon juice at the end—it prevents the peas from darkening and adds freshness
Good to know
Tips
- For a soupy dal, use the full 4.5 cups of water; for a thicker porridge-like consistency, reduce water to 3.5 cups (840 ml) and increase pressure-cooking time to 14 minutes
- If your pressure cooker is smaller (4 quarts / 3.8 L), halve all ingredients except reduce water to 2 cups (480 ml) and cook for 10 minutes
- Serve over steamed basmati rice, with warm naan or roti, or alongside a vegetable curry for a complete meal
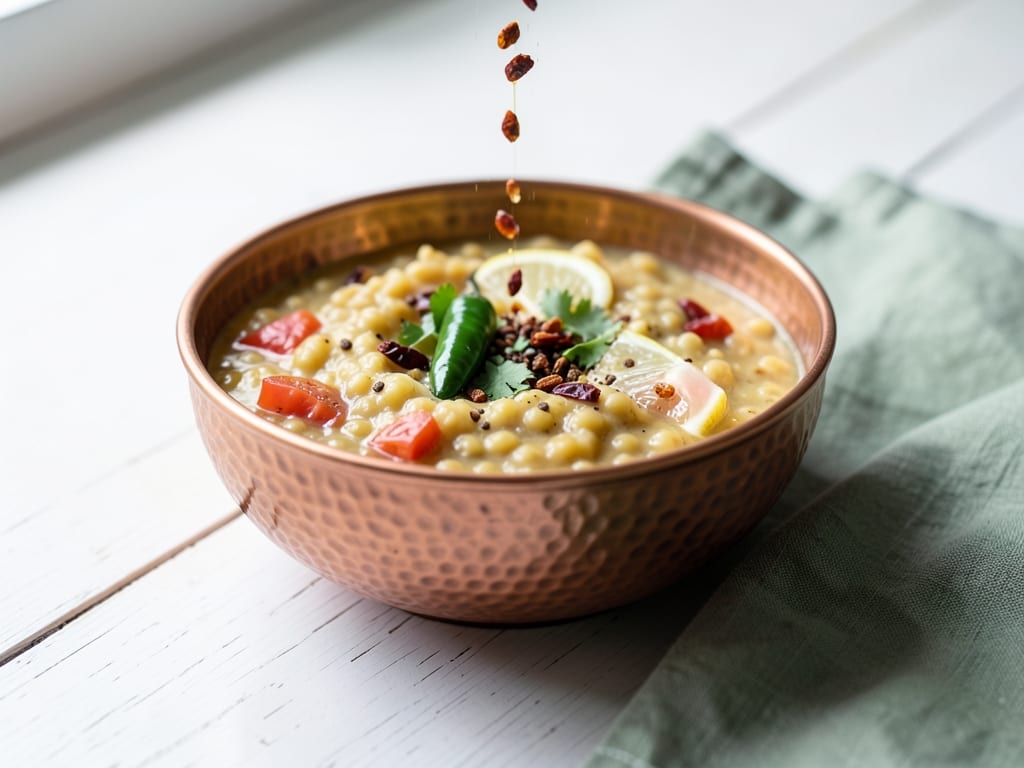
- Make a spiced ghee garnish: warm 1 tablespoon ghee in a small skillet, add a pinch of cumin seeds and dried red chili flakes, cook for 30 seconds, then drizzle over the dal just before serving
Make ahead
The dal can be made up to 2 days ahead. Cool, cover, and refrigerate. Reheat gently on the stovetop over medium heat, stirring occasionally and adding a splash of water if it has thickened too much. It also freezes well for up to 3 months in an airtight container; thaw in the refrigerator and reheat gently.
Storage & reheating
Room temperature: up to 2 hours. Refrigerator: up to 3 days in an airtight container. Freezer: up to 3 months in a freezer-safe container. Reheat on the stovetop over medium heat, stirring frequently, or in the microwave in 30-second intervals, adding water as needed to reach desired consistency. Do not reheat more than once from frozen.
Substitutions
- ghee → unsalted butter or coconut oil. Use the same amount. Ghee adds authentic flavor and richness, but butter works well and is more neutral; coconut oil adds a subtle sweetness
- yellow split peas, rinsed and drained → red lentils or moong dal. Use the same amount. Red lentils cook slightly faster (10 minutes); moong dal has a slightly different texture but works equally well
- fresh ginger → 1/2 teaspoon (1 g) ground ginger. Use half the amount of fresh. Ground ginger is drier and more concentrated; start with less and adjust to taste
- fresh lemon juice → 1 tablespoon (15 ml) fresh lime juice or 1/4 teaspoon citric acid. Lime juice is equally bright; citric acid is shelf-stable but adds less flavor complexity
More bean sides
See all →


Find more like this
- Meal
- Dinner
- Cuisine
- Indian
- Method
- Instant Pot