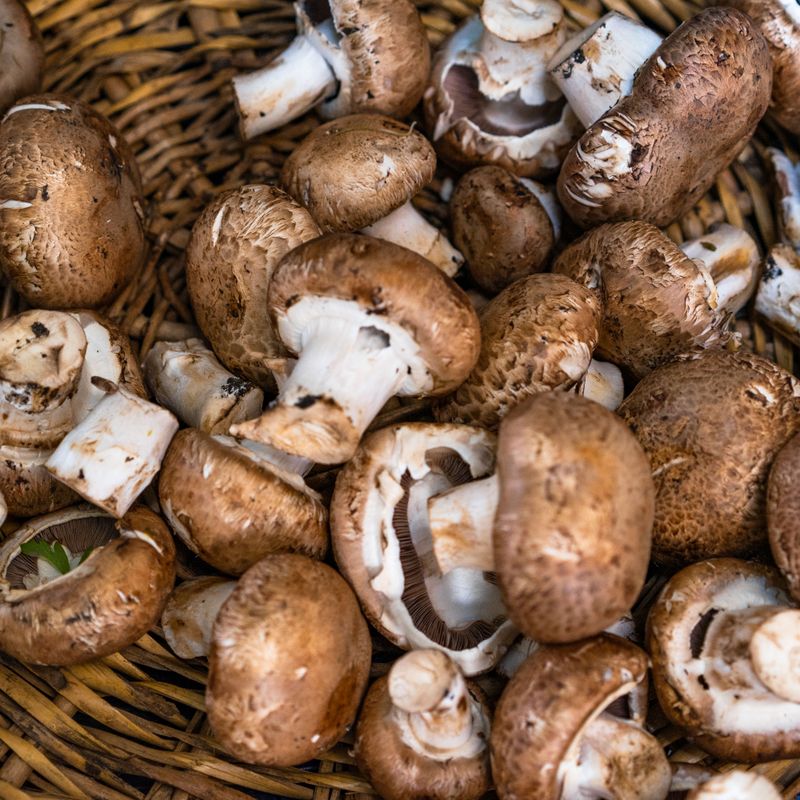
Vegan Mushroom and Wild Rice Chowder
A creamy, deeply savory plant-based chowder featuring tender wild rice, caramelized mushrooms, and vegetables finished with silky plant-based cream. Made entirely in the Instant Pot for convenience and to concentrate flavors. Perfect as a main course or elegant starter.
- Prep
- 15 min
- Cook
- 42 min
- Wait
- 5 min
- Total
- 1 hr 2 min
- Makes
- 5 servings (about 10 cups)
Steps
Before you start
- Gather and chop all vegetables before starting (onion, carrots, potato, mushrooms, garlic)
- Ensure your Instant Pot's sealing ring is clean and in place, and the pot is clean inside
- Read through the recipe and timing; the pressure cooking is hands-off but the natural release requires monitoring
- Have a small bowl ready for whisking the plant-based cream mixture
Sauté onion and garlic
- Set the Instant Pot to sauté mode on high heat.
- Add the olive oil, then the diced onion.
- Cook for 3–4 minutes, stirring occasionally, until the onion is softened and translucent.
- Add the minced garlic and cook for 1 minute more until fragrant.
+ Show details− Hide details
Ready when: Onion is translucent and garlic is fragrant
Tip: Toasting the aromatics well builds a deeper flavor foundation for the entire chowder
Brown mushrooms
- Add the diced mushrooms to the pot.
- Sauté for 5–6 minutes, stirring occasionally but not constantly, until they release their liquid, the liquid evaporates, and the mushrooms begin to brown around the edges.
+ Show details− Hide details
Ready when: Mushrooms are browned on the edges and excess liquid has evaporated
Tip: Don't stir too frequently; let them sit to develop caramelization and concentrate their umami flavor
Add vegetables, rice, and broth
- Add the diced carrots, diced potato, and wild rice to the pot.
- Stir well to combine.
- Pour in the vegetable broth, then add the fresh thyme and bay leaves.
- Season with ½ teaspoon salt and ¼ teaspoon black pepper.
- Stir everything together, making sure to scrape the bottom of the pot with your spoon to deglaze any brown, stuck-on bits.
+ Show details− Hide details
Ready when: All ingredients are combined and the bottom of the pot is deglazed
Tip: Thorough deglazing prevents the Instant Pot from displaying a "burn" notice, which would prevent it from pressurizing
Pressure cook
- Close the Instant Pot lid and ensure the steam vent is set to "sealing." Press the high pressure button and set the timer for 25 minutes.
- The pot will take several minutes to reach pressure before the countdown timer begins.
+ Show details− Hide details
Tip: Wild rice requires longer cooking than regular rice; 25 minutes ensures it's fully cooked through and tender
Release pressure naturally
- When the pressure cooking timer beeps, turn the Instant Pot off.
- Allow the pressure to release naturally for 5 minutes.
- Then carefully move the steam vent to "venting" to quick-release any remaining pressure.
- Wait until the red pressure pin drops and the lid can be opened safely before proceeding.
+ Show details− Hide details
Ready when: Red pressure pin has dropped completely and lid opens without resistance
Tip: Natural release is gentler than quick-release and helps the vegetables stay intact
Prepare plant-based cream
- While the pressure is releasing, whisk together the cornstarch and 3 tablespoons of the plant-based milk in a small bowl until smooth (no lumps).
- Then whisk in the remaining plant-based milk (about ¾ cup), the nutritional yeast, and an additional ¼ teaspoon salt.
- Set the mixture aside.
+ Show details− Hide details
Ready when: Mixture is smooth and free of cornstarch lumps
Tip: Whisking the cornstarch with cold milk first prevents lumps when it's added to the hot chowder
Thicken chowder
- Turn the Instant Pot to sauté mode on medium-high heat.
- Slowly pour the plant-based cream mixture into the pot while stirring constantly with a whisk.
- Continue cooking and stirring for 2–3 minutes until the chowder thickens, becomes creamy, and you no longer detect any raw starch flavor.
+ Show details− Hide details
Ready when: Chowder coats the back of a spoon and tastes creamy with no starchy aftertaste
Tip: Stir constantly while pouring to prevent lumps from forming in the hot liquid
Adjust seasoning and serve
- Turn off the Instant Pot.
- Remove the bay leaves from the pot.
- Taste the chowder and adjust the seasoning with additional salt and black pepper as needed.
- If the chowder seems too thick, stir in a bit more plant-based milk, ¼ cup at a time, until you reach your desired consistency.
- Ladle into bowls and serve hot.
+ Show details− Hide details
Ready when: Seasoning is balanced and consistency is to your preference
Tip: The chowder will continue to thicken slightly as it cools, so don't make it too thick initially
Good to know
Tips
- Mushroom selection matters greatly: a mix of cremini and shiitake creates the most complex umami-rich flavor. Don't use all button mushrooms, as they contribute less depth.
- The browning step in step 2 is crucial—don't skip it or rush it. Caramelized mushrooms develop flavors that transform the entire chowder.
- If your Instant Pot displays a "burn" message before pressurizing, it means something is stuck to the bottom. Turn it off, stir in an additional ½ cup of broth, and scrape the bottom thoroughly before trying again.
- For a heartier, thicker chowder, increase the diced potato to 1½ cups (225 g) or add a second potato; for a brothier chowder, reduce the cornstarch to 1 tablespoon.
Make ahead
This chowder can be prepared up to 3 days ahead. Make it through step 7 (thickening), then cool to room temperature and store in an airtight container in the refrigerator. Reheat gently on the stovetop over medium heat, stirring frequently and adding a splash of vegetable broth or plant-based milk if needed to reach your preferred consistency.
Storage & reheating
Room temperature: Up to 2 hours (not recommended for extended storage due to potential milk separation). Refrigerator: Up to 4 days in an airtight container. Freezer: Up to 3 months. To reheat from frozen, thaw overnight in the refrigerator, then warm gently on the stovetop over medium heat, whisking in an extra ¼–½ cup of plant-based milk to restore creaminess, as the mixture may separate after freezing.
Substitutions
- mixed fresh mushrooms (cremini and shiitake blend) → all cremini, all button, or any blend of fresh mushrooms (except enoki); portobello mushrooms add deeper earthy flavor but may need slight cooking adjustments. The ratio of cremini to shiitake can vary; cremini gives earthiness while shiitake adds umami depth
- unsweetened plant-based milk (oat, almond, or soy) → unsweetened cashew, almond, or soy milk. Avoid sweetened plant-based milks, as they will alter the savory balance; coconut milk (full-fat, unsweetened) works but imparts a distinct coconut flavor
- wild rice, uncooked → a 50/50 mix of wild rice and brown rice, or all brown rice. If substituting, increase the broth to 5½ cups and reduce the pressure-cooking time to 18–20 minutes, checking for doneness earlier
- cornstarch → 3 tablespoons cashew cream (blend ½ cup soaked raw cashews with ½ cup water until smooth and creamy) or 2 tablespoons tapioca starch. Cashew cream adds richness and a more luxurious mouthfeel; tapioca starch is gluten-free but creates a slightly slicker texture
More chowders
See all →

Find more like this
- Meal
- Dinner
- Method
- StovetopInstant Pot