
Torta Ahogada
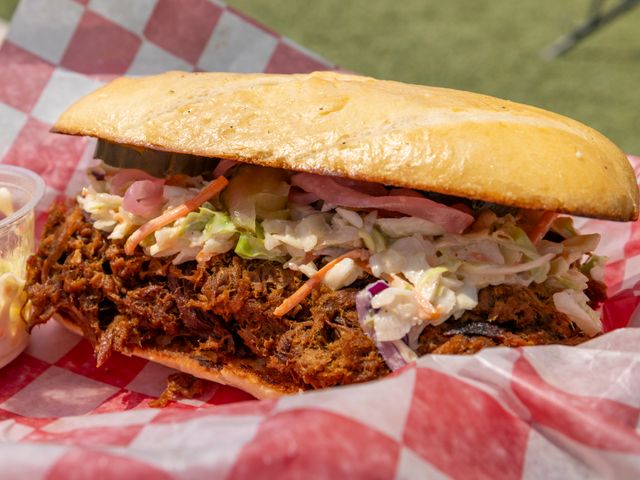
A traditional Jalisco-style Mexican sandwich featuring slow-braised carnitas and crispy edges, stacked on a soft telera roll with pickled jalapeños and fresh onion, then dipped generously in a rich, deeply flavored sauce made from roasted tomatoes and dried guajillo chiles. The "drowning" in sauce is essential to the authentic experience.
- Prep
- 25 min
- Cook
- 3 hr 40 min
- Total
- 4 hr 5 min
- Makes
- 4 tortas (sandwiches)
Steps
Before you start
- Preheat your oven to 275°F (135°C) and position a rack in the lower third if braising the carnitas in the oven
- Pat the pork shoulder chunks dry with paper towels to help them brown properly
- Have all ingredients prepped and measured (mise en place) before you begin cooking
- Read through the recipe to understand the timing—most of the cooking is passive braising time
Brown the Pork
- Heat the lard in your large Dutch oven over medium-high heat until shimmering, about 2 minutes.
- Pat the pork shoulder chunks dry and season generously all over with salt.
- Working in two batches to avoid crowding the pot, brown the pork on all sides until deeply golden brown, about 12–15 minutes total, turning occasionally with tongs.
- Transfer the browned pork to a plate.
- Don't wash the pot—the caramelized browned bits are flavorful and will add depth to the braise.
+ Show details− Hide details
Ready when: Pork chunks are deeply browned on all sides with a rich, golden-brown crust
Tip: Don't skip the browning step—it develops flavor through the Maillard reaction. If the pot feels too crowded, work in batches even if it takes longer; proper browning is worth it.
Braise the CarnitasOven 275°F / 135°C
- Return the pot to medium heat.
- Add the smashed garlic cloves and bay leaves, stirring for about 30 seconds until fragrant.
- Return all the browned pork to the pot.
- Pour in the orange juice if using it, along with any accumulated meat juices from the plate.
- Cover the pot with a tight-fitting lid and transfer to the preheated 275°F (135°C) oven.
- Braise for 3 to 3.5 hours, until the pork is completely fork-tender and shreds easily with no resistance.
- Check for doneness by inserting an instant-read thermometer into the thickest piece of pork; it should read at least 145°F (63°C) and be fork-tender.
- Alternatively, braise on the stovetop over very low heat (just a gentle bubble at the surface), stirring occasionally, for the same amount of time.
+ Show details− Hide details
Ready when: Pork is so tender it shreds easily when pressed with a fork; there is no resistance or chewy texture. Internal temperature reads at least 145°F (63°C) when measured in the thickest piece.
Tip: Keep the lid on to trap moisture and prevent drying. If braising on the stovetop, adjust the heat low enough that you hear only an occasional bubble, not a steady simmer. The key is low and slow.
Toast and Deseed the Chiles
- While the pork braises, prepare the sauce.
- Heat a dry skillet over medium heat.
- Place the 4 guajillo chiles in the hot skillet for about 15 seconds per side, pressing gently with a spatula, until fragrant and slightly darkened.
- Be careful not to let them burn.
- Transfer to a plate to cool.
- Once cool enough to handle, use your fingers to deseed and devein them by gently pulling out the stem and shaking out the seeds.
- You can also rinse them quickly under water if you want to remove more seeds.
- Set aside.
+ Show details− Hide details
Ready when: Chiles are fragrant and slightly darkened; they should be flexible, not brittle or burned
Tip: Toasting releases the chiles' essential oils and deepens their flavor. A light toast is all you need—burnt chiles taste bitter.
Roast the Tomatoes
- Place the Roma tomato halves on a broiler pan or large skillet, cut-side down.
- Set the broiler to high and position the pan 4–5 inches from the heat source.
- Broil for 10–12 minutes until the tomato skins are blackened and blistered in spots and the flesh is soft and has released its juices.
- Alternatively, roast them in a dry skillet over medium-high heat, cut-side down, for about 8–10 minutes, stirring occasionally, until they're very soft and slightly charred.
+ Show details− Hide details
Ready when: Tomato skins are blackened in spots; flesh is very soft and has released juices
Tip: The charring and softening is essential to developing the sauce's depth of flavor. Don't skip this step.
Blend the Sauce Base
- Add the roasted tomato halves, deseeded guajillo chiles, minced garlic (4 cloves), roughly chopped onion (1/2 onion), salt (1 tsp), and 1/2 cup of broth to a blender.
- Add the optional cumin (1/2 tsp) and oregano (1/2 tsp) if using.
- Blend on high speed for 1–2 minutes until completely smooth, working in batches if your blender is small.
- If the mixture is too thick, add another splash of broth.
- For a silkier sauce, strain through a fine-mesh sieve (optional but recommended), pressing with the back of a spoon to extract all liquid.
+ Show details− Hide details
Ready when: Sauce is completely smooth with no chunks; if strained, it flows smoothly through the sieve
Tip: A completely smooth sauce gives the best eating experience. If straining, save the liquid that comes through—it's full of flavor.
Simmer and Season the Sauce
- Pour the blended sauce into a medium saucepan and bring to a gentle simmer over medium heat, stirring occasionally.
- Simmer for 8–10 minutes to meld the flavors and reduce slightly.
- The sauce should be the consistency of a thick tomato soup—pourable but with body.
- If it's too thick, whisk in a bit more broth or water (1/4 cup at a time) until it reaches the right consistency.
- Taste and adjust the salt.
- The sauce should taste bright, slightly smoky from the chiles, and deeply flavorful.
- Keep warm on low heat until serving.
+ Show details− Hide details
Ready when: Sauce is smooth, pourable, and deeply red with a rich aroma; flavor is balanced and complex
Tip: The sauce should be warm but not boiling when you serve the tortas. If you're worried about temperature, transfer to a shallow bowl for dipping instead of serving from a pot.
Assemble and Dip the TortasOven 300°F / 150°C
- Warm the telera rolls by wrapping them in a clean kitchen towel and warming in a 300°F (149°C) oven for 5 minutes, or toast them in a dry skillet over medium heat for 1–2 minutes per side until lightly browned.
- Slice each roll in half horizontally.
- Remove the carnitas from the braising liquid using tongs or a slotted spoon (discard the cooking liquid or save for soup).
- Shred the meat with two forks or your fingers, discarding any excess fat if desired.
- Layer about 1/4 of the shredded carnitas into each roll, then top with a small handful of sliced white onion (about 2 tablespoons per torta) and a spoonful of pickled jalapeños with some of their liquid (about 2 tablespoons per torta).
- If using avocado, add a few slices to each torta now.
- Close the rolls gently.
- Pour the warm sauce into shallow bowls for dipping.
- Hold each torta over a bowl and dip the entire sandwich into the sauce, rotating so it's well coated and saturated.
- Serve immediately with extra sauce on the side for dipping.
+ Show details− Hide details
Ready when: Tortas are assembled, warm, and thoroughly dipped in sauce with a glossy, saturated appearance
Tip: The key to an authentic torta ahogada is the dipping—don't be shy with the sauce. The bread should be well saturated but not falling apart. Some people like to pour extra sauce over the torta after dipping or serve it in a bowl alongside.
Good to know
Tips
- Carnitas cook best at a very low temperature. If braising on the stovetop, adjust the heat so there's only a gentle bubble at the surface—not a rolling boil. Constant high heat will dry out the pork.
- Roasting the tomatoes and chiles is crucial; it caramelizes the sugars and creates a deeper, more complex sauce flavor than using them raw.
- The sauce should be smooth and pourable like a thick soup, not thick like a paste. You can always thin it with broth or water, but you can't thicken it easily.
- Warm the telera rolls just before assembly—a quick toast in a dry skillet or toaster works perfectly and keeps the texture from getting soggy too quickly.
- This is called 'torta ahogada' (drowned torta) because the dipping in sauce is essential. Don't be stingy with the sauce—it's not a condiment, it's part of the dish. Dip generously just before eating.
Make ahead
Carnitas can be made 1 day ahead, cooled, and refrigerated in their cooking liquid. Reheat gently in a 300°F (149°C) oven for 20–30 minutes. The sauce can also be made 1 day ahead and refrigerated; reheat over medium heat, stirring occasionally and adding a splash of water if it thickens.
Storage & reheating
Cooked carnitas and sauce can each be stored separately in the refrigerator for up to 3 days in airtight containers. Freeze carnitas (drained of cooking liquid) for up to 2 months and sauce for up to 2 months in freezer bags or containers. Reheat carnitas in a 300°F (149°C) oven for 20–30 minutes until warm through; reheat sauce on the stovetop over medium heat, stirring occasionally and adding a splash of water if it thickens. Assembled tortas are best eaten fresh.
Substitutions
- lard or vegetable oil → Vegetable oil, bacon fat, or shortening. Lard renders best and develops the most authentic flavor, but any neutral fat works. Avoid olive oil, which has too strong a flavor.
- dried guajillo chiles → Ancho chiles, pasilla chiles, or dried red chiles. Adjust quantity and heat level to taste. Anchos are slightly sweeter; pasillas are earthier and less spicy.
- telera rolls → Bolillo rolls, torta rolls, or crusty bread rolls. You need rolls that are soft inside but sturdy enough to hold up to dipping without falling apart. Avoid soft sandwich bread.
- pickled jalapeños → Fresh jalapeños sliced and quick-pickled in vinegar (1 cup vinegar + 1 tbsp salt, heated and poured over sliced chiles), or serrano chiles. Fresh chiles will be spicier and crisper than pickled; adjust quantity to your heat preference.
More sandwiches
See all →

Find more like this
- Meal
- Lunch
- Cuisine
- Mexican
- Main ingredient
- Pork ShoulderTomatoes