
Carnitas Torta
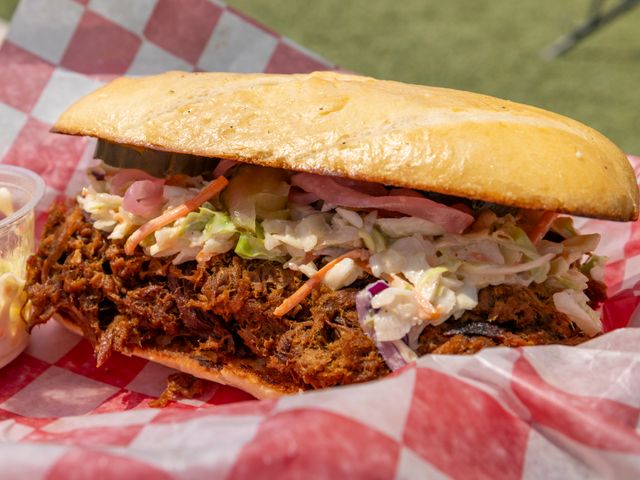
A classic Mexican sandwich featuring fall-apart pork carnitas, creamy refried beans, fresh avocado, and zesty toppings on a soft bolillo roll. The carnitas simmer low and slow for hours, building deep, savory flavor, then crisp slightly at the edges. While the cooking takes time, the assembly is quick—layer the warm pork over mayo and beans, add cool avocado and tomato, pickled jalapeños, and melted cheese, and you have a satisfying handheld meal. Perfect for using the leftover carnitas for tacos or nachos later.
Steps
Before you start
- Carnitas can be made 1–3 days ahead; store in an airtight container with the braising liquid for moisture
- If using store-bought carnitas (about 1.5 lbs), skip steps 1–6 and jump to step 7 (saves 3+ hours)
- Have all toppings at room temperature or lightly warmed
- Drain pickled jalapeños well to prevent the bread from becoming soggy
Prep and Season Pork
- Cut pork shoulder into 2–3 inch chunks, trimming large deposits of excess fat.
- Pat the pieces dry with paper towels (moisture prevents browning).
- In a small bowl, combine cumin, oregano, and 1 tablespoon salt.
- Season the pork pieces evenly with the spice mixture and several grinds of black pepper.
- Let sit at room temperature while you prepare the pot, about 5 minutes.
+ Show details− Hide details
Tip: Dry pork browns better and develops a flavorful crust. Pat each piece thoroughly before seasoning.
Brown Pork in Batches
- Heat lard in a large heavy pot (5–6 quart Dutch oven or heavy-bottomed pot) over medium-high heat until shimmering, about 2 minutes.
- Working in batches of 4–5 pieces, brown the pork on all sides without crowding the pot; crowded pieces steam instead of brown.
- Sear each batch 3–4 minutes on all sides until deep golden brown.
- Transfer browned pieces to a clean plate.
- Do not drain the fat from the pot.
+ Show details− Hide details
Ready when: Pork pieces are deep golden brown on all sides
Tip: Don't skip browning—it builds flavor through the Maillard reaction. Low heat won't brown properly; medium-high is essential.
Add Aromatics and Liquid
- Return all browned pork to the pot.
- Scatter crushed garlic cloves, bay leaves, and the halved onion around and over the pork.
- Pour in water (don't stir yet; the water will deglaze the pot).
- Increase heat to high and bring the liquid to a rolling boil, scraping the bottom of the pot with a wooden spoon to release all the browned bits (fond) stuck to the bottom.
+ Show details− Hide details
Ready when: Liquid is at a rolling boil
Tip: Scrape the pot thoroughly to incorporate all the fond—this is where much of the flavor lives.
Simmer Carnitas Until TenderOven 190°F / 90°C
- Reduce heat to low, cover the pot with a lid, and simmer gently for 2.5–3 hours, stirring gently every 45 minutes or so.
- The carnitas are done when a fork easily shreds a piece into tender strands and the meat breaks apart without resistance.
- The internal temperature should reach at least 190°F (88°C) in the thickest pieces (this high temperature ensures proper tenderness and shredding).
- The pot should smell rich and savory.
+ Show details− Hide details
Ready when: Pork easily shreds with a fork; internal temp 190°F (88°C) or higher
Tip: Keep the heat low—a gentle, barely visible simmer gives tender meat. A rolling boil can make the meat tough and dry.
Crisp Edges and Reduce Liquid
- Remove the lid, increase heat to medium, and simmer uncovered for 30–40 minutes, stirring gently every 10 minutes to prevent sticking.
- As the liquid reduces, the pork edges will begin to brown and crisp slightly against the pot bottom.
- The liquid should reduce to just 1–2 inches in the bottom of the pot.
- The carnitas should look slightly caramelized and have a rustic, slightly crispy appearance.
+ Show details− Hide details
Ready when: Pork edges are lightly caramelized and crispy; liquid reduced to 1–2 inches
Tip: This uncovered phase creates the signature crispy exterior that makes carnitas different from regular pulled pork. Don't skip it.
Shred and Season Final
- Remove from heat and let cool 5 minutes.
- Using two forks, shred the pork directly in the pot, breaking it into bite-sized pieces (1–2 inches).
- You can discard the bay leaves, garlic skins, and large onion pieces if desired, or leave them mixed in for extra flavor and texture.
- Taste and adjust seasoning with salt and pepper to your liking.
- Carnitas can be stored in an airtight container with the cooking liquid up to 3 days in the refrigerator, or frozen for up to 3 months.
+ Show details− Hide details
Ready when: Pork is fully shredded into bite-sized pieces
Tip: Shred while still warm—the meat breaks apart much more easily. If making ahead, store with the cooking liquid for moisture.
Prep Toppings
- While carnitas cool or while waiting to assemble, prepare all toppings: slice avocados in half, remove the pit, and slice lengthwise into 1/4-inch slices (do this just before assembly to prevent browning).
- Core and slice tomatoes into 1/4-inch rounds.
- Thinly slice white onion into delicate rings.
- Shred or tear lettuce into bite-sized pieces.
- Warm refried beans in a small pot over low heat or in the microwave until they reach a spreadable, creamy consistency, stirring once or twice (about 3–5 minutes).
- Drain pickled jalapeños in a fine-mesh strainer, pressing gently to remove excess vinegar.
+ Show details− Hide details
Ready when: All toppings are prepped and beans are warm and spreadable
Tip: Prep avocado last to prevent browning; if making ahead, toss with a squeeze of lime juice and cover with plastic wrap.
Warm and Toast Rolls
- Split each bolillo roll in half lengthwise.
- To help the bread hold up to juicy fillings, lightly toast the cut sides in a large skillet over medium heat for 1–2 minutes per side until light golden and slightly crispy, or place under a broiler for 1 minute.
- Remove from heat and place on a clean work surface, cut sides facing up.
+ Show details− Hide details
Ready when: Bread is lightly toasted and slightly crispy on cut sides
Tip: Toasting is optional but highly recommended—it creates a buffer between the bread and wet fillings, preventing a soggy sandwich.
Layer and Assemble
- Place the bottom halves of the rolls on a serving surface, cut side up.
- Spread each bottom half with a thin layer of mayonnaise (about 2 tablespoons), or use chipotle mayo mixed with regular mayo for a spicier version.
- Add a layer of warm refried beans over the mayo, about 1/3 cup per sandwich, spreading evenly to cover the surface.
- Layer on 1/3 cup shredded warm carnitas (reheated gently if made ahead), gently pressing to distribute evenly.
- Top with 1.5–2 oz cheese slices or torn pieces, allowing some to warm slightly from the hot carnitas.
- Add a small handful of shredded lettuce, 2–3 tomato slices, a few white onion rings, 3–4 drained pickled jalapeño slices, and 1/2 of a sliced avocado, arranging them in layers so they fit snugly without falling out.
- Top with the upper half of the roll and press down gently but firmly.
- Serve immediately, while the carnitas and cheese are still warm.
+ Show details− Hide details
Ready when: Torta is fully assembled with all components layered inside
Tip: Assemble just before serving to keep the bread from getting soggy. If serving a crowd, assemble in batches as people are ready to eat.
Good to know
Tips
- Don't crowd the pot when browning pork—crowded pieces steam instead of developing a flavorful crust. Brown in batches even if it takes longer.
- Keep the initial simmer very low and gentle. A rolling boil can toughen the meat and cause too much evaporation. You want barely visible bubbles.
- Carnitas taste even better made 1–2 days ahead; the flavors have time to meld and deepen. Make them when you have time, then assemble fresh tortas whenever you're hungry.
- Toast the bread lightly before assembling—this prevents the bread from becoming soggy from the warm beans and carnitas. It's an optional step but worth the few extra minutes.
Make ahead
Carnitas are excellent made 1–3 days ahead; store in an airtight container with the cooking liquid in the refrigerator. Reheat gently in a pot over low heat with a splash of water before assembling. Carnitas can also be frozen up to 3 months; thaw overnight in the refrigerator and reheat. All other ingredients can be prepped a few hours ahead and stored separately.
Storage & reheating
**Room temperature**: Assembled tortas last 1–2 hours before the bread starts to soften. **Refrigerator**: Store carnitas separately from assembled tortas in an airtight container up to 3 days. Store other toppings separately. Reassemble fresh for best texture. **Freezer**: Carnitas freeze well up to 3 months in an airtight container. Do not freeze assembled tortas. Thaw carnitas overnight in the refrigerator and reheat gently before using.
Substitutions
- pork shoulder → Slow-cooked chicken thighs (about 3 lbs; reduce cooking time to 1.5–2 hours). Chicken will be leaner and slightly less rich, but still delicious. Cochinita pibil (Yucatecan slow-cooked pork) is another authentic Mexican option.
- refried beans (canned or homemade) → Refried black beans, or whole pinto or black beans mashed with a little broth. Black beans have a slightly earthier flavor but work beautifully in tortas.
- Oaxaca cheese or fresh mozzarella → Queso fresco, fresh mozzarella, or Swiss cheese. Oaxaca is traditional and melts slightly from warm carnitas; other cheeses offer different textures. Queso fresco won't melt but adds fresh flavor.
- mayonnaise or Mexican crema → Mexican crema or sour cream mixed with a squeeze of lime juice. Crema is traditional and tangier than mayo. A lime squeeze brightens both.
More sandwiches
See all →


Find more like this
- Meal
- Lunch
- Cuisine
- Mexican
- Main ingredient
- Pork Shoulder
- Diet
- Sugar-Free
- Method
- Stovetop
- Quick & Easy
- Make Ahead