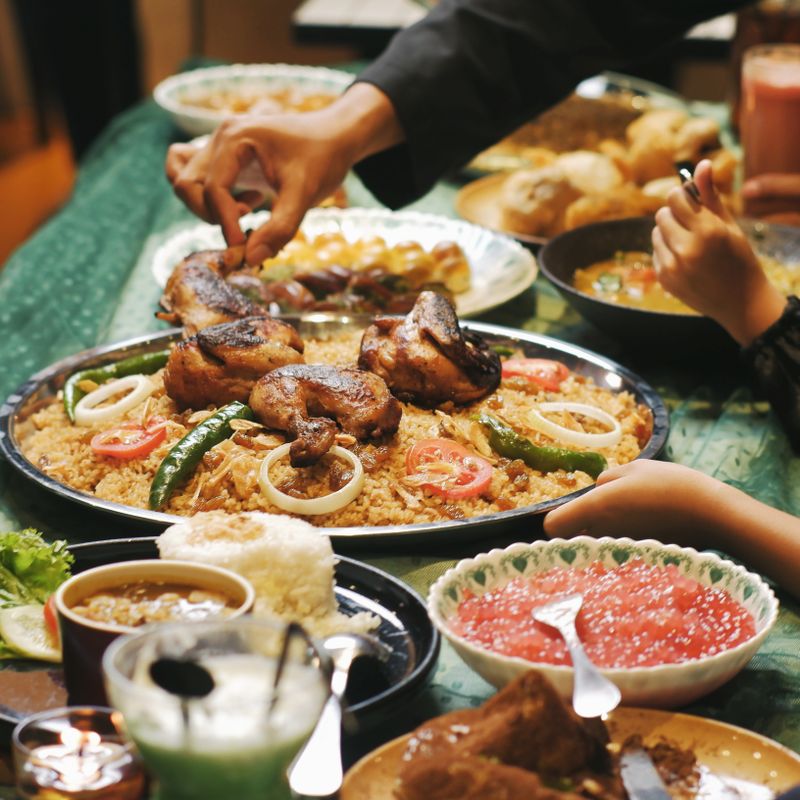
Sourdough Ramadan Iftar Harissa Chicken Flatbread
A deeply flavored sourdough flatbread topped with warm harissa-spiced chicken, caramelized onions, and garlic—perfect for breaking the fast. The dough bulk ferments for hours, developing complex tang and tender crumb, while the filling cooks on the stovetop with fragrant spices. Served warm and soft, this is a satisfying Middle Eastern–inspired iftar dish made entirely on the stovetop.
- Prep
- 15 min
- Cook
- 50 min
- Wait
- 4 hr 40 min
- Total
- 5 hr 45 min
- Makes
- 4 flatbreads (serves 4 for iftar)
Steps
Before you start
- Use active sourdough starter that's been fed 4–8 hours prior and is bubbly and visibly active
- Measure and chop all filling ingredients (onions, garlic, chicken) before you start the dough so everything is ready during bulk fermentation
- Plan for 4–6 hours of bulk fermentation time—warmer kitchens (72–75°F) ferment faster; cooler ones (68–70°F) take the full 6 hours
- Ensure your kitchen temperature is between 68–75°F (20–24°C) for predictable fermentation
Mix dough base
- In a large bowl, combine 1 cup (200g) active sourdough starter, 2.5 cups (300g) all-purpose flour, and 5 fl oz (150ml) water.
- Stir with your hand or a wooden spoon until the flour is fully hydrated and a shaggy dough forms with no dry flour visible.
- It will be rough and sticky.
- Cover the bowl with a damp towel and let rest for 30 minutes at room temperature.
- This rest, called an autolyse, allows the flour to fully absorb water and begins to develop the gluten network, making the dough much easier to work with later.
+ Show details− Hide details
Ready when: All flour is wet and incorporated, dough is shaggy and cohesive
Tip: Don't skip the autolyse—it makes the dough much easier to handle and improves the final crumb structure.
Incorporate salt and oil
- After 30 minutes, add 1 tsp (6g) salt and 15ml of the olive oil to the dough.
- Wet your fingers or hands (water prevents sticking better than dry hands), then fold the dough over itself 4–5 times, rotating the bowl 90 degrees between each fold, until the salt and oil are fully incorporated and the dough feels smoother and less sticky.
- This takes about 5 minutes of folding.
+ Show details− Hide details
Ready when: Salt and oil are fully incorporated, dough feels cohesive and slightly less sticky
Tip: Wet hands prevent the dough from sticking to your fingers. Work gently to avoid deflating all the air.
Bulk ferment with coil folds
- Return the dough to the bowl, cover with a damp towel, and let bulk ferment at room temperature (68–75°F / 20–24°C).
- For the first 2 hours, perform a coil fold every 30 minutes: wet your hand, reach into the dough from the side, grab a section, pull it up and fold it toward the center, then rotate the bowl 90 degrees and repeat 3–4 times.
- After 2 hours, cover the bowl and let the dough rest undisturbed for the remaining fermentation.
- Continue bulk fermentation for a total of 4–6 hours, until the dough has increased in volume by 50–75%, shows visible bubbles on the surface, and passes the poke test: a gentle poke with a wet finger should slowly spring back halfway.
- Fermentation time depends on your kitchen temperature—warmer kitchens (72–75°F) finish in 4–5 hours; cooler kitchens (68–70°F) may take a full 6 hours.
- The dough should smell pleasantly sour and slightly yeasty.
+ Show details− Hide details
Ready when: Dough increased 50–75% in volume, visible large bubbles on surface, poke test shows slow spring-back
Tip: Room temperature is the key variable—if your kitchen is cool, fermentation takes longer. You can also refrigerate the dough overnight after bulk fermentation and cook it the next day for deeper flavor.
Caramelize onions for filling
- While the dough ferments (start this after about 3 hours of bulk fermentation so the filling is warm when you cook the flatbreads), heat a 12-inch (30 cm) skillet over medium heat for 1 minute.
- Add 15ml of the olive oil, then add the 2 large thinly sliced onions (400g).
- Stir occasionally and cook for 20–25 minutes, until the onions are deeply golden-brown and soft, with a sweet aroma.
- The onions should reduce in volume and become almost jam-like.
- If they are browning too quickly, reduce heat to medium-low.
- This slow caramelization develops rich, sweet flavor that balances the spice of the harissa.
- By the end, you should have about 150g of soft, caramelized onions.
+ Show details− Hide details
Ready when: Onions are deeply golden-brown, very soft, and sweet-smelling; volume has reduced by about 60%
Tip: Resist the urge to rush this step—high heat creates bitter burnt spots instead of sweet caramelization. Low and slow is the only way to develop deep, complex sweetness.
Add chicken and harissa to onionsOven 165°F / 75°C
- Increase the heat to medium-high.
- Add 3 minced garlic cloves to the caramelized onions and cook for 1 minute, stirring, until fragrant and the raw garlic smell disappears.
- Add the 400g diced chicken breast, stirring frequently to break up any clumps, and cook for 8–10 minutes until the chicken is mostly opaque and the edges are lightly golden.
- Do not overcook.
- Stir in 2 tbsp (30ml) harissa paste, the zest and juice from 1 medium lemon, a pinch of salt, and a few grinds of black pepper to taste.
- Cook for another 2–3 minutes, stirring constantly, until the chicken is cooked through and reads 165°F (74°C) on an instant-read thermometer.
- Taste and adjust seasoning—add more salt, pepper, or harissa if desired.
- The filling should be warm, slightly spicy, and aromatic.
- Remove from heat and set aside.
+ Show details− Hide details
Ready when: Chicken reads 165°F (74°C) internal temperature, harissa is fully incorporated, filling is warm and cohesive
Tip: Diced chicken cooks very quickly—aim for an internal temp of 165°F to ensure food safety without drying out the meat. Use an instant-read thermometer for accuracy.
Divide and shape flatbread dough
- Once bulk fermentation is complete, lightly oil your work surface with a little olive oil.
- Gently turn the dough out onto the oiled surface—do not punch it down, as you want to preserve all the air bubbles for texture.
- Using a bench scraper or knife, divide the dough into 4 equal pieces by eye or weight (the total weight should be around 880g; divide into roughly 220g pieces).
- Gently shape each piece into a loose ball by pulling the edges toward the center without deflating it.
- Then, using your fingertips and palms, gently stretch each ball into an oval or rectangle roughly 8×6 inches (20×15 cm) and about ¼ inch (6 mm) thick.
- Work slowly and gently—the dough should still feel airy.
- If the dough resists stretching and snaps back, wait 1–2 minutes and try again.
- Cover the shaped pieces with a damp towel and let rest for 5–10 minutes.
- This rest allows the gluten to relax so the flatbread doesn't shrink when cooked.
+ Show details− Hide details
Ready when: Each piece is gently stretched to ¼ inch thick and rested, still holding air bubbles
Tip: Handle the dough gently—the air bubbles you've developed through bulk fermentation create the light, airy texture when cooked. Rough handling or pressing hard will deflate them.
Cook flatbreads on stovetop
- Heat a 12-inch (30 cm) skillet over medium-high heat for 1 minute until very hot.
- Lightly oil or butter the skillet.
- Working one flatbread at a time, carefully place a shaped oval onto the hot skillet.
- Cook without moving it for 2–3 minutes, until the bottom is golden-brown with light charring and the dough has visibly puffed up.
- You may see some steam escape—this is the water in the dough creating steam pockets, which is good.
- Flip the flatbread and cook the second side for 1.5–2 minutes until also golden-brown.
- The flatbread should feel soft and slightly blistered, not hard or crispy.
- Transfer to a clean plate or cutting board, and repeat with the remaining 3 pieces of dough.
- If the skillet heat is dropping between batches, let it reheat for 30 seconds before cooking the next flatbread.
+ Show details− Hide details
Ready when: Bottom is golden-brown with light charred spots, flatbread is visibly puffed and soft to the touch
Tip: Don't fidget with the flatbread while it cooks—let it sit undisturbed so it develops proper color and texture. If it's browning too quickly, lower the heat slightly. The flatbread should puff from steam, not brown too dark.
Assemble harissa chicken flatbreads
- Place each warm flatbread on a serving plate.
- Top generously with the warm harissa chicken and caramelized onion mixture, dividing it evenly among the 4 flatbreads (about 150ml per flatbread).
- Garnish with 1 tbsp (4g) of fresh chopped cilantro per flatbread if desired.
- Serve immediately while the flatbreads are still warm and soft.
- On the side, serve about ⅓ cup (100ml) of plain yogurt per person and lemon wedges for squeezing.
- This is an ideal iftar meal—warm, satisfying, and deeply flavored.
+ Show details− Hide details
Ready when: Flatbreads are plated and topped, ready to serve hot
Tip: Serve immediately while the flatbreads are still soft and warm. If you need to hold them briefly, keep them covered with a clean towel to retain heat and moisture.
Good to know
Tips
- Watch your bulk fermentation carefully using the visual cues (volume increase, bubbles, poke test) rather than just the clock—sourdough speed varies with kitchen temperature. A kitchen at 72°F ferments 30% faster than one at 68°F.
- Use a sourdough starter that's at peak activity: it should be visibly bubbly, have roughly doubled in size since feeding, and smell pleasantly tangy with no moldy or acetone odors.
- Don't skip the caramelization of the onions—this slow process builds deep sweetness that balances the sharp spice of harissa and prevents the filling from tasting one-dimensional.
- Sourdough flatbread is forgiving: if your flatbread doesn't puff dramatically on the skillet, it will still taste delicious and be soft inside. Puff is nice but not essential; focus instead on achieving golden-brown spots and a soft, warm bread.
Make ahead
Dough can be refrigerated overnight after bulk fermentation (cold fermentation in the fridge for 8–12 hours actually deepens flavor). Shape, wrap individually, and refrigerate. Bring to room temperature for 15 minutes before cooking. The harissa chicken filling can be made 1 day ahead, refrigerated, and reheated gently in a skillet before serving.", "make_ahead_text": null
Storage & reheating
Leftover flatbreads: Store in an airtight container at room temperature for 1–2 days. Reheat on a skillet over medium heat for 1–2 minutes per side until warm. Harissa chicken filling: Refrigerate in an airtight container for 3–4 days; reheat gently in a skillet over medium-low heat, stirring occasionally, until warmed through. Flatbreads can be wrapped individually and frozen for up to 1 month; thaw at room temperature and reheat as above.
Substitutions
- sourdough starter → 3g instant yeast mixed with 120ml warm water (let this mixture ferment for 30 minutes before mixing into dough). The final flatbread will lack the complex sour flavor and tender crumb of true sourdough, but the texture will be lighter.
- harissa paste → 2 tbsp red pepper flakes or Turkish red pepper (Aleppo pepper), mixed with 1 tbsp paprika and 2 tbsp olive oil to form a paste. Homemade harissa will be less balanced but provides similar heat and depth. Add the spice mixture to the chicken in the same way.
- skinless, boneless chicken breast → Chicken thighs (use the same 400g weight, dice into ¾-inch cubes) or lamb shoulder (diced), or even chickpeas for a vegetarian version. Chicken thighs stay juicier and more forgiving; lamb adds deeper flavor. Chickpeas require shorter cooking time (add in the last minute).
- fresh cilantro → Fresh parsley, mint, or dried oregano. Cilantro is traditional in Middle Eastern cooking, but parsley is milder and mint adds freshness. Use equal amounts.
More flatbreads
See all →
Find more like this
- Meal
- Dinner
- Cuisine
- Middle Eastern
- Main ingredient
- Chicken Breast
- Diet
- HalalSugar-Free
- Method
- Stovetop
- Occasion
- Ramadan