
Sourdough Peruvian Ají Amarillo Chili and Potato Bread Bowl
A stunning edible bread bowl made from tangy sourdough, filled with a creamy Peruvian ají amarillo chili studded with tender potatoes, chickpeas, and aromatic spices. The combination of chewy, fermented bread and the distinctive yellow chili paste delivers bold, complex flavors in every bite—perfect for a showstopping lunch or dinner.
- Prep
- 45 min
- Cook
- 1 hr 15 min
- Wait
- 8 hr
- Total
- 10 hr
- Makes
- 4 bread bowls with filling
Steps
Before you start
- Have active sourdough starter fed and bubbly 4–8 hours before mixing (or use 50g of mature starter that's been fed within the last 8 hours)
- Clear 8 hours for the bulk fermentation and final proof, or make dough the morning before for next-day baking
- If ají amarillo paste is unavailable, prepare it from dried pods 1 hour ahead
Mix and autolyse
- In the bowl of a stand mixer, combine 50g active sourdough starter, 350ml lukewarm water (75–78°F / 24–26°C), and 500g bread flour.
- Mix with the dough hook on low speed for 3–4 minutes until all flour is incorporated and no dry bits remain.
- The dough will be shaggy.
- Let rest, uncovered, at room temperature for 30 minutes (autolyse).
- This hydrates the flour evenly.
+ Show details− Hide details
Ready when: All flour is moistened; dough is shaggy but cohesive
Tip: Autolyse without salt makes gluten development faster later
Add salt and continue mixing
- Add 10g kosher salt to the dough.
- Mix on medium-low speed for 8 minutes.
- The dough will transform from shaggy to smooth and elastic, becoming slightly sticky but holding together.
- If it seems very wet or very stiff, adjust by adding water 1 tablespoon at a time or a pinch more flour, but err slightly toward sticky (it will firm up during fermentation).
+ Show details− Hide details
Ready when: Dough is smooth, elastic, and slightly tacky; it holds together and doesn't tear easily
Tip: The dough should feel like soft, silky earlobes—not stiff and not soupy
Bulk fermentation with folds
- Transfer the dough to a lightly oiled 3-quart bowl.
- Cover loosely with a damp kitchen towel or plastic wrap.
- Let rest at warm room temperature (68–72°F / 20–22°C) for 6 hours.
- Perform a set of 4 stretch-and-folds at 30-minute intervals during the first 2 hours: wet your hand, grab one side of the dough, stretch it up and fold it over the center, rotate the bowl 90 degrees, and repeat 3 more times.
- By the end of bulk fermentation, the dough should be visibly puffed (50–75% increase in volume) and show some bubbles on top and sides.
+ Show details− Hide details
Ready when: Dough is airy, puffed, and jiggles slightly when the bowl is gently shaken; poke test: a gentle finger poke slowly springs back halfway
Tip: Bulk fermentation time varies by room temp—cold kitchens may need 7–8 hours; warm ones 5–6 hours
Pre-shape and rest
- Turn the dough onto a lightly floured work surface.
- Gently shape it into a round by folding the edges toward the center 4–5 times, rotating as you go.
- Flip it seam-side down.
- Let it rest on the counter for 15 minutes uncovered (bench rest).
- This relaxes the gluten before final shaping.
+ Show details− Hide details
Ready when: Dough is relaxed and no longer springs back immediately when pressed
Tip: Don't skip the bench rest—it prevents the dough from shrinking too much when shaped
Final shape into 4 rounds
- Divide the dough into 4 equal pieces (roughly 350g each).
- Shape each piece into a tight round: fold the edges toward the center, creating tension on the surface, then flip seam-side down.
- Roll gently on the work surface, cupping your hands around it, to build surface tension.
- Each ball should be smooth and taut, about 4 inches (10 cm) in diameter.
+ Show details− Hide details
Ready when: Each dough ball is smooth, round, and holds its shape without flattening
Tip: Proper shaping creates the structural integrity needed for bread bowls that won't collapse
Final proof in banneton
- Place each round seam-side up in a floured banneton basket (or 8-inch bowl lined with a floured towel).
- Cover loosely with a damp towel or plastic wrap.
- Proof at room temperature (68–70°F / 20–21°C) for 4–6 hours, or in the refrigerator overnight (8–12 hours).
- Cold fermentation deepens flavor and makes scoring easier.
- To test readiness: poke gently—the dough should spring back very slowly, almost not at all.
+ Show details− Hide details
Ready when: Poke test: indentation springs back 50% (not at all if cold from fridge)
Tip: Overnight cold proof in the fridge is easiest and gives the best flavor and rise
Preheat oven and prepare for bakingOven 500°F / 260°C
- One hour before baking, preheat your oven to 500°F (260°C) with a Dutch oven placed inside (if using one piece at a time, or use a baking stone).
- For 4 bread bowls, you'll bake them in batches of 1–2 per Dutch oven, or use a baking sheet with a covered tent.
- If dough was cold-proofed, remove from fridge and let sit at room temperature for 30–45 minutes so it's not ice-cold when it hits the oven.
+ Show details− Hide details
Ready when: Oven thermometer reads 500°F; Dutch oven is hot
Tip: A very hot oven with a Dutch oven creates a steam chamber that gives you the best crust
Score and bake the bread bowlsOven 500°F / 260°C
- Working with one dough ball at a time, carefully invert it seam-side down onto parchment paper.
- Using a sharp bread knife or lame, score the top in a shallow tic-tac-toe pattern (2 horizontal, 2 vertical lines) or a simple cross, about ¼ inch (0.6 cm) deep.
- This helps the dough expand evenly and defines where you'll carve the bowl.
- Carefully place on parchment into the preheated Dutch oven (or onto baking stone and cover with a tent of foil).
- Bake covered at 500°F (260°C) for 20 minutes to trap steam.
- Then remove the cover, reduce heat to 450°F (232°C), and bake for 20–25 more minutes until deep golden-brown.
- The loaf should sound hollow when tapped on the bottom.
- Transfer to a wire rack.
+ Show details− Hide details
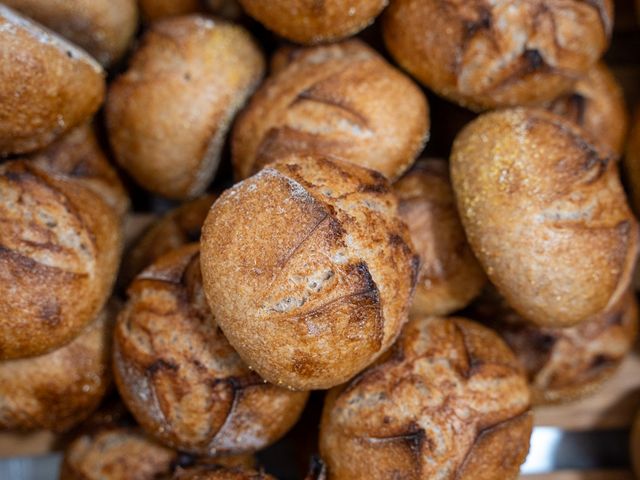
Ready when: Crust is deep mahogany brown; loaf sounds hollow when tapped; internal temp ~210°F (99°C)
Tip: Bake on parchment, not directly on Dutch oven bottom, to prevent sticking and make removal easier
Cool and hollow the bowls
- Cool the baked rounds on a wire rack for at least 15 minutes—they must be warm but not piping hot.
- Once cool enough to handle comfortably, use a serrated knife to carefully carve out the interior, leaving about ¾-inch (2 cm) walls all around and a ½-inch-thick base.
- Work slowly and be gentle to avoid tearing.
- Reserve the carved-out bread pieces for serving alongside (torn into pieces) or save for breadcrumbs.
- The bowl is now ready to fill.
+ Show details− Hide details
Ready when: Bread is warm to touch but not hot; knife slides through crumb cleanly without tearing
Tip: A serrated knife with a gentle sawing motion works best; don't gouge or you'll break through the walls
Begin the ají amarillo filling
- While bread cools, heat 3 tablespoons olive oil in a large heavy-bottomed pot or deep skillet (12 inches / 30 cm) over medium heat.
- Add the diced onion (160g) and sauté for 4–5 minutes, stirring occasionally, until translucent and just starting to soften.
- Add the minced garlic (20g) and cook for 1 minute more until fragrant.
- Stir in the 1.5 tsp ground cumin and 0.75 tsp smoked paprika, cooking for another 30 seconds to bloom the spices.
+ Show details− Hide details
Ready when: Onion is translucent; garlic is fragrant; spices smell toasted
Tip: Don't skip blooming the spices in the oil—it releases their essential oils and deepens flavor
Build the ají amarillo base
- Stir in the 3 tablespoons (45g) ají amarillo paste, breaking it up with a wooden spoon and mixing well until fragrant.
- Cook for 1–2 minutes, stirring constantly, to allow the paste to caramelize slightly and marry with the oil and spices.
- Then add the 2 cups (480ml) vegetable or chicken broth and the 1.5 lb (700g) cubed waxy potatoes.
- Bring to a gentle boil over medium-high heat.
+ Show details− Hide details
Ready when: Mixture is aromatic; broth comes to a gentle boil; potatoes begin to soften at edges
Tip: Stir the ají amarillo paste constantly to prevent scorching on the bottom
Simmer potatoes and add chickpeas
- Once boiling, reduce heat to medium and simmer uncovered for 12–15 minutes until the potatoes are almost tender but still hold their shape.
- Add the drained and rinsed chickpeas (425g / 1 can), stir, and continue simmering for 5 more minutes until the potatoes are fully tender and the liquid has reduced slightly and thickened (it should coat the back of a spoon lightly).
- Season with the 2 tablespoons fresh lime juice and black pepper to taste.
+ Show details− Hide details
Ready when: Potatoes are fork-tender; liquid is slightly reduced and silky; flavors are balanced (bright from lime, warm from spices)
Tip: Taste as you season—ají amarillo and lime are the flavor stars; lime juice brightens everything at the end
Assemble and serve
- Place each hollow bread bowl on a serving plate.
- Ladle the hot ají amarillo chili with potatoes and chickpeas into each bowl, dividing equally.
- Garnish with fresh cilantro (15g, optional), crumbled cotija cheese (optional), and thinly sliced rocoto or jalapeño pepper (optional).
- Serve immediately with any extra filling on the side and torn pieces of reserved bread for scooping.
+ Show details− Hide details
Ready when: Bowls are filled and garnished; bread is still warm; filling steams gently
Tip: Serve immediately so the bread stays crispy on the outside; if it sits too long, the filling will soften the bottom
Bake remaining bread bowlsOven 450°F / 230°C
- Repeat steps 7–8 for the remaining 2 dough balls, baking one or two at a time depending on your oven space.
- Keep the filled bowls warm (loosely covered with foil in a 200°F / 93°C oven) if you're serving everything together.
+ Show details− Hide details
Ready when: All 4 loaves are baked, cooled, hollowed, and ready to fill
Tip: Stagger baking so your first bowls don't get cold; keep warm in a low oven
Keep warm (optional)Oven 200°F / 95°C
- If not serving all 4 bowls immediately, keep filled bowls loosely covered with foil in a 200°F (93°C) oven for up to 20 minutes.
- The bread will soften slightly but remain warm and pleasant to eat.
+ Show details− Hide details
Ready when: Bread stays warm without drying out
Tip: Don't cover tightly or the bread will steam and lose its texture
Good to know
Tips
- Sourdough strength varies: if your starter is young or weak, use 60g instead of 50g to ensure good rise and sour flavor development. Feed your starter 12 hours before mixing for peak activity.
- Ají amarillo paste is the soul of this dish—buy good quality (brands like Oquendo or homemade) or make your own by soaking dried ají amarillo peppers. The paste gives the characteristic golden color and fruity-spicy warmth that defines the dish.
- Bread bowls are best served warm and eaten within 20 minutes of filling; the longer the filling sits in the bowl, the softer the bread becomes. If making ahead, keep bowls and filling separate until serving time.
- For a vegan version, use vegetable broth (not chicken) and omit the cotija cheese or replace with nutritional yeast or vegan cheese. The filling is naturally plant-based; the bread is vegan as-is.
Make ahead
Dough can be shaped and cold-proofed in the refrigerator for up to 24 hours, then baked directly from cold (may add 5–10 minutes to bake time). Ají amarillo filling can be made up to 3 days ahead, cooled, and reheated gently on the stovetop just before serving. Bread bowls can be baked up to 8 hours ahead, cooled completely, and gently reheated in a 350°F (176°C) oven for 5 minutes before hollowing and filling.
Storage & reheating
Cooled, unfilled bread bowls: room temperature in an airtight container for 1 day, or frozen in an airtight bag for up to 3 months (thaw at room temperature, then optionally recrisp in a 350°F / 176°C oven for 5 minutes). Filled bowls are best eaten immediately but can be refrigerated loosely covered for up to 4 hours (bread will soften; reheat gently in a 325°F / 163°C oven for 10 minutes). Leftover filling: refrigerate in an airtight container for up to 3 days, or freeze for up to 2 months; reheat on the stovetop over medium heat, stirring occasionally, until heated through.
Substitutions
- ají amarillo paste → ají mirasol paste or homemade ají amarillo (soak 3–4 dried ají amarillo peppers in hot water for 15 minutes, blend with garlic, salt, and a splash of soaking liquid until smooth). Ají mirasol is slightly darker and slightly less fruity but creates a similar creamy base; homemade paste takes extra time but delivers authentic flavor
- waxy potatoes (such as Yukon Gold or fingerling) → Peruvian potatoes (purple or yellow) or Yukon Gold; avoid russets which break down too easily. Waxy potatoes hold their shape in the chili; russets will become mushy
- canned chickpeas → 1.5 cups cooked dried chickpeas (soaked overnight and simmered until tender), or 1 cup white beans, or drained canned butter beans. White beans or butter beans are milder; cook beans to the same tenderness as potatoes
- cotija cheese, crumbled → queso fresco, feta, or cotija alternative like salted ricotta cheese. Cotija's salty, crumbly texture is traditional; queso fresco is slightly softer but has similar flavor; feta adds tang
More yeast breads
See all →



Find more like this
- Meal
- Dinner
- Cuisine
- Mexican
- Diet
- HalalSugar-Free
- Method
- Oven